AdWords Auto-Tagging
Letting AdWords and Woopra work together on campaign reporting with utm data.
Google AdWord's auto-tagging makes tracking your AdWords campaigns very easy! But in order to allow it to work with analytics solutions other than Google Analytics, you will have to do a couple extra steps. Luckily, doing these steps will also give you some extra power and customizability in how you define and report on your campaigns.
Some concepts in here may require some familiarity with how urls work and specifically, the query part of the url. For a basic introduction to the concepts used in this article, see Campaign Tracking.
Configuring Auto-Tagging: the Shared Library
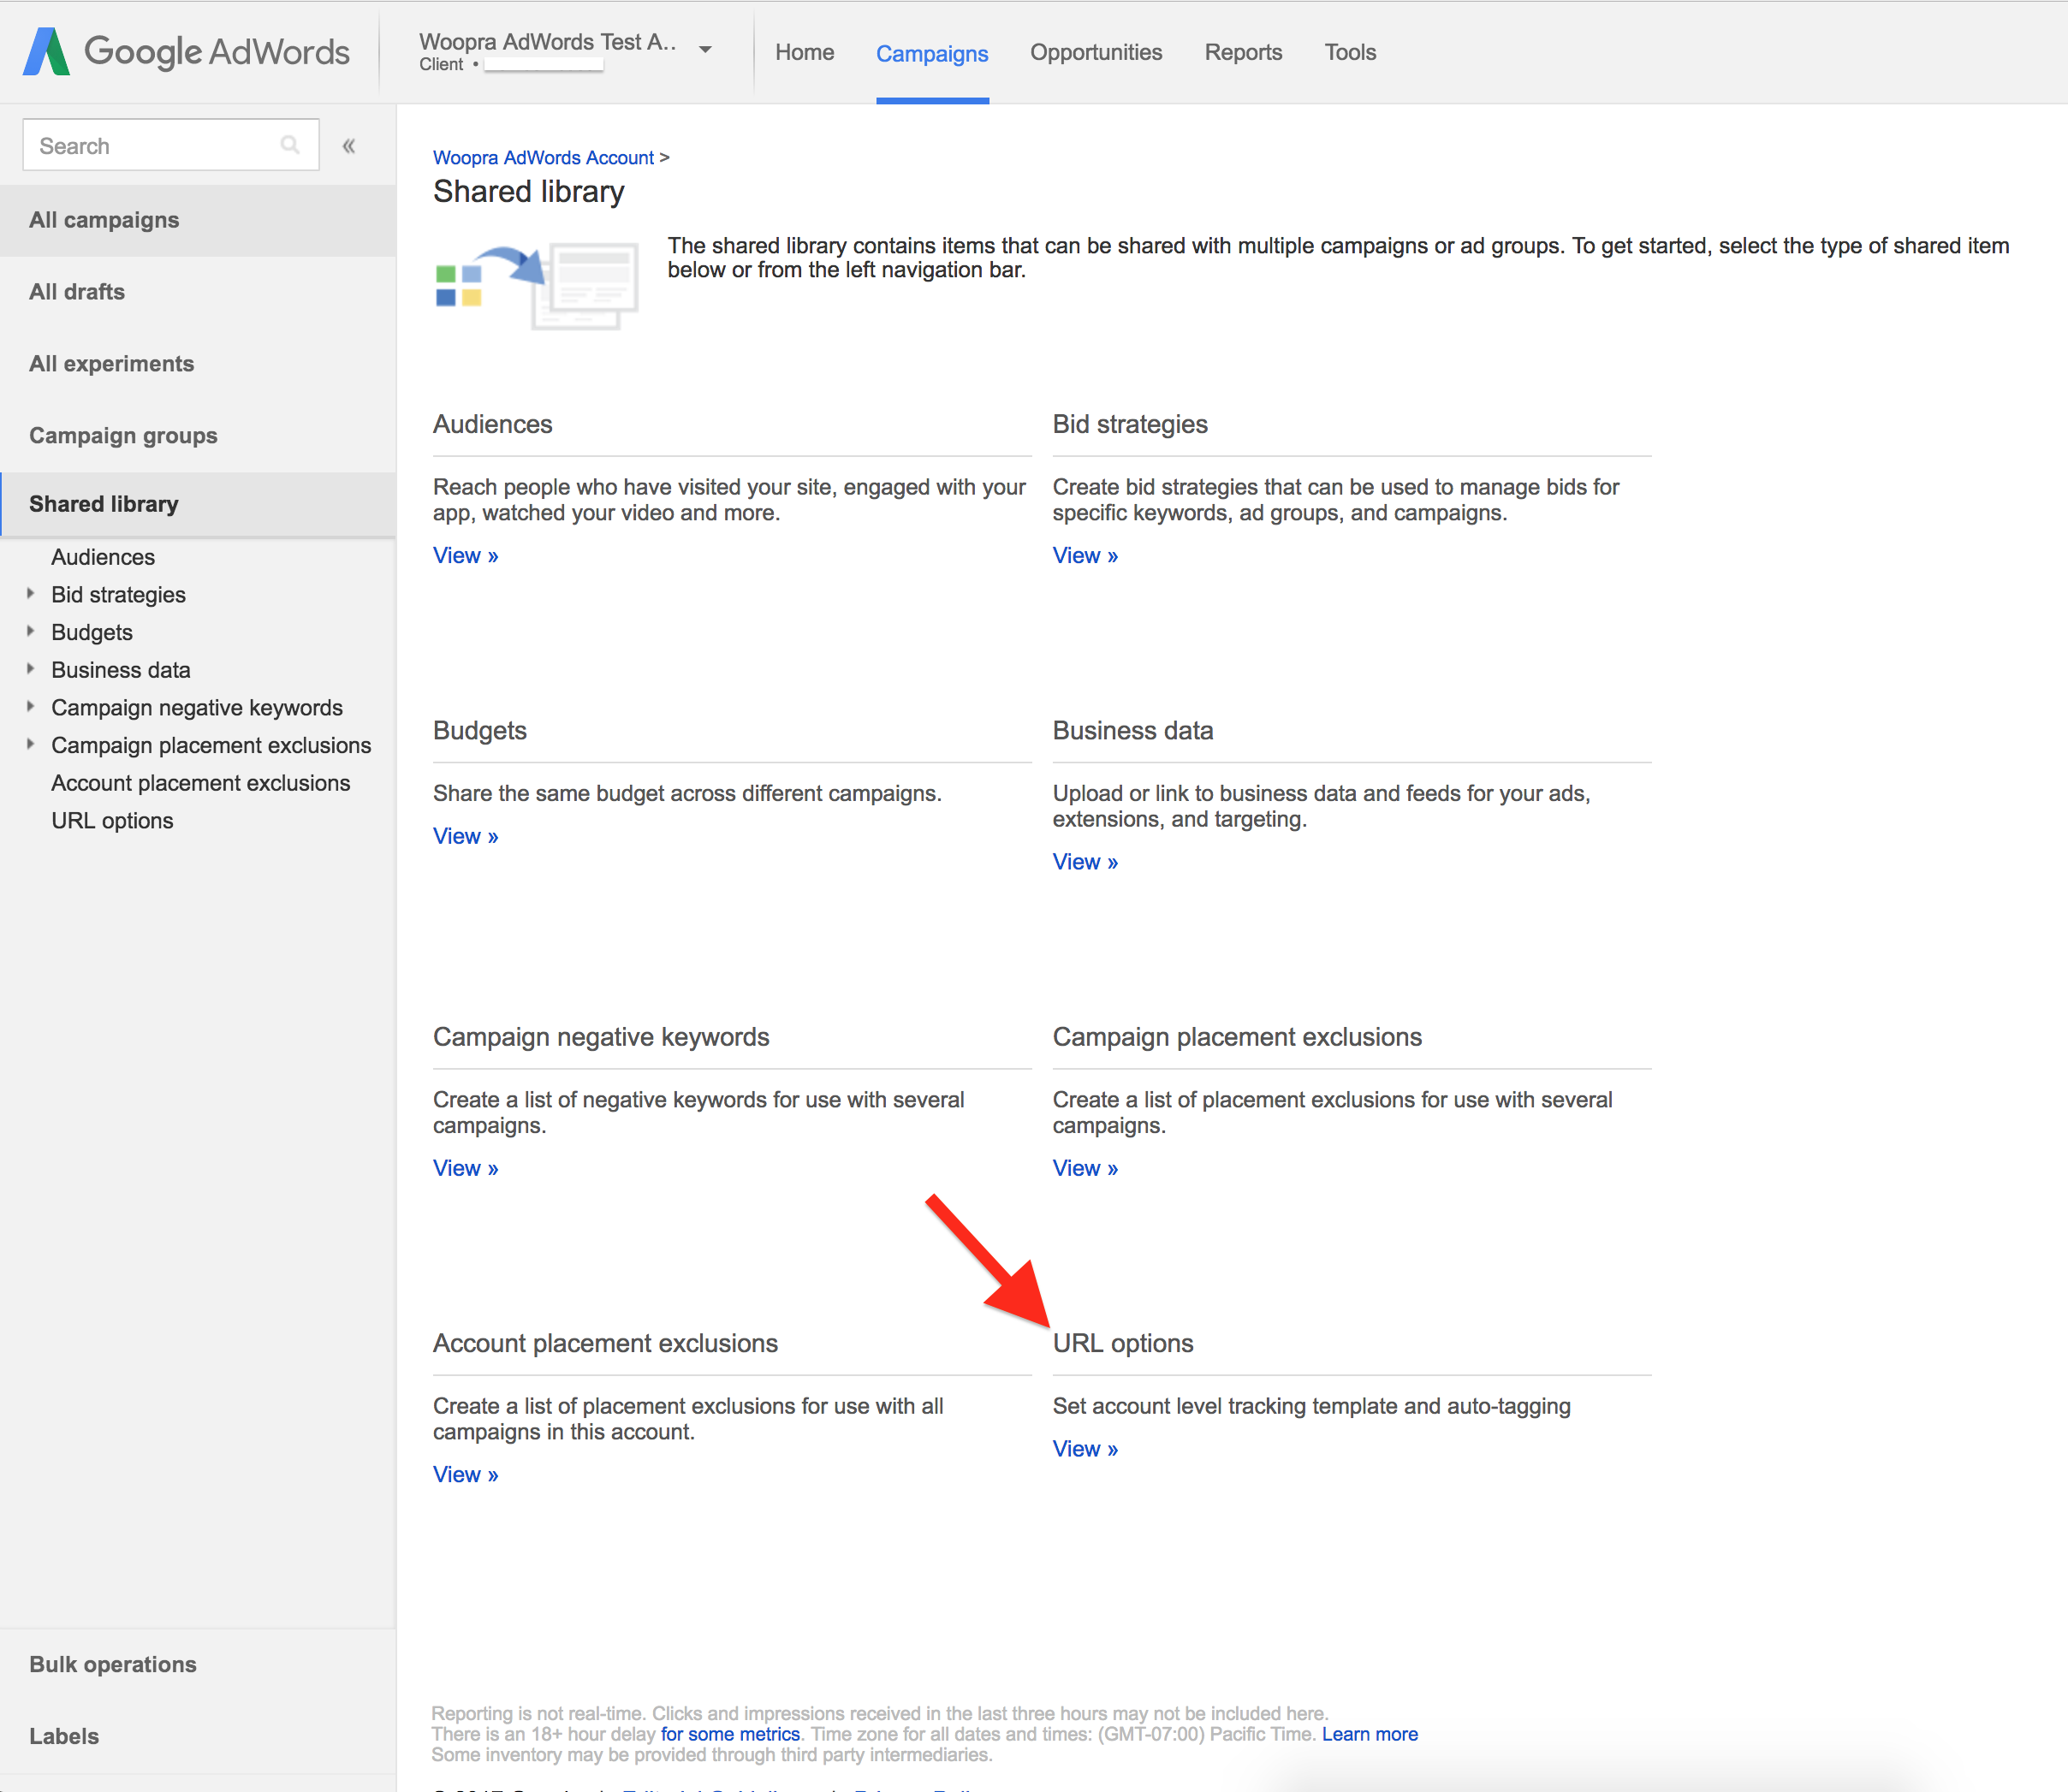
AdWords has a section in its interface called the "Shared Library." This tab contains account-level settings and defaults that can be used in multiple campaigns. To set up UTM Auto-Tagging to work with Woopra, you need to tell AdWords to send the campaign data in the universal utm_ format, rather than encoded in the gclid that only Google Analytics can read. Here's how:
Instructions
- Navigate to the Shared Library, and then to the "URL options." Note the URL options are not available from manager accounts, only on an individual ad account level.

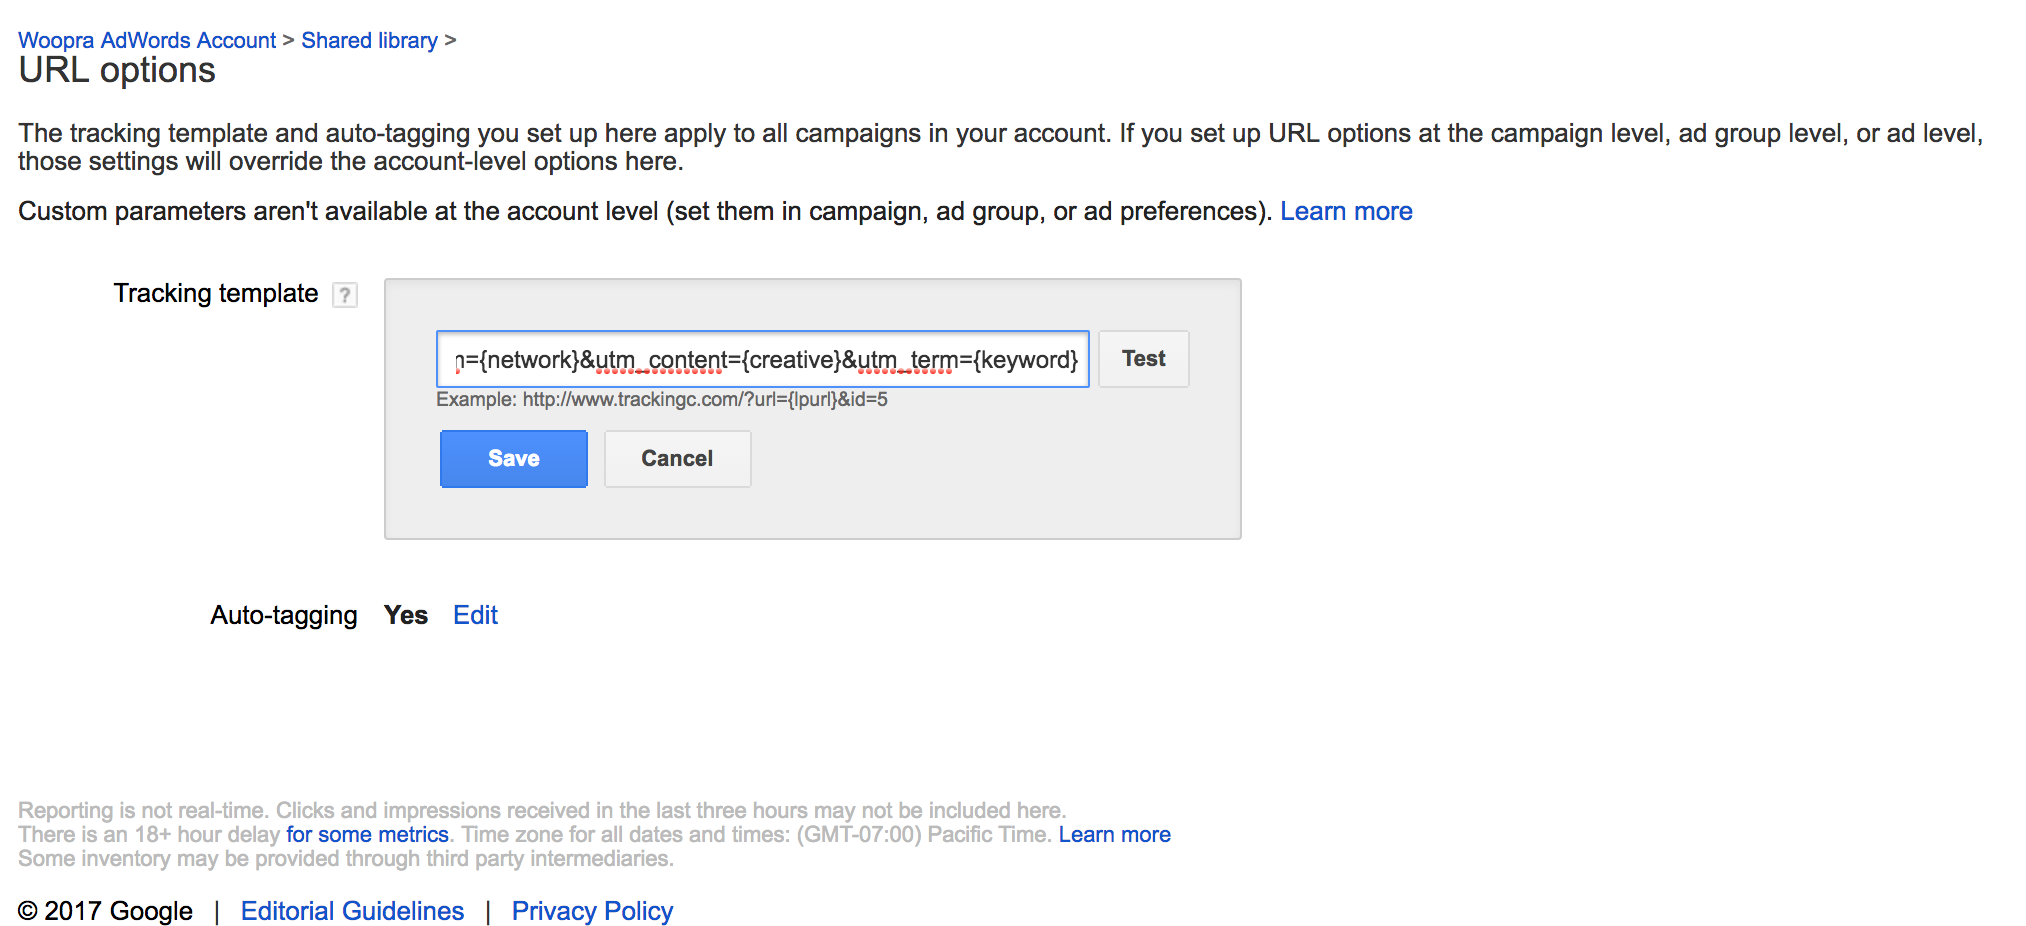
- Turn on Auto-Tagging by clicking the edit button, and selecting the check box. This will tell AdWords to include query parameters to help identify campaigns, etc. with each pageview.

- Create your tracking template. This is creating a template for the urls to which AdWords directs people who click your add. Each campaign may have its own url that a clicked ad will lead to, and using this template will allow AdWords to automatically add other information to the query part of the URL.
The concept here is that you are going to tell AdWords that when creating the url for the link in one of your adds, put it through this template on a per-ad-view basis so that each click gets the right metadata or campaign information in the query.
So the template will look something like: {base url you provided} ?(begin query)utm_campaign={campagin name}&utm_medium={campaign medium} and will form a recipe for AdWords to add in the data. When creating the url, the parts in the {} braces (called Value Track Parameters, more here) will be exchanged for actual values, while the parts outside will be included literally. A full list of available Value Track parameters is available here.
Here is an actual functional example. You can start with copying this into the template in AdWords, and then you can adjust it as necessary after testing to meet your goals:
{lpurl}?utm_campaign={campaignid}&utm_source=AdWords&utm_medium={network}&utm_content={creative}&utm_term={keyword}Note that {lpurl} means the target url for the ad, which you provide to google when building a particular ad--so this will be replaced with the actual page on your site where you want people to go.

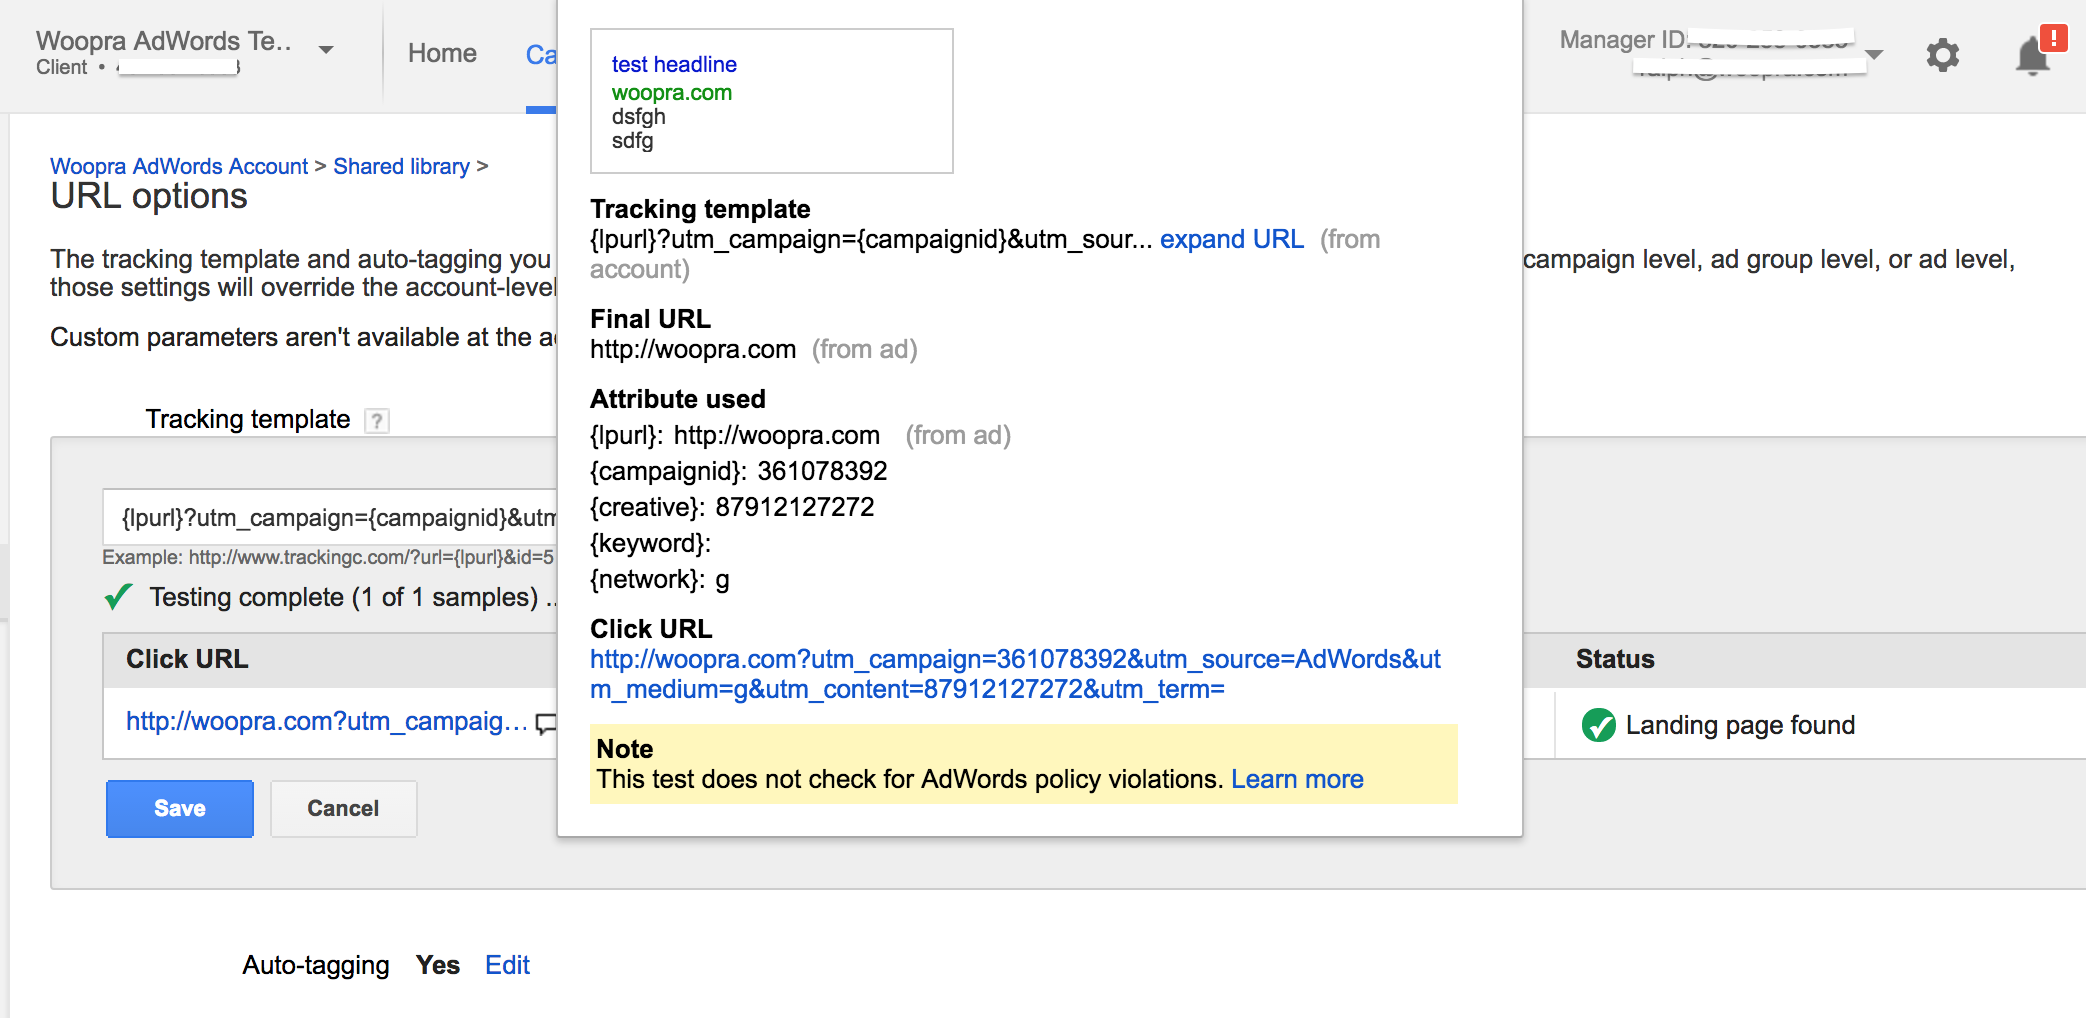
- You can click "test" and it will run the template and create a test url that you can click to go to one of your pages--usually it will just use the homepage. If you click the test link and load your page, you should see the utm parameters in the url address bar, and you should also see a new pageview event in your profile in Woopra, with campaign data associated with it right there in the interface. AdWords will also note any errors it detects, and you can use this to make sure you are getting all the right campaign data and utm parameters you want.

Pro Tip:You can create custom ValueTrack tags to carry things like human-readable campaign name. For more info on this, see this AdWords Article.
Updated 3 months ago
