Salesforce
Follow the below steps to successfully install the Woopra and Salesforce integration, map fields between the two tools, and setup the Woopra embedded profile feature in Salesforce.
Note: You must have both Woopra and Salesforce accounts to access the integration. You must have the Woopra Javascript tracking code on your website, and it must be identifying visitors via email address for the integration to work. If you have not set up Woopra accordingly, please follow steps one and two of the setup tutorial or contact us at [email protected].
Installing the Salesforce Integration
- Navigate to the “Configure” section of your Woopra instance.
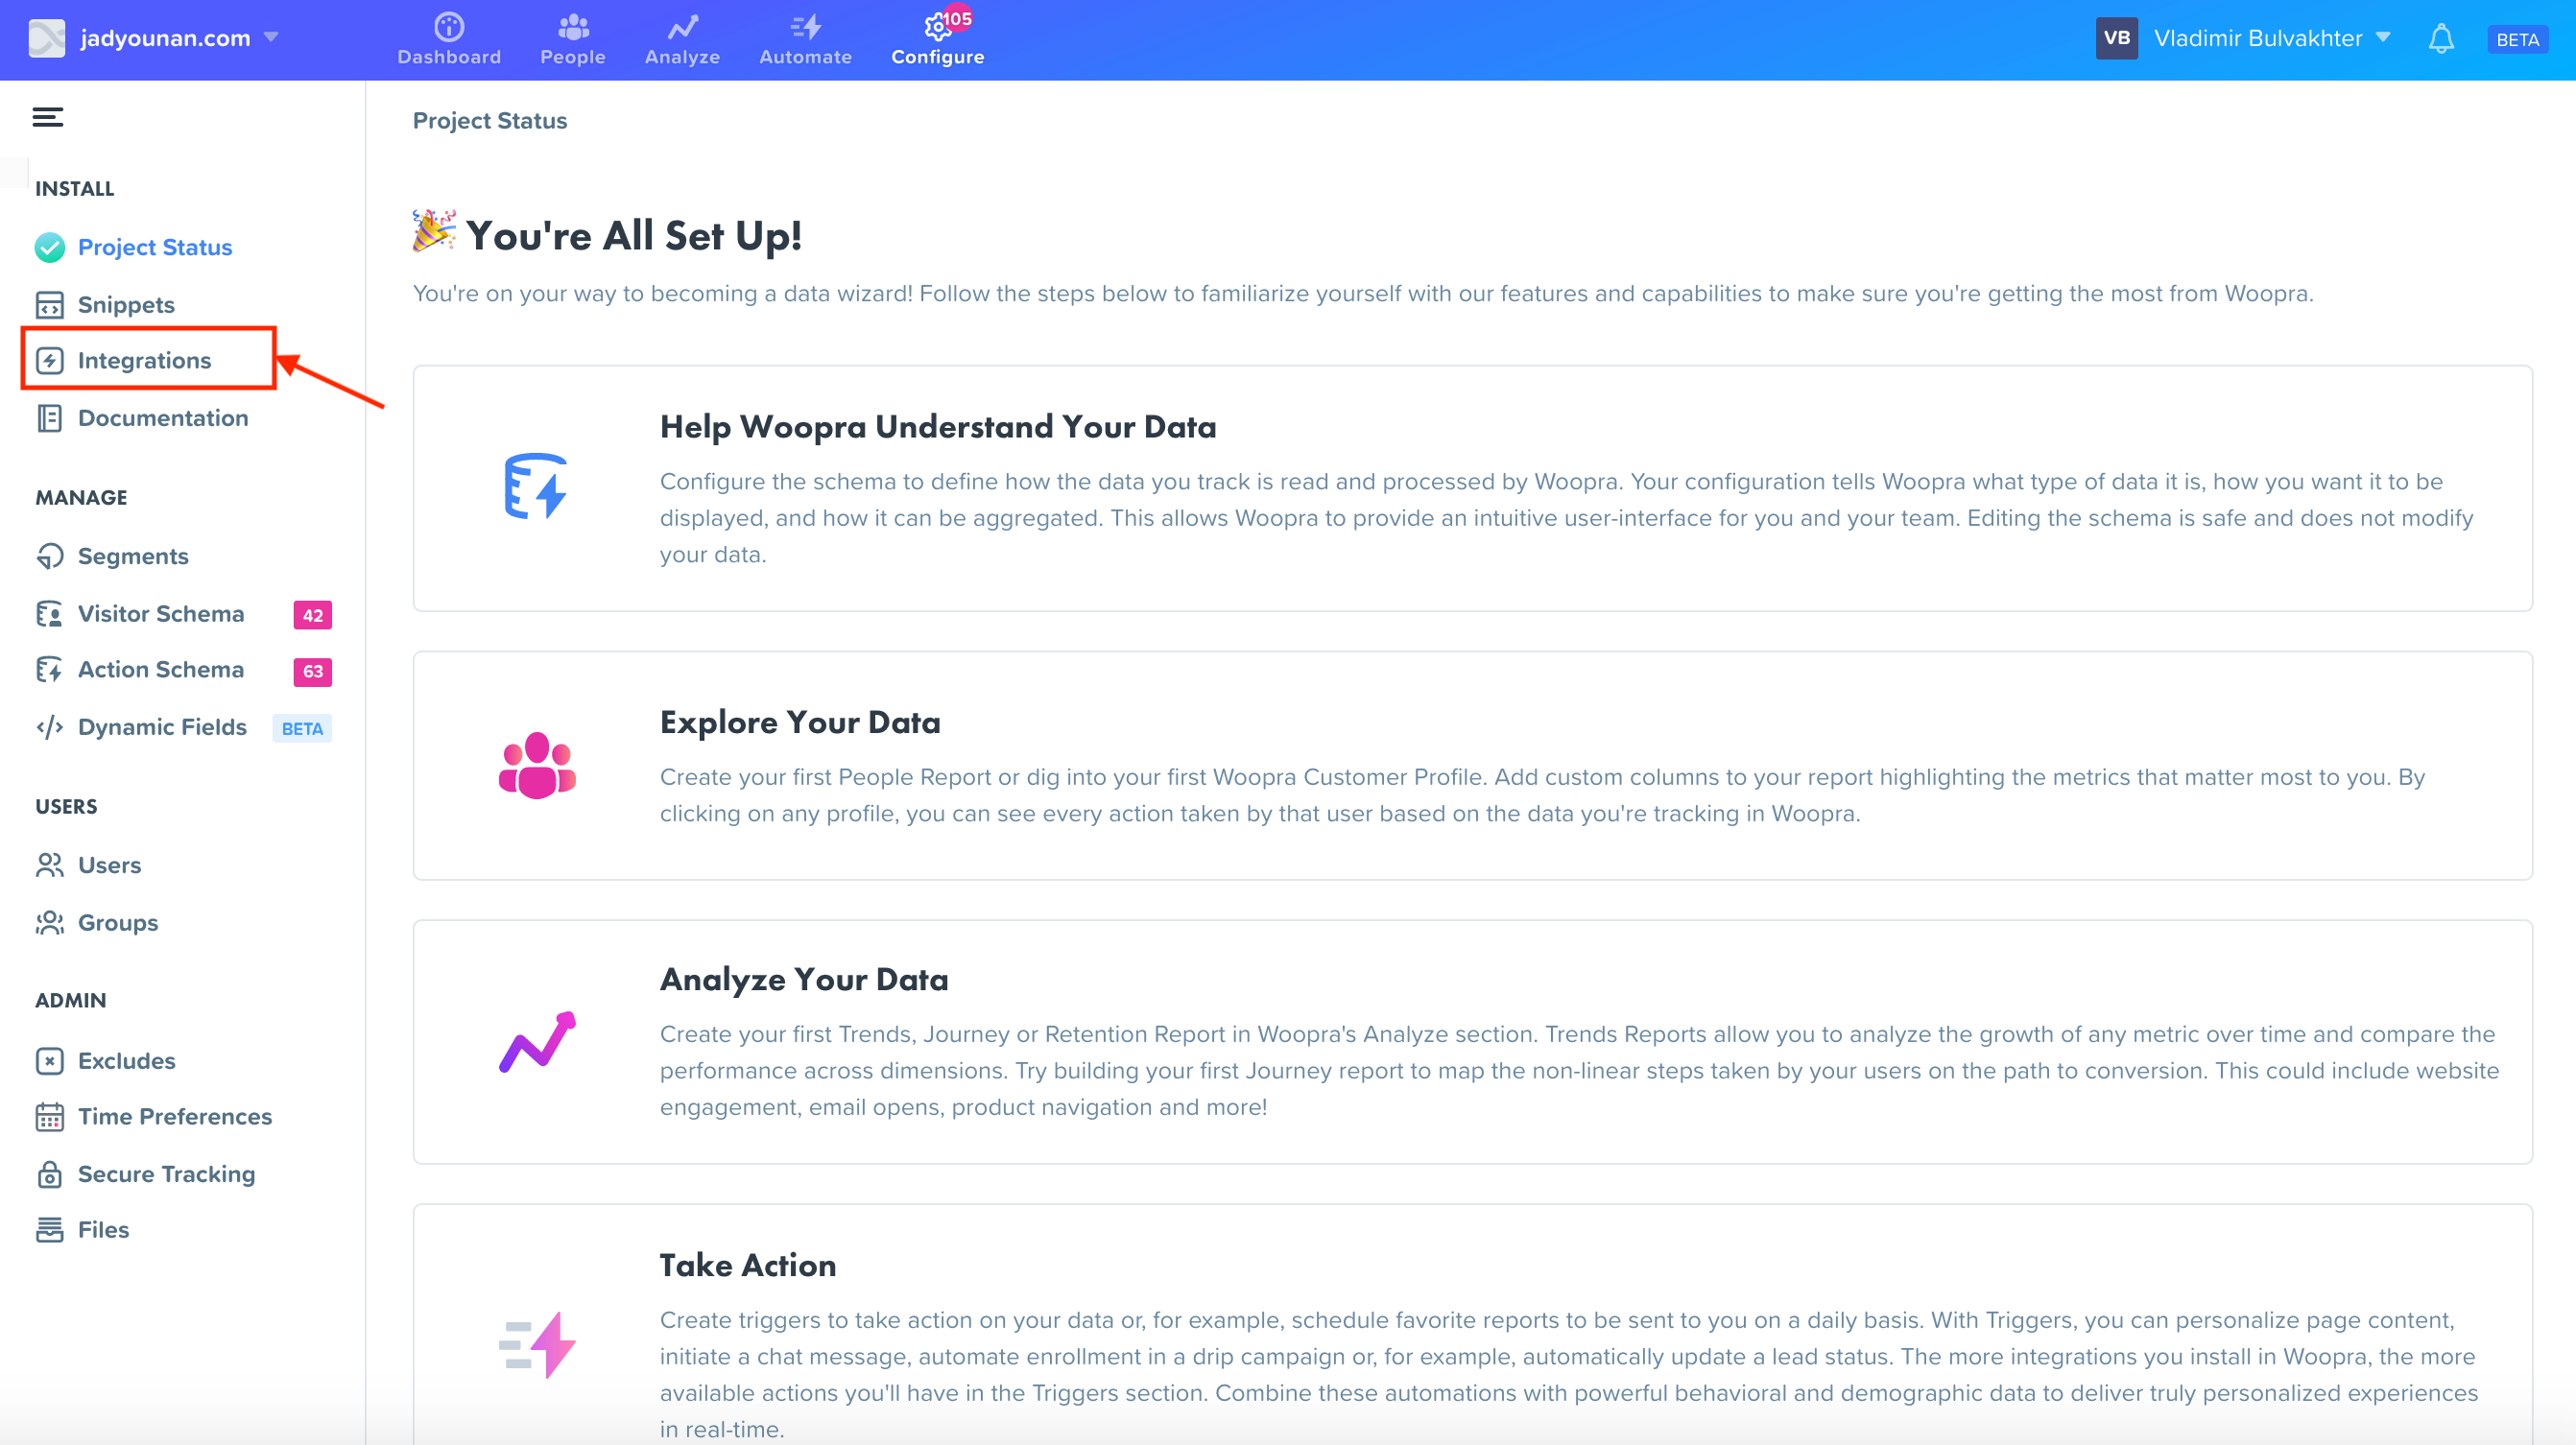
- Click on the “Integrations” button on the sidebar.
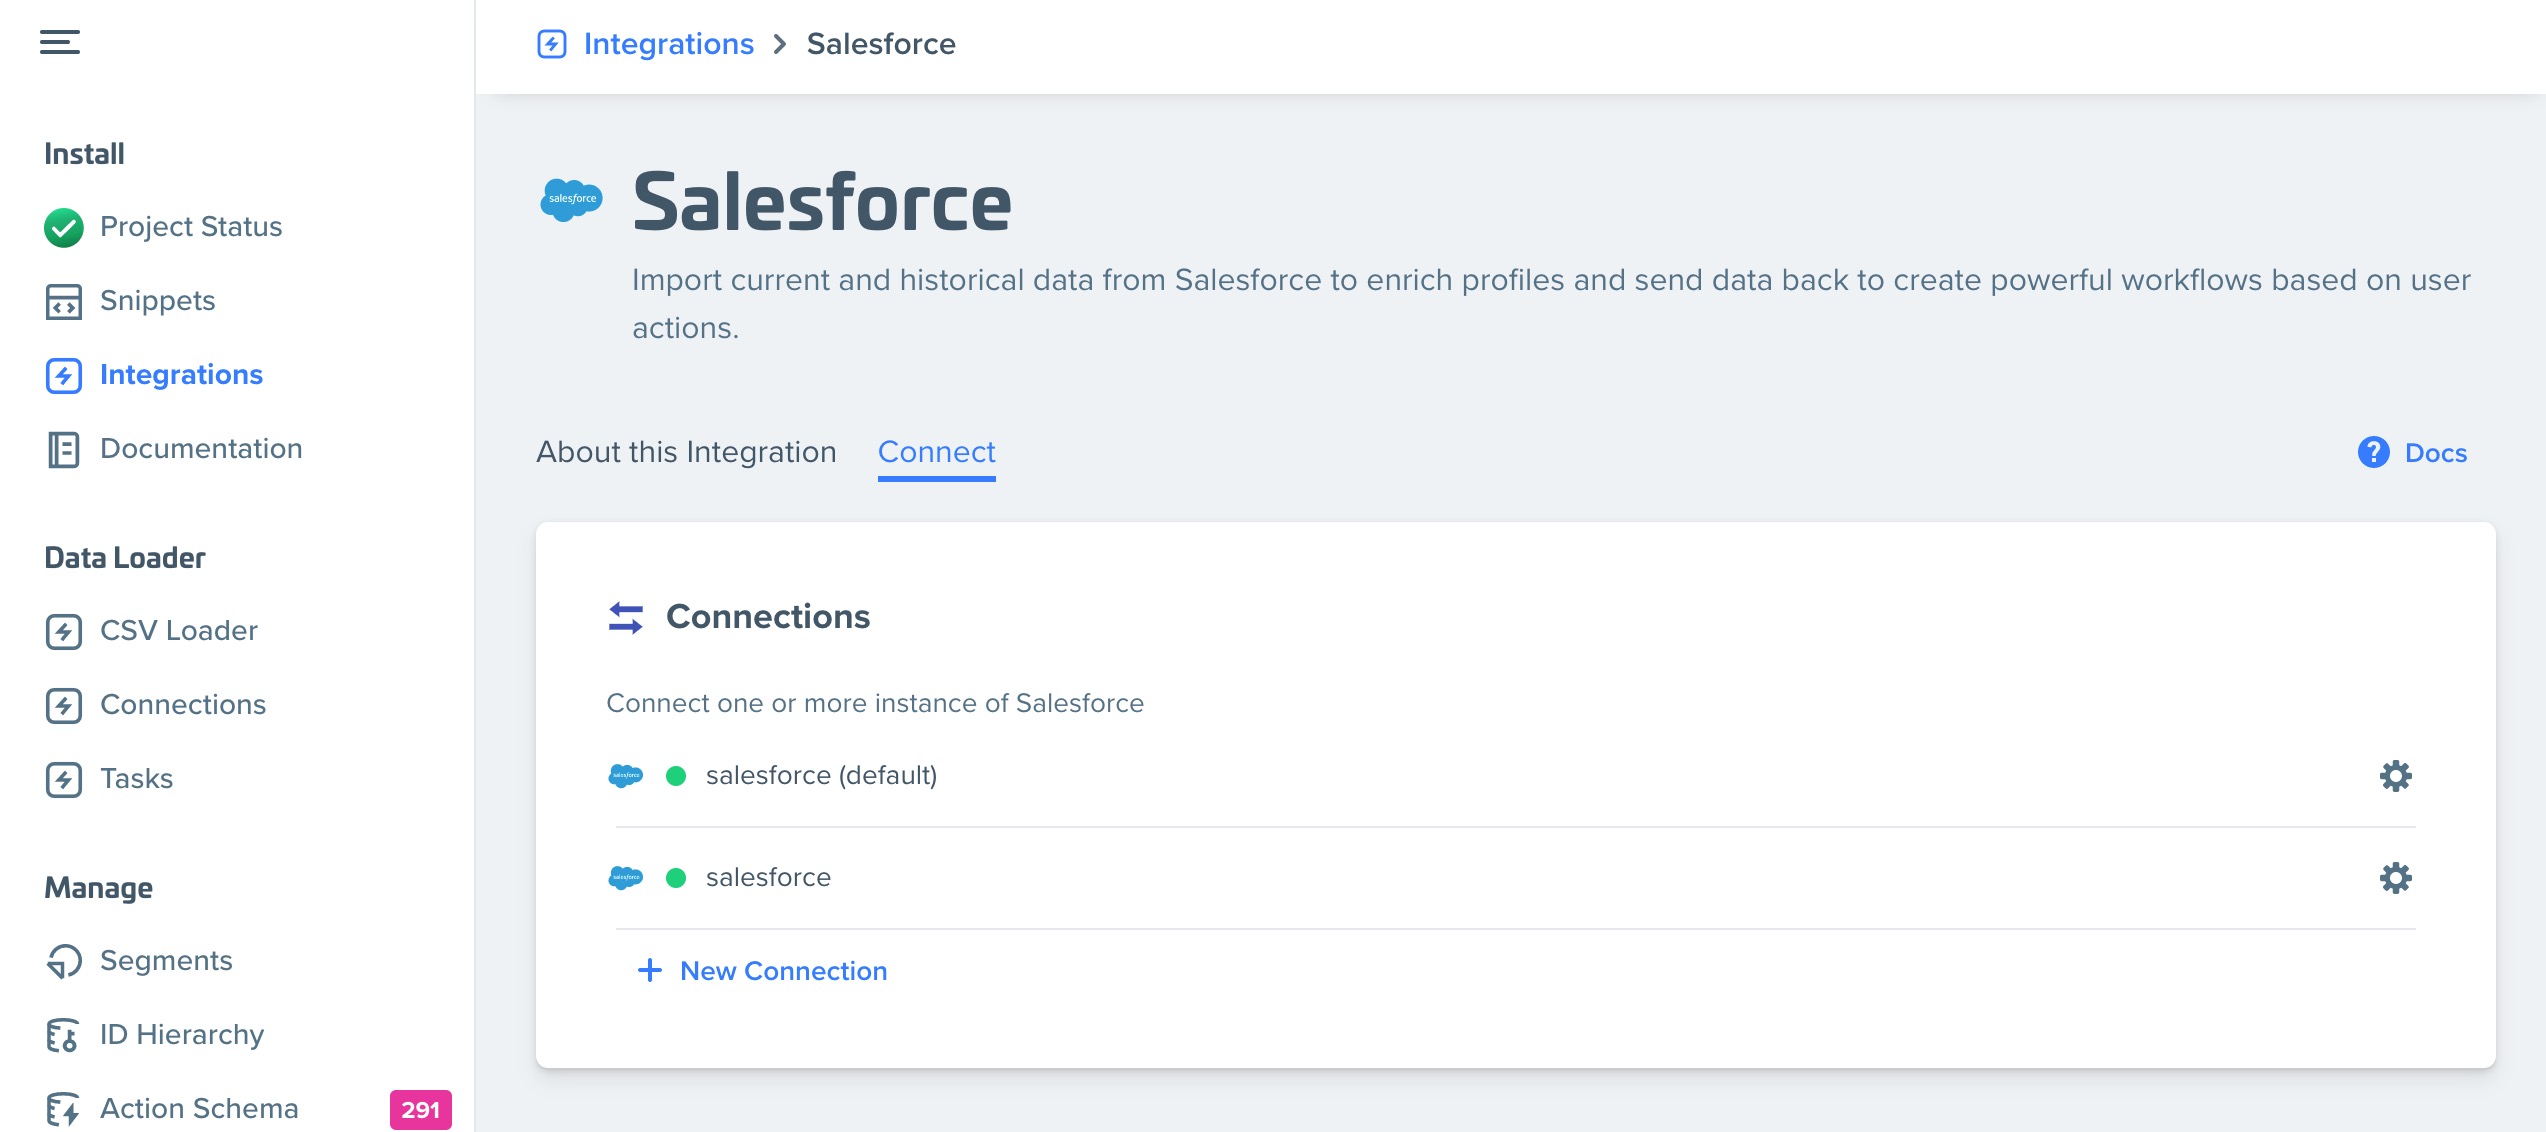
- Search for the Salesforce integration and click on the app.
- Click the “Connect” tab on the top and create a new connection.
Configure the Tasks
With our Data Loader connection made, we can pull in any data from your Salesforce Objects. In the following section, we have some examples of how to set up the Tasks to pull in specific data. If you have any questions, please reach out to our support and we can help set up these tasks.
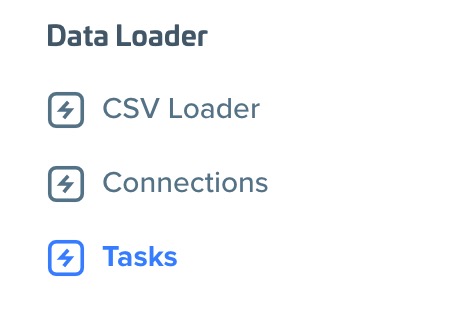
Once the connection is made, navigate to the "Task" tab under the Data Loader section on the left pane.
"Lead Created" Task Example
Click in the upper right corner to set up a new Task. Here, we'll configure the Task to pull in Leads when they are created using the Lead Object.
First we'll configure the Source Configuration as follows:
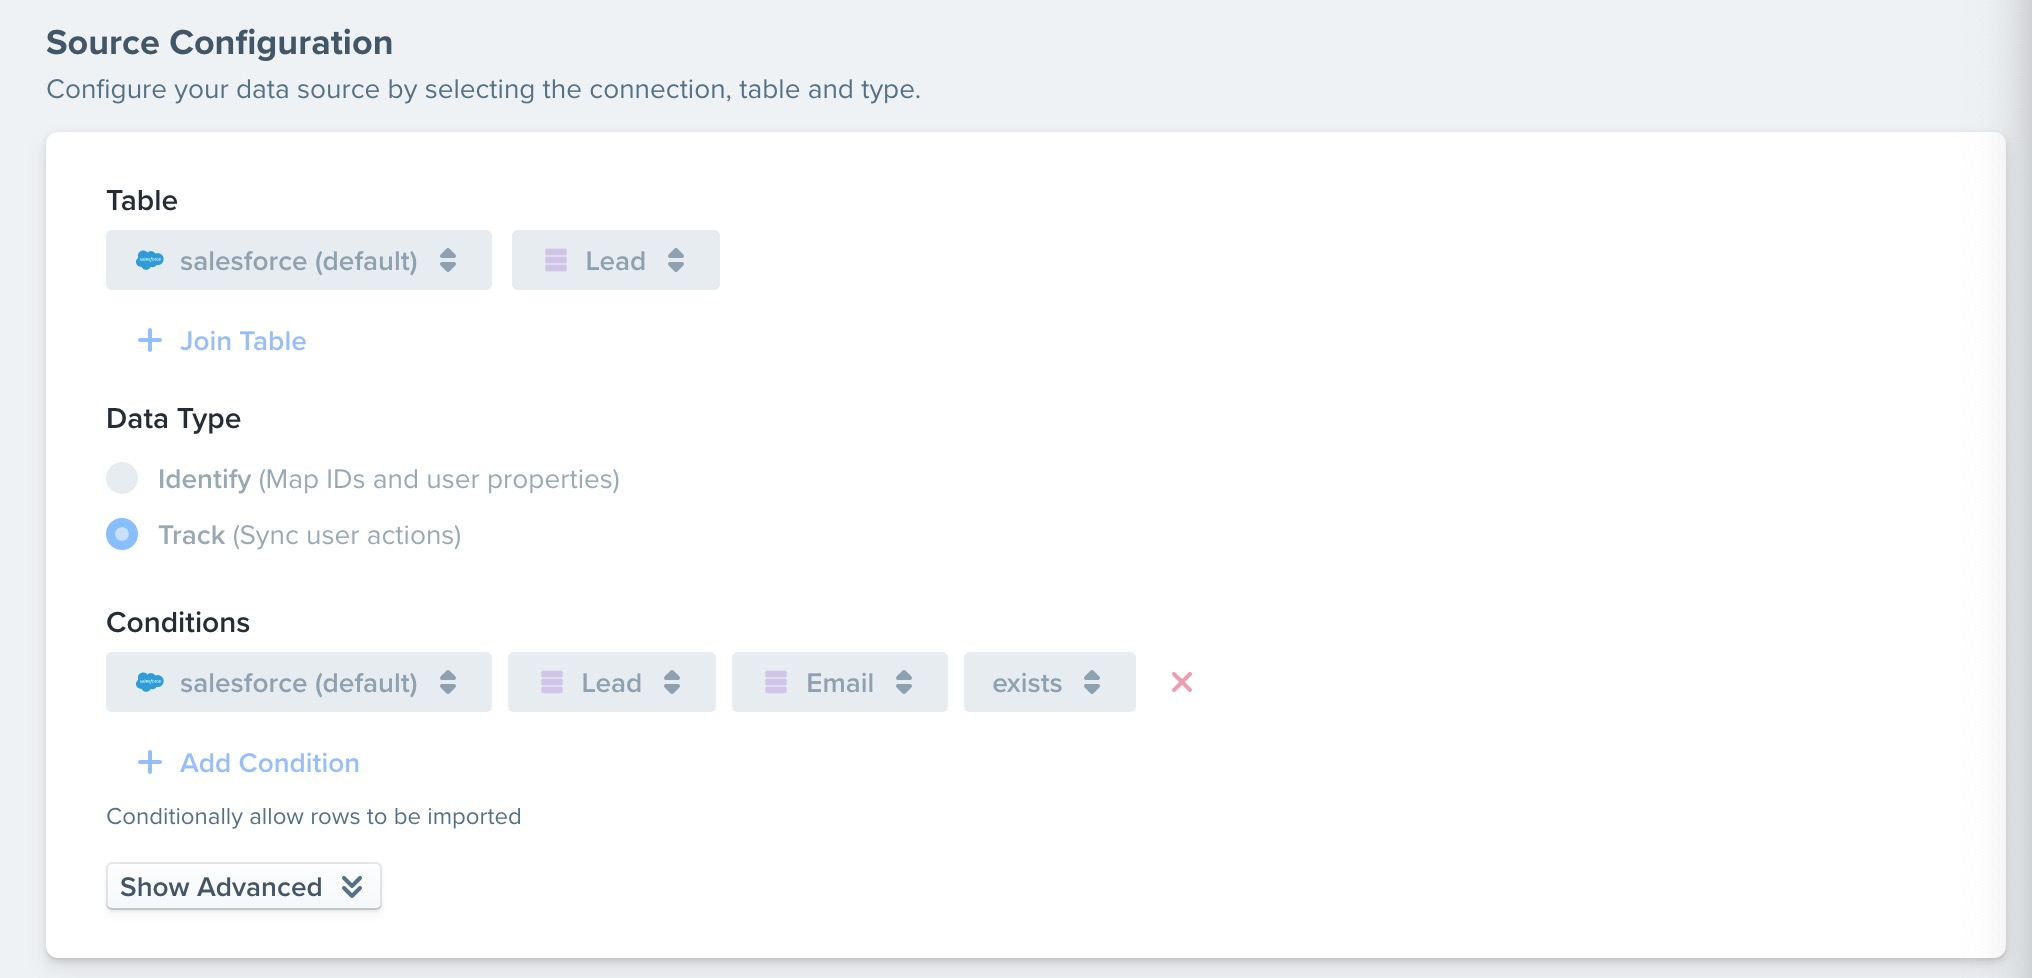
We are using a "Track" data type since we are pulling in an event when the leads are created.
Next, we'll configure the mapping, Visitor properties, and Event properties.
Select and Map
First, we'll map the lead email to the email in Woopra. This is to tell Woopra what profiles to send the data to. Typically email is the most common mapping.
Visitor Properties
The Visitor Properties can be any data you want to import from the Lead to enrich Lead profiles
Event Name
In our example, we used 'sf created lead'.
Event Properties
It's ok to duplicate what you selected in the Visitor Properties here or simply add properties for the event that are important. We suggest adding at least 'status' as one of the event properties.
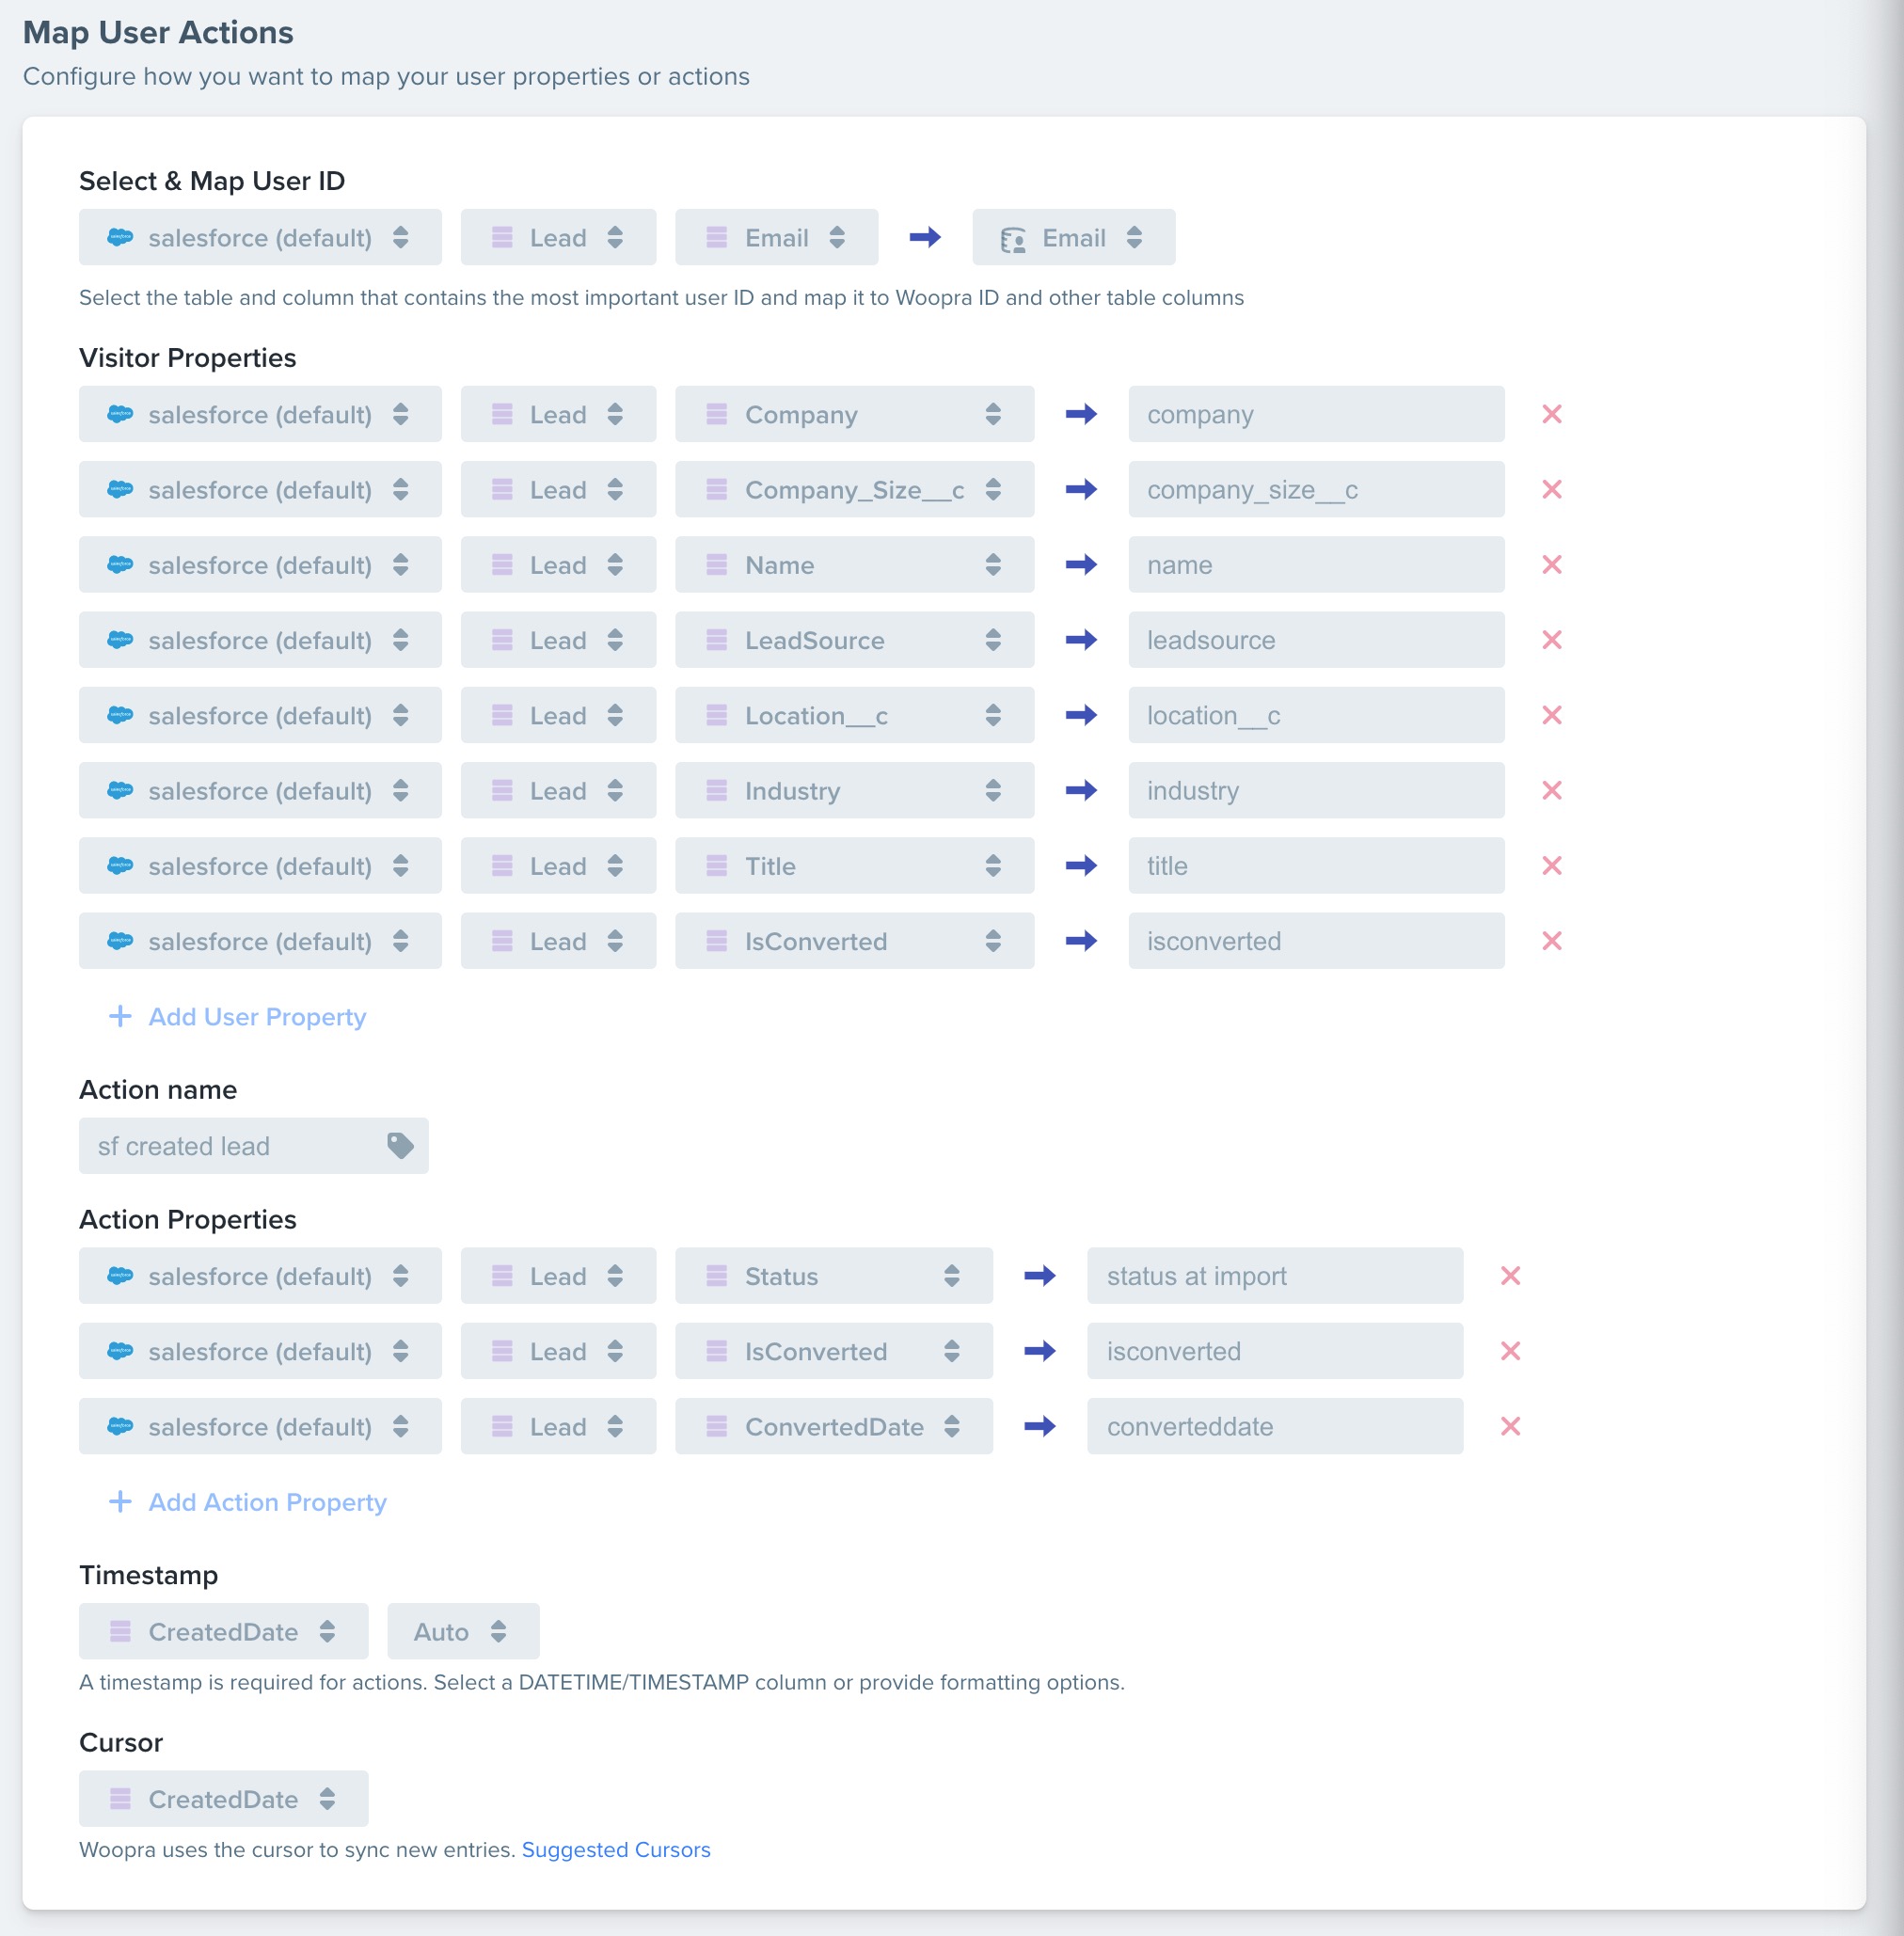
This is an example setup of the Lead Import Task. You can follow this, or tweak the imported fields to suit your needs.
Timestamp and Cursor
Select CreatedDate for the timestamp and Cursor
Save and Activate
Lastly, you can save, preview and activate the task. The task might take some time for the import to complete. The Task will automatically check for new updates at set sync intervals.
Double Check Your FieldsIt's important to make sure you have all the fields you want to import selected. It's always a good idea to bring in more data than less because you can always hide fields in Woopra but it's difficult to go back and re-import the data if you need to add a field later.
If you need to add a field later, you'd have to pause and reset the cursor which will remove all the imported data, and you will need to start the task over.
"Lead Update" Task Example
Click in the upper right corner to set up a new Task. Here, we'll configure the Task to pull in updates to Leads using the LeadHistory and Lead Objects.
First, we'll configure the Source Configuration as follows:
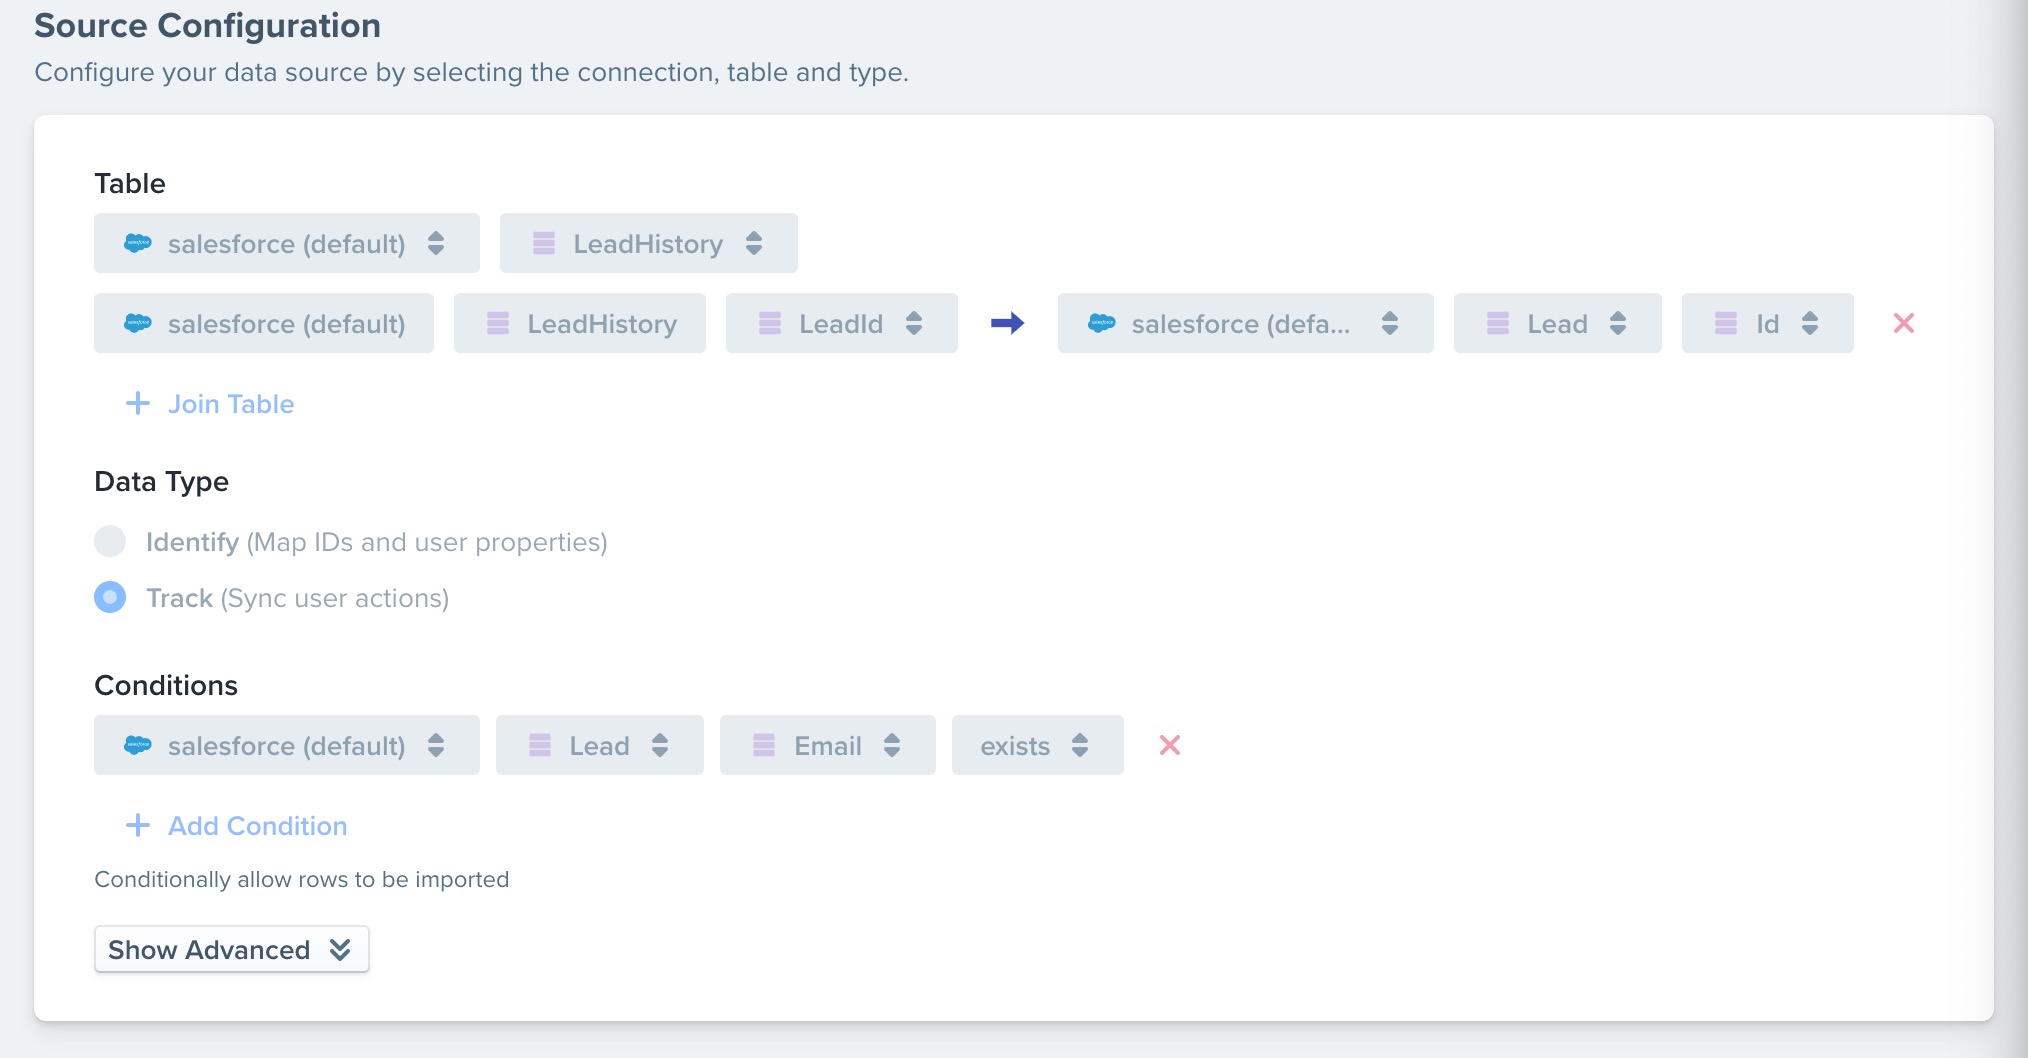
We will need to join the Leadhistory object with the Lead object to make sure we have the lead email field available to us to map.
Next, we'll configure the mapping, Visitor properties, and Event properties.
Select and Map
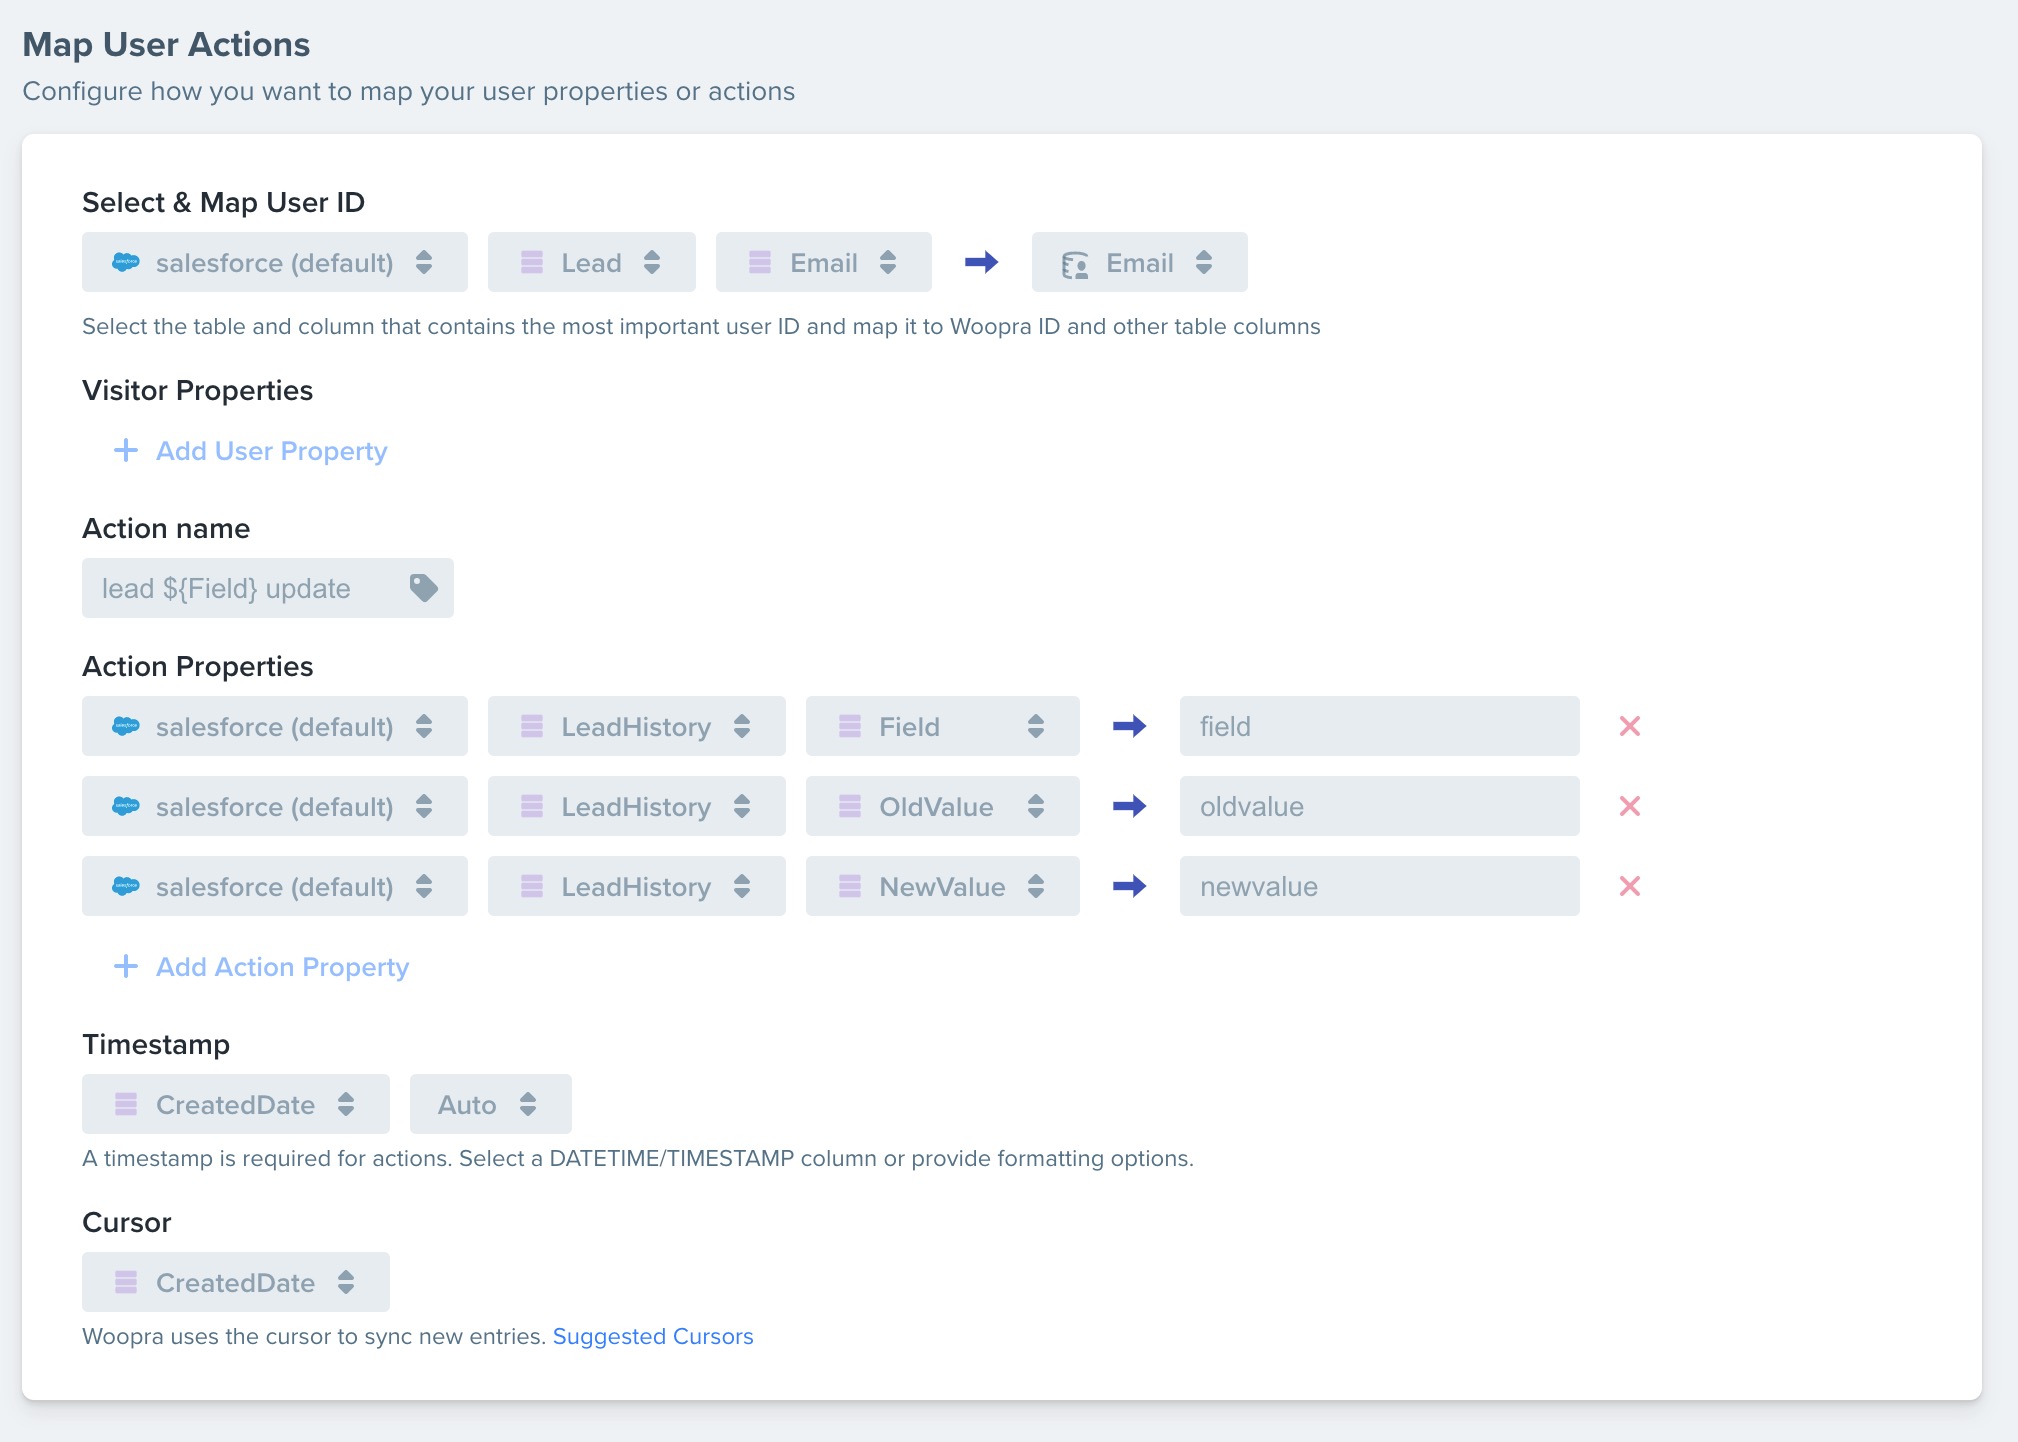
First, we'll map the lead email to the email in Woopra. This is to tell Woopra what profiles to send the data to. Typically email is the most common mapping.
Visitor Properties
We'll leave these blank for this Task.
Event Name
In our example, we used 'lead ${Field} update'. This will create multiple different events for the types of updates. These include Lead updates for leadmerged, leadconverted, owner, created, status, ownerassignment, title company, and other history updates.
Event Properties
Select from the LeadHistory Object the following: Field, OldValue, and NewValue.
Timestamp and Cursor
Select CreatedDate for the timestamp and Cursor
Save and Activate
Lastly, you can save, preview and activate the task. The task might take some time for the import to complete. The Task will automatically check for new updates at set sync intervals.
"Opportunity History Update" Task Example
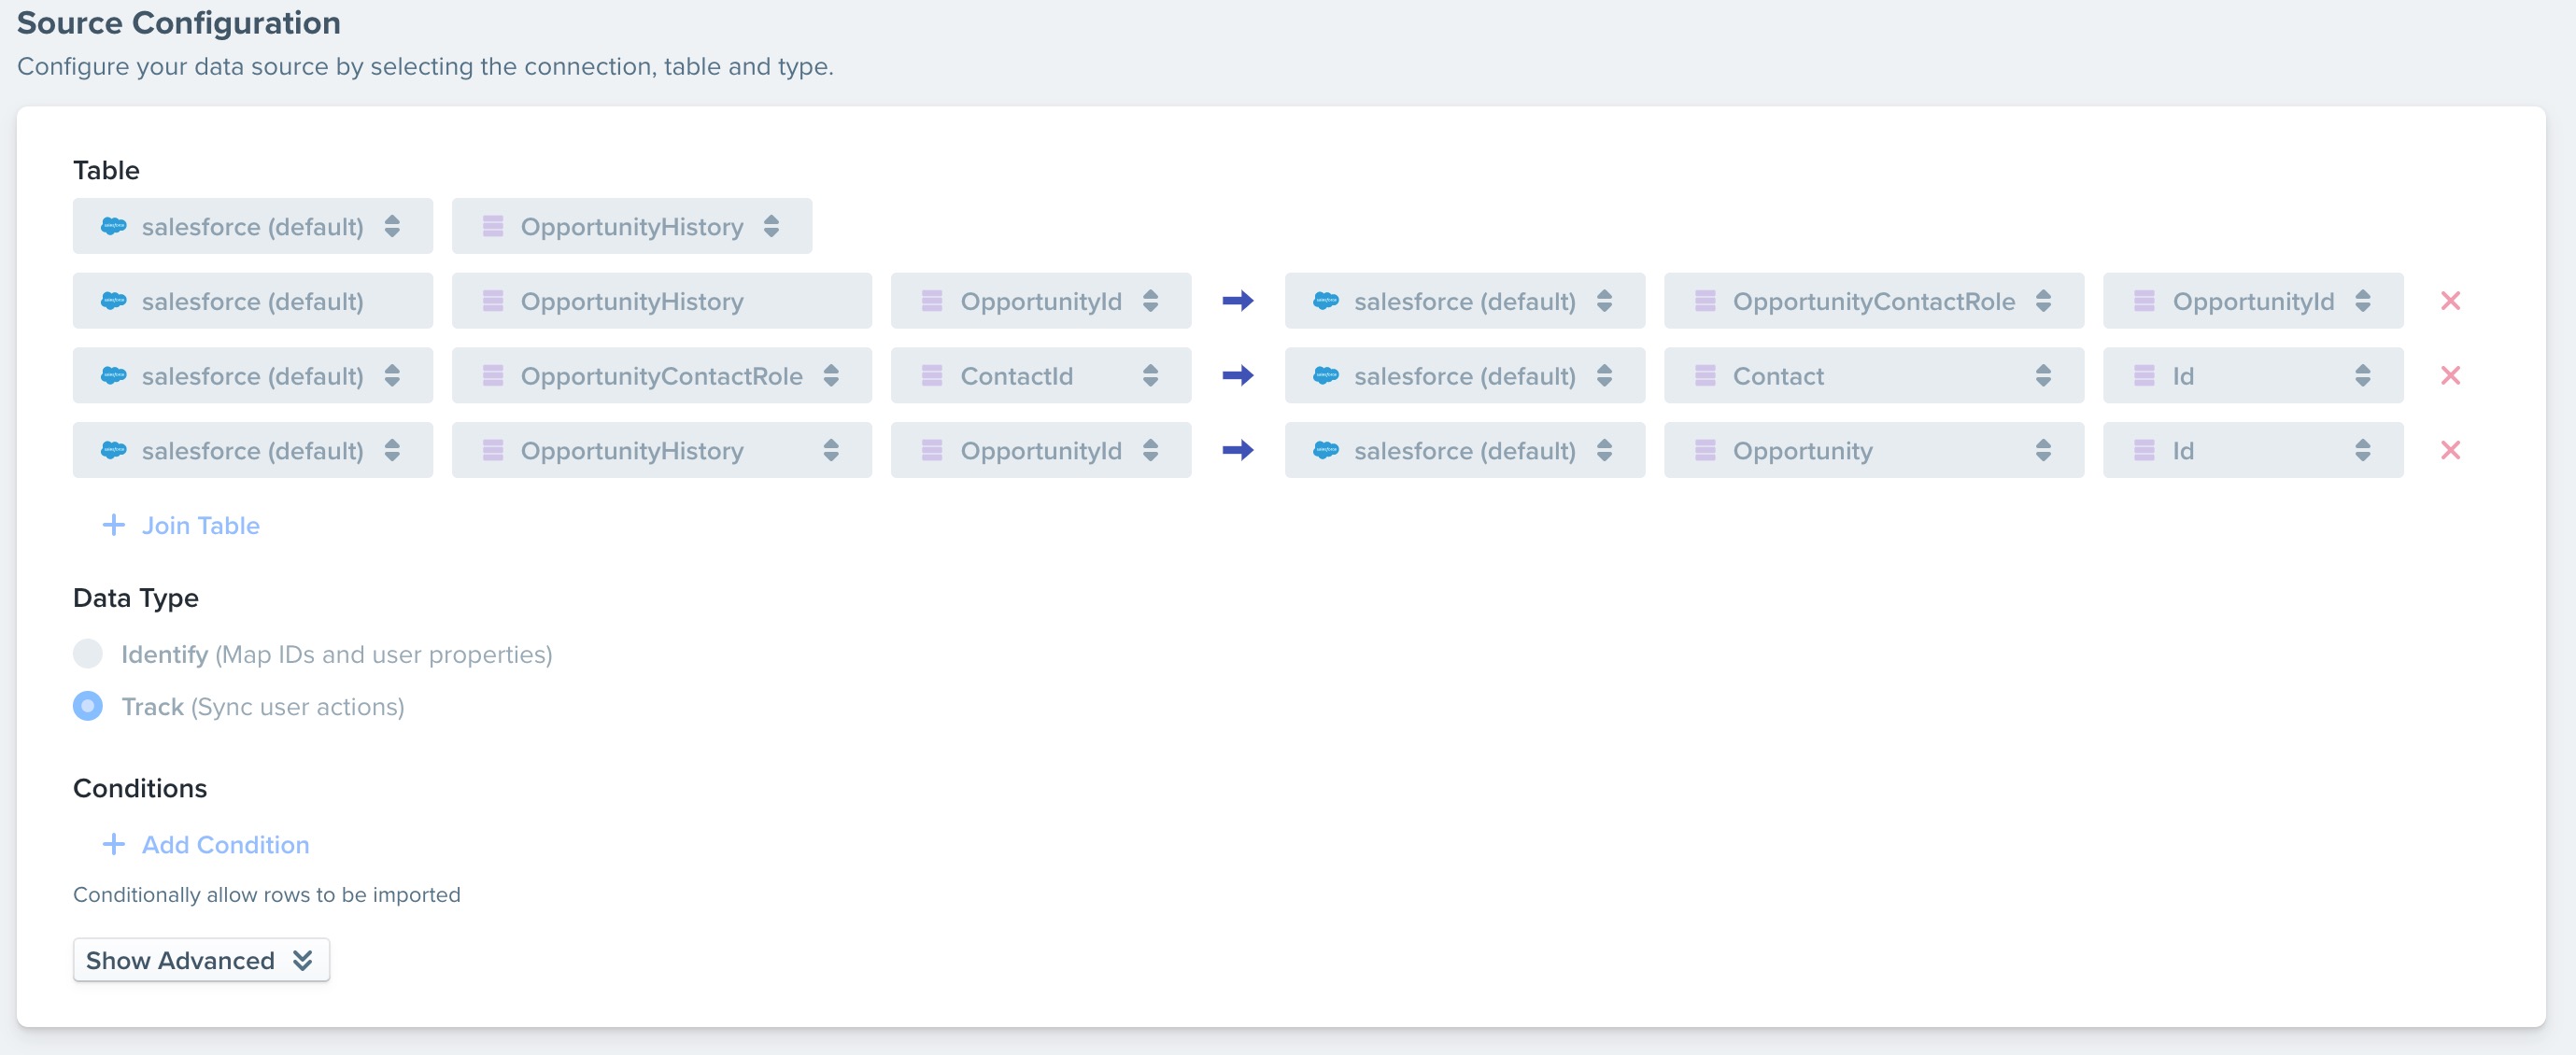
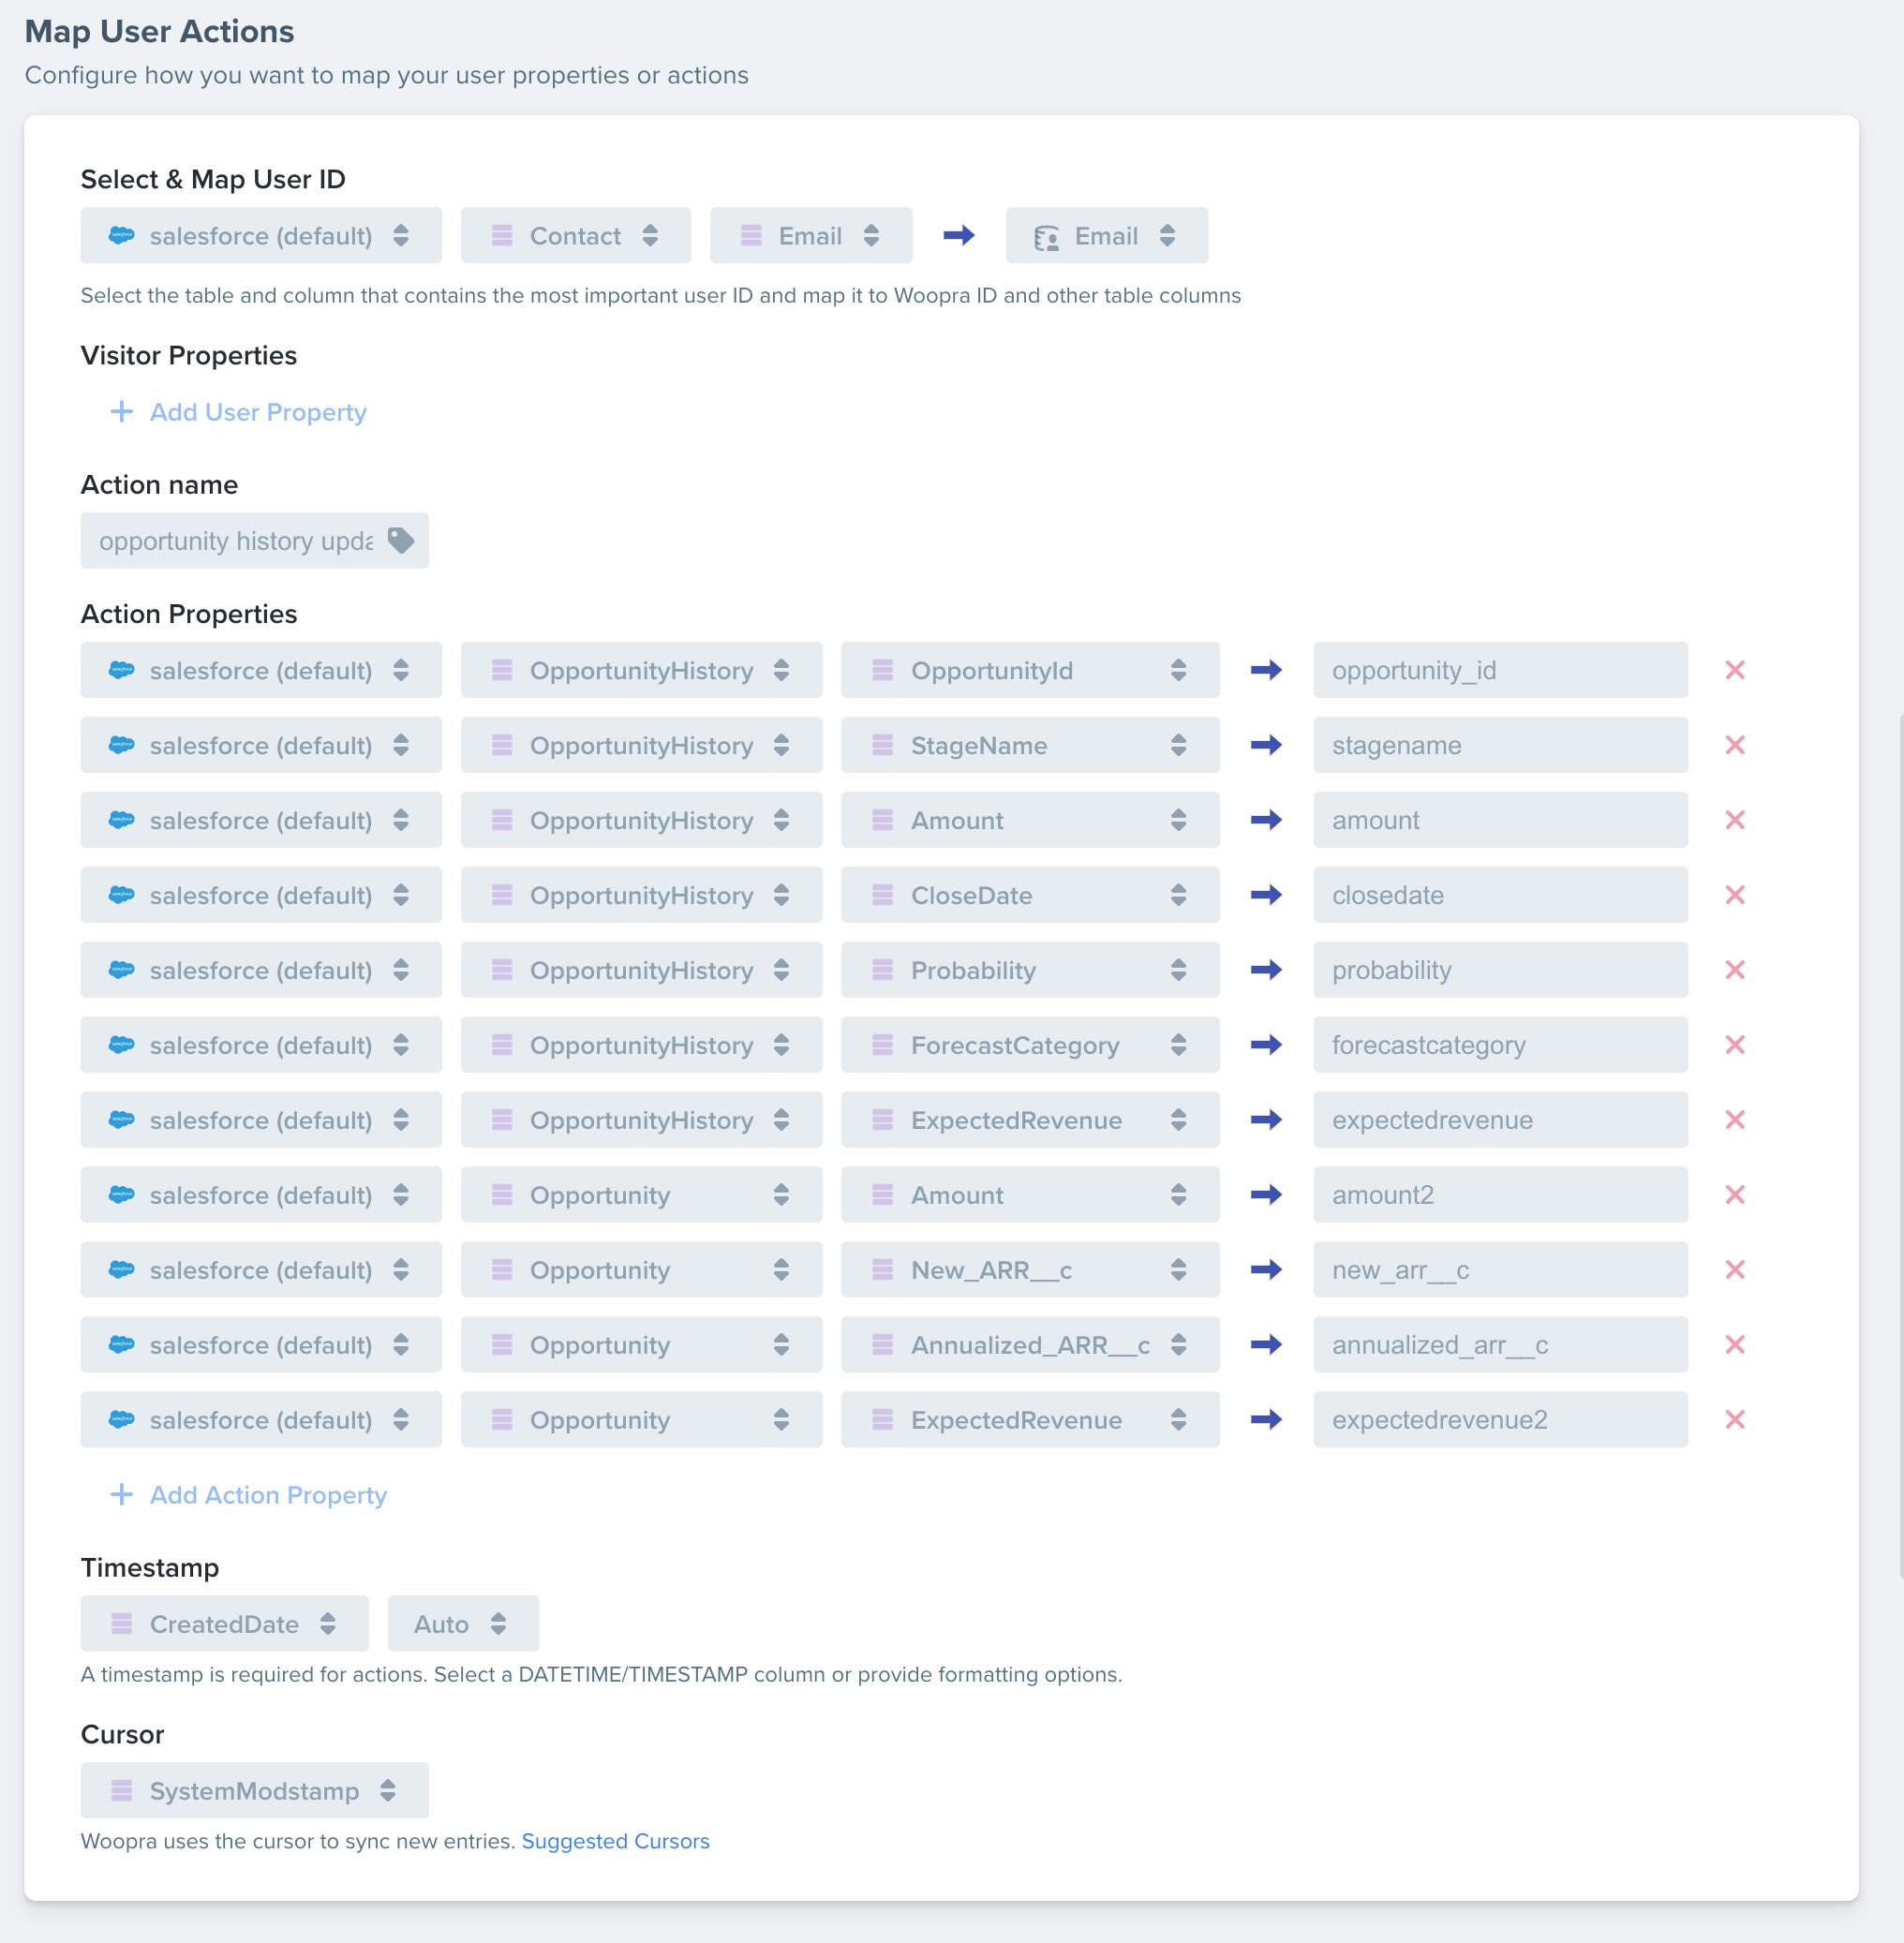
Since the Opportunity Object can be connected to multiple emails, we can only map Opportunity history events to the main contact. To do this, we will need to create several joins using the OpportunityHistory, OpportunityContactRole, Contact, and Opportunity Objects.
Please configure the joins in this exact way:
Select and Map
First, we'll map the Contact email to the email in Woopra. This is to tell Woopra what profiles to send the data to. Typically, email is the most common mapping.
Visitor Properties
We'll leave these blank for this Task.
Event Name
In our example, we used 'opportunity history update' as the Event Name.
Event Properties
You can customize what you want to bring in, but we recommend at least opportunityid, stagename, closedate as standard fields. If you add more, remember it's better to bring in more than fewer fields. Bring in anything you think you might need.
Timestamp and Cursor
Select CreatedDate for the timestamp and SytemModstamp for the cursor.
Save and Activate
Lastly, you can save, preview and activate the task. The task might take some time for the import to complete. The Task will automatically check for new updates at set sync intervals.
Adding the Embedded Profile Widgets in Salesforce
- Start by Installing the Woopra package for Salesforce.
- Log in to Salesforce as an administrator and select “Setup” in the top navigation.
- Under “Build” select the “Leads” dropdown.
- Select “Page Layout” to customize the page layout for your leads.
- Click on “Edit Layout”
- Under VisualForce Pages, add a Section and set the Section Properties so that the layout is 1-Column. Name your section.
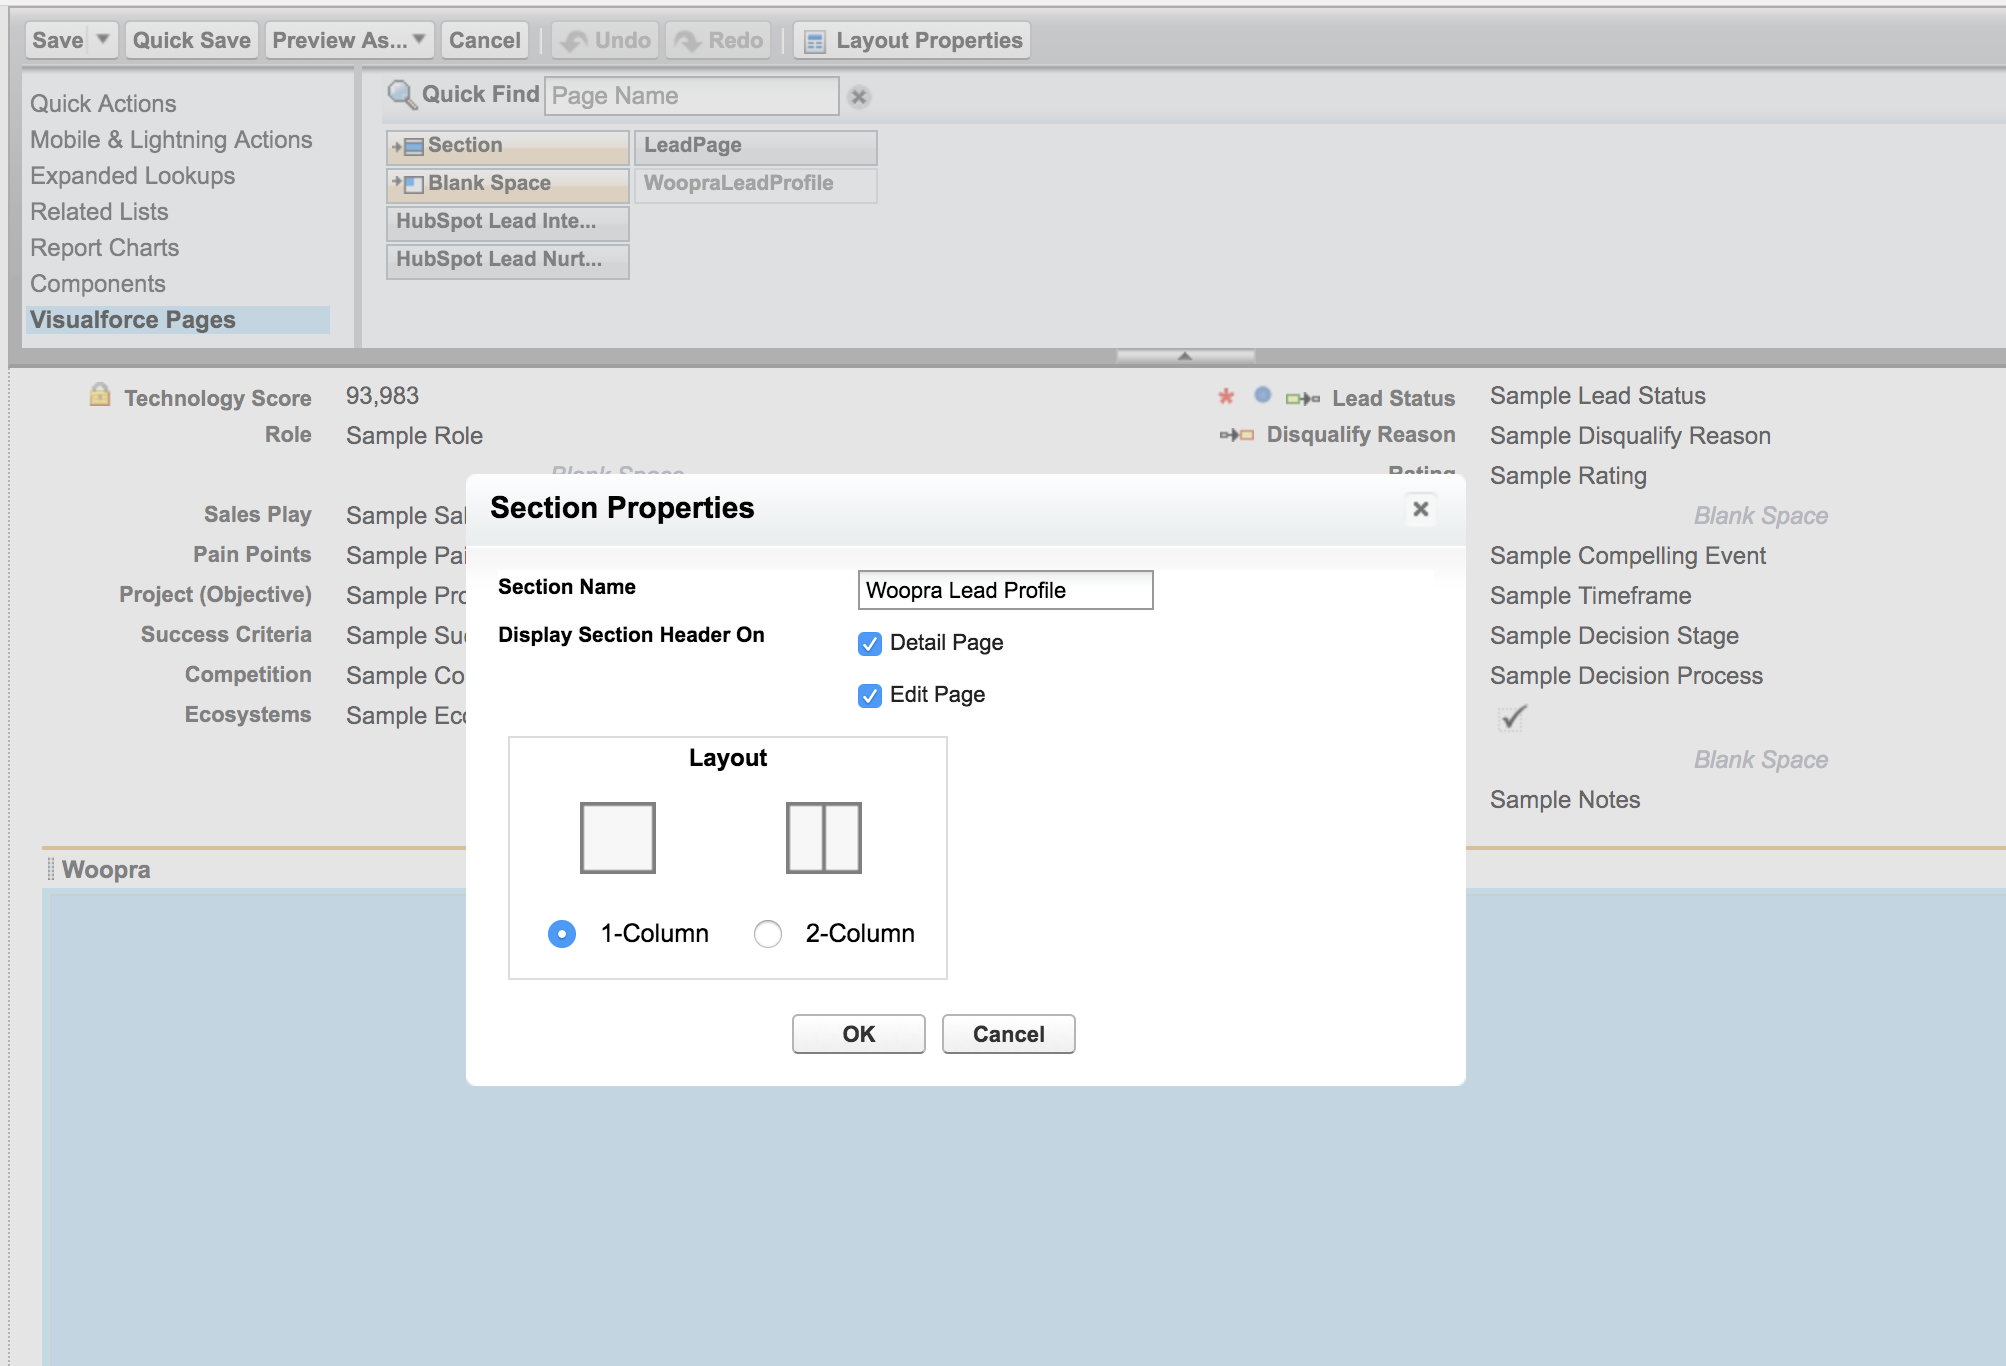
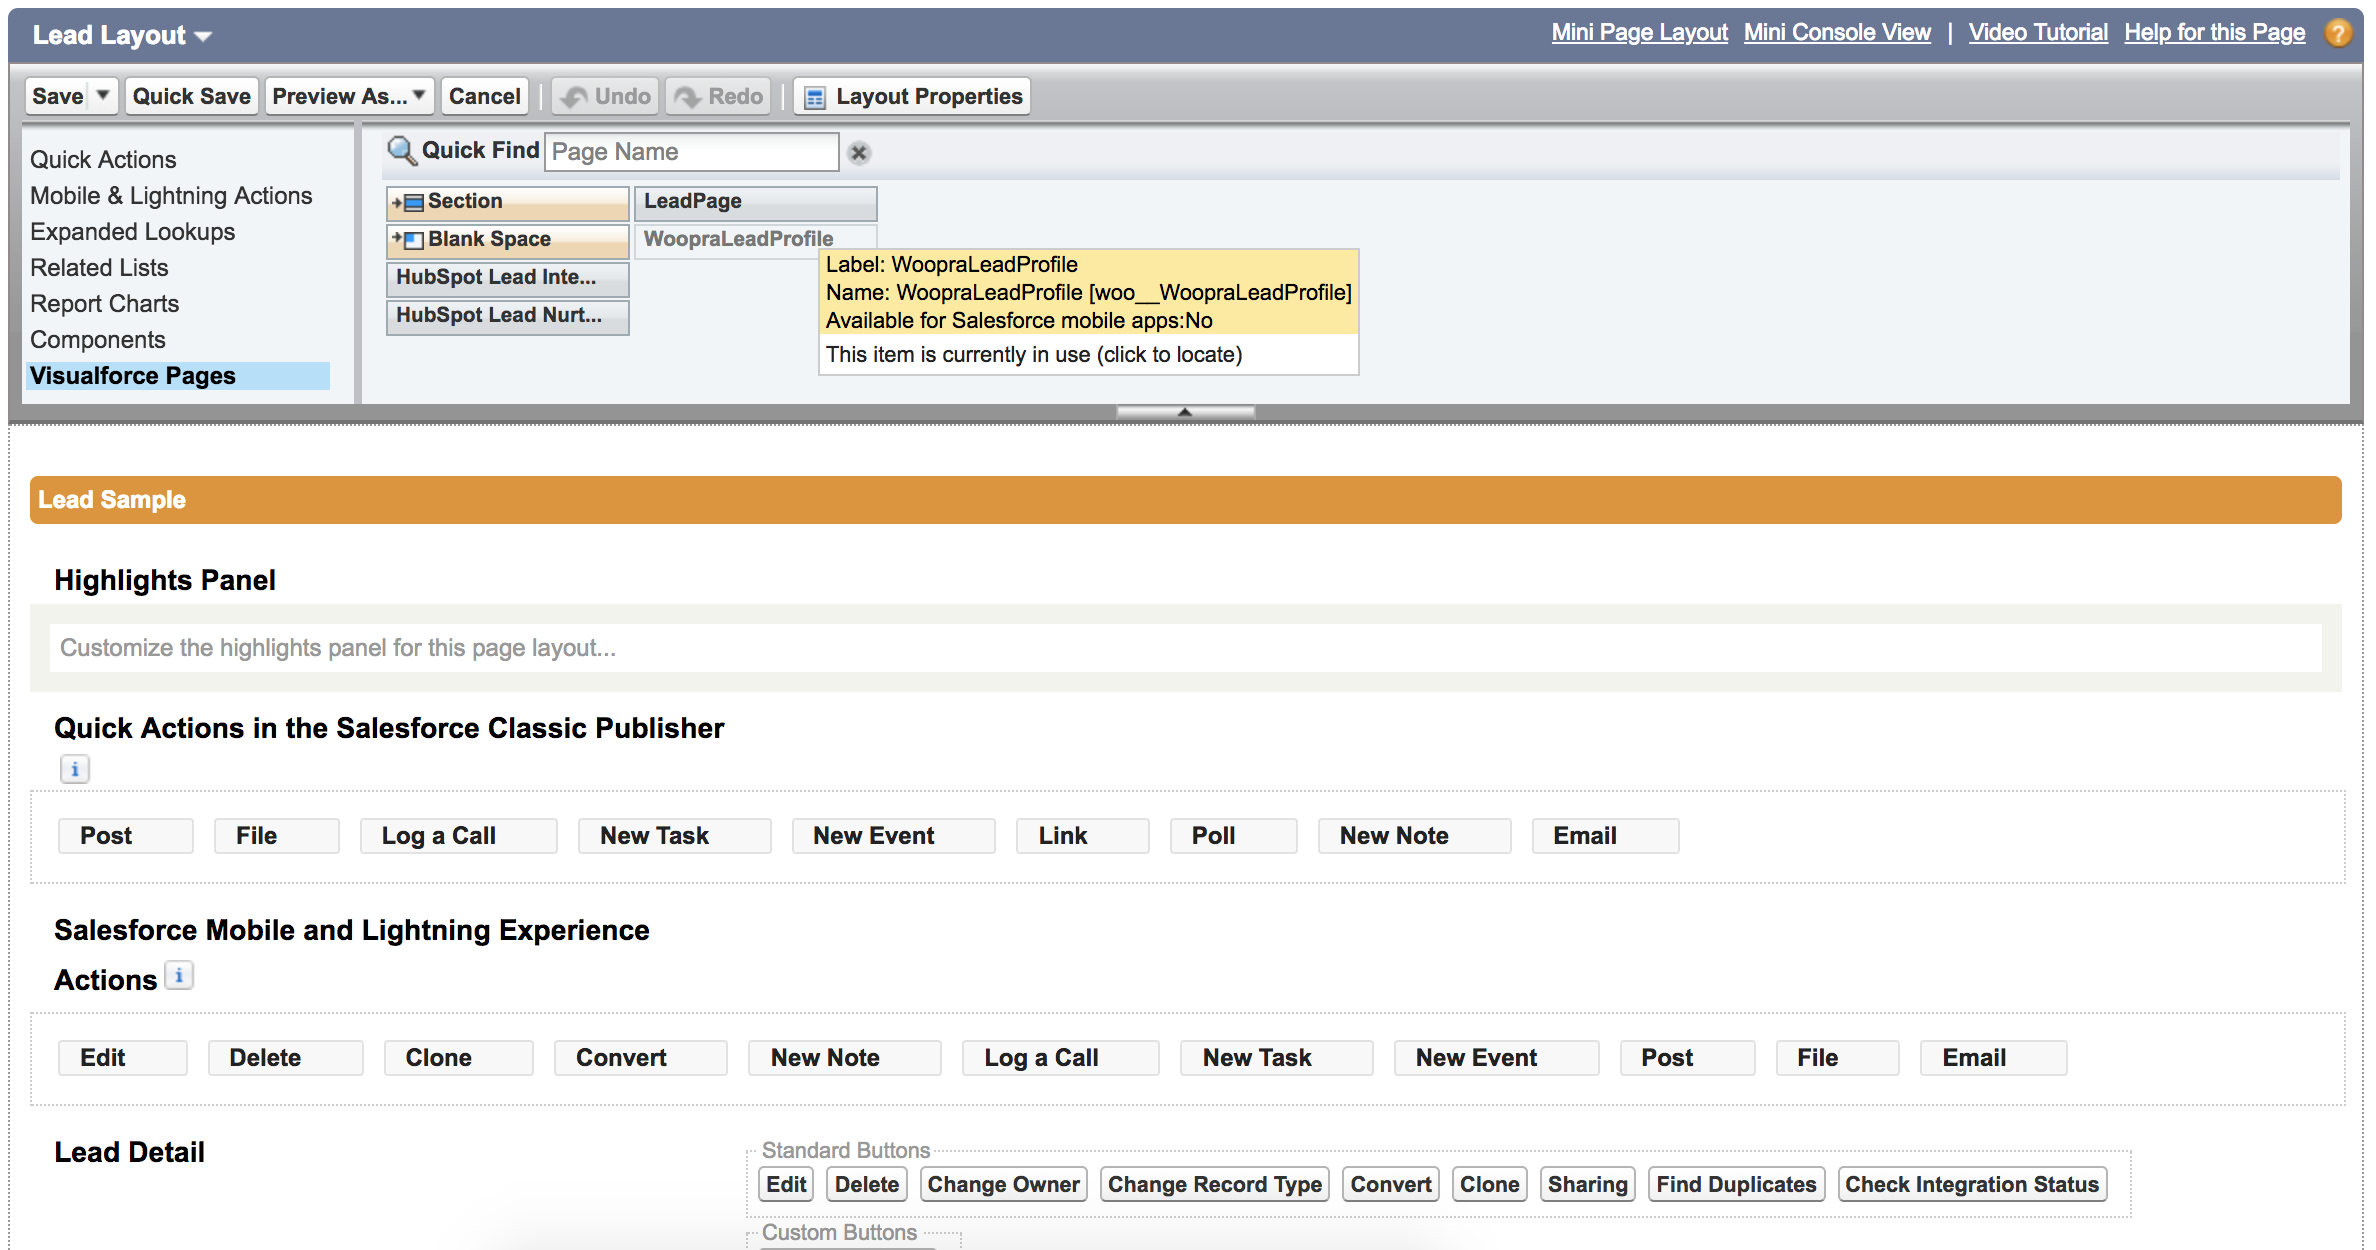
- Next, drag the “WoopraLeadProfile” to the section you just created.
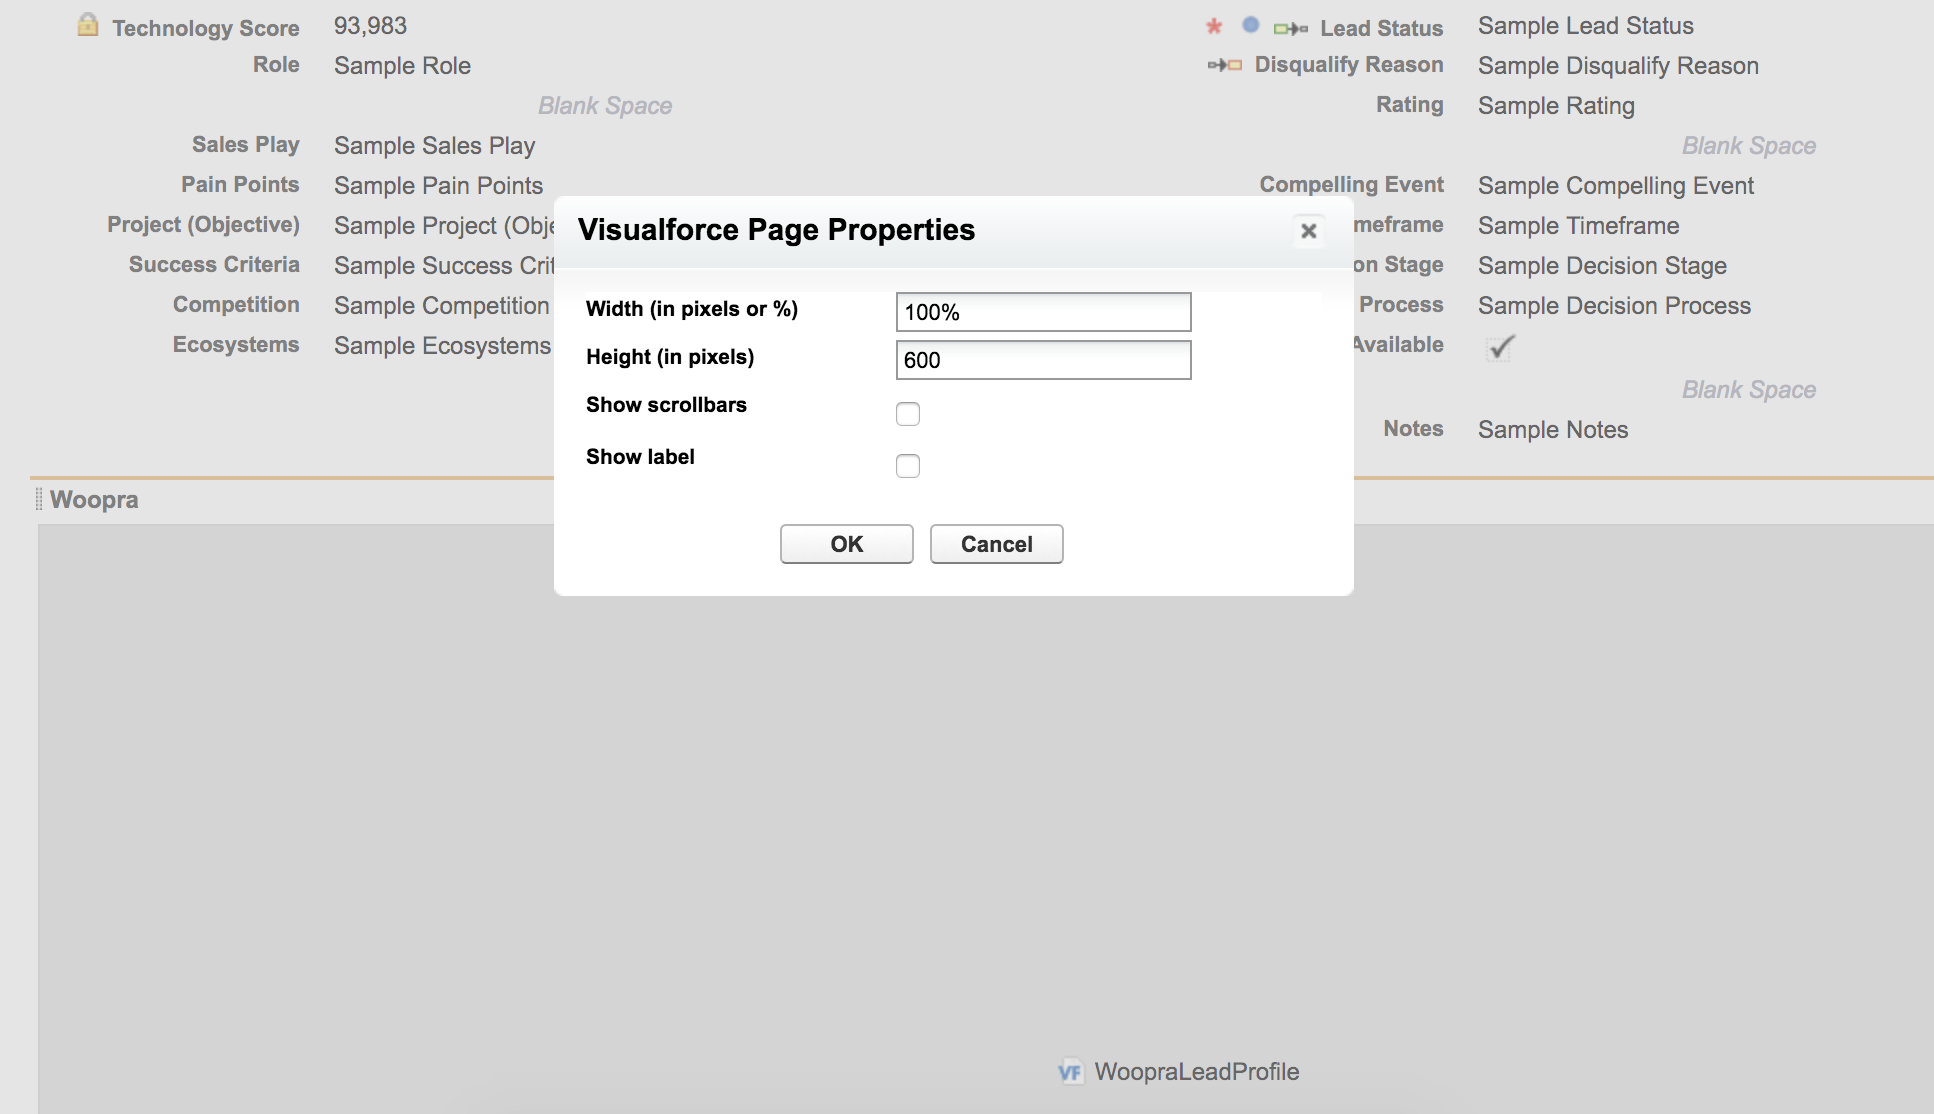
- Scroll to the added Woopra Profile, click on the configuration button and add the following settings for width and height.
- Hit “Save” and you’re all set. Follow the same instructions to add the Woopra profile to the Contact layout and save!
Configure Settings to Allow Salesforce Users to See Profiles
You'll need to provide Woopra access keys for Salesforce Visualforce pages. If the access keys are not provided, the Visualforce page will rely on the current user being logged into Woopra and you may not see the profiles populate.
To fix this, the following configuration needs to be edited in Salesforce:
-
Go to Settings > App Setup > Develop > Custom Settings
-
Click on Manage next to “WoopraSettings”
-
Click on Edit
Note: Woopra needs to map by email address at the lead and contact level to embed the live Woopra profile. Be sure that you've set up to map by email address in your Woopra configuration.
Updated 3 months ago
