Segmentation Filters
Woopra’s Segmentation filters allow you to set up powerful behavioral Segments to study the audience that is most important to you and your KPIs.
Leveraging segmentation filters, you can answer some of the most critical questions such as:
- What behavioral attributes do my customers have in common?
- What events have my customers taken while engaging with my marketing website or product?
Our segmentation filters are both very powerful when it comes to defining your audience and extremely flexible as you can leverage multiple types of data within Woopra.
The following data points can be applied to the segmentation filters:
- Events or associated Event Properties
- Visit or associated User Properties
More information about each type of data can be found in this document.
Event Properties
When it comes to understanding what event customers have performed, it’s always a good idea to start filtering by Event Properties.
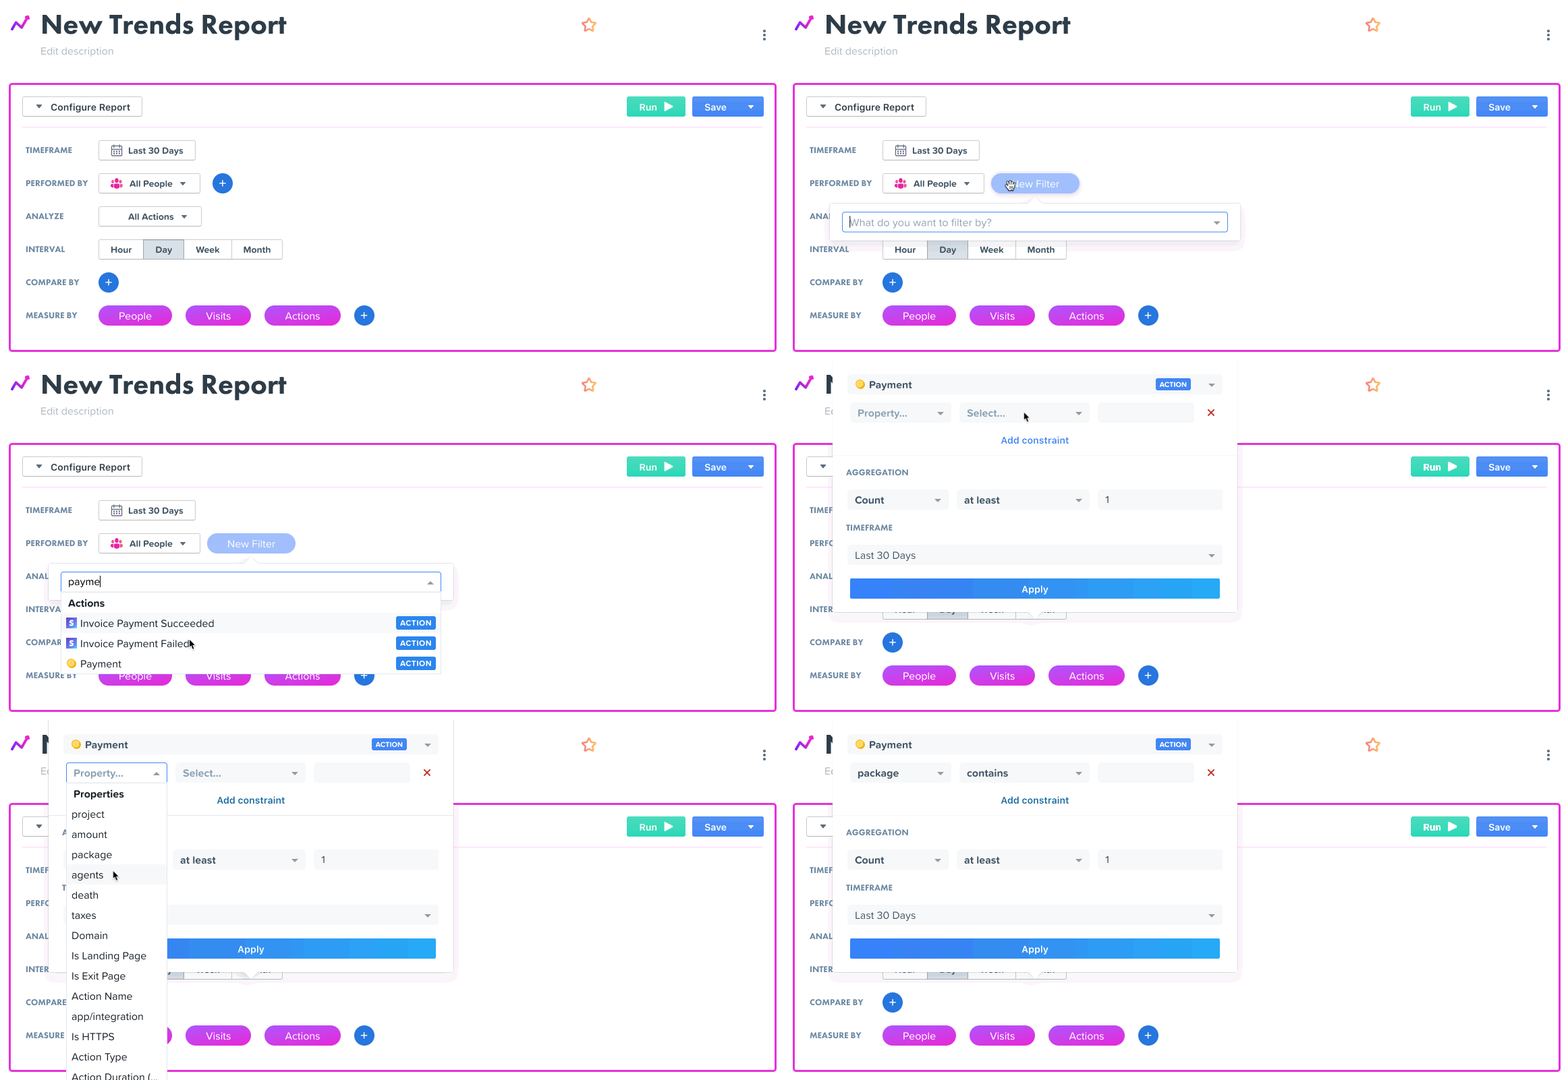
First, select the event you want to analyze by – this could be a payment, signup, login or any other custom event you’re tracking within Woopra. Please note that Woopra will default to an event performed at least once within the last 30 days. You can always customize how often you want this event to be performed by your customers and what the timeframe for this event is.
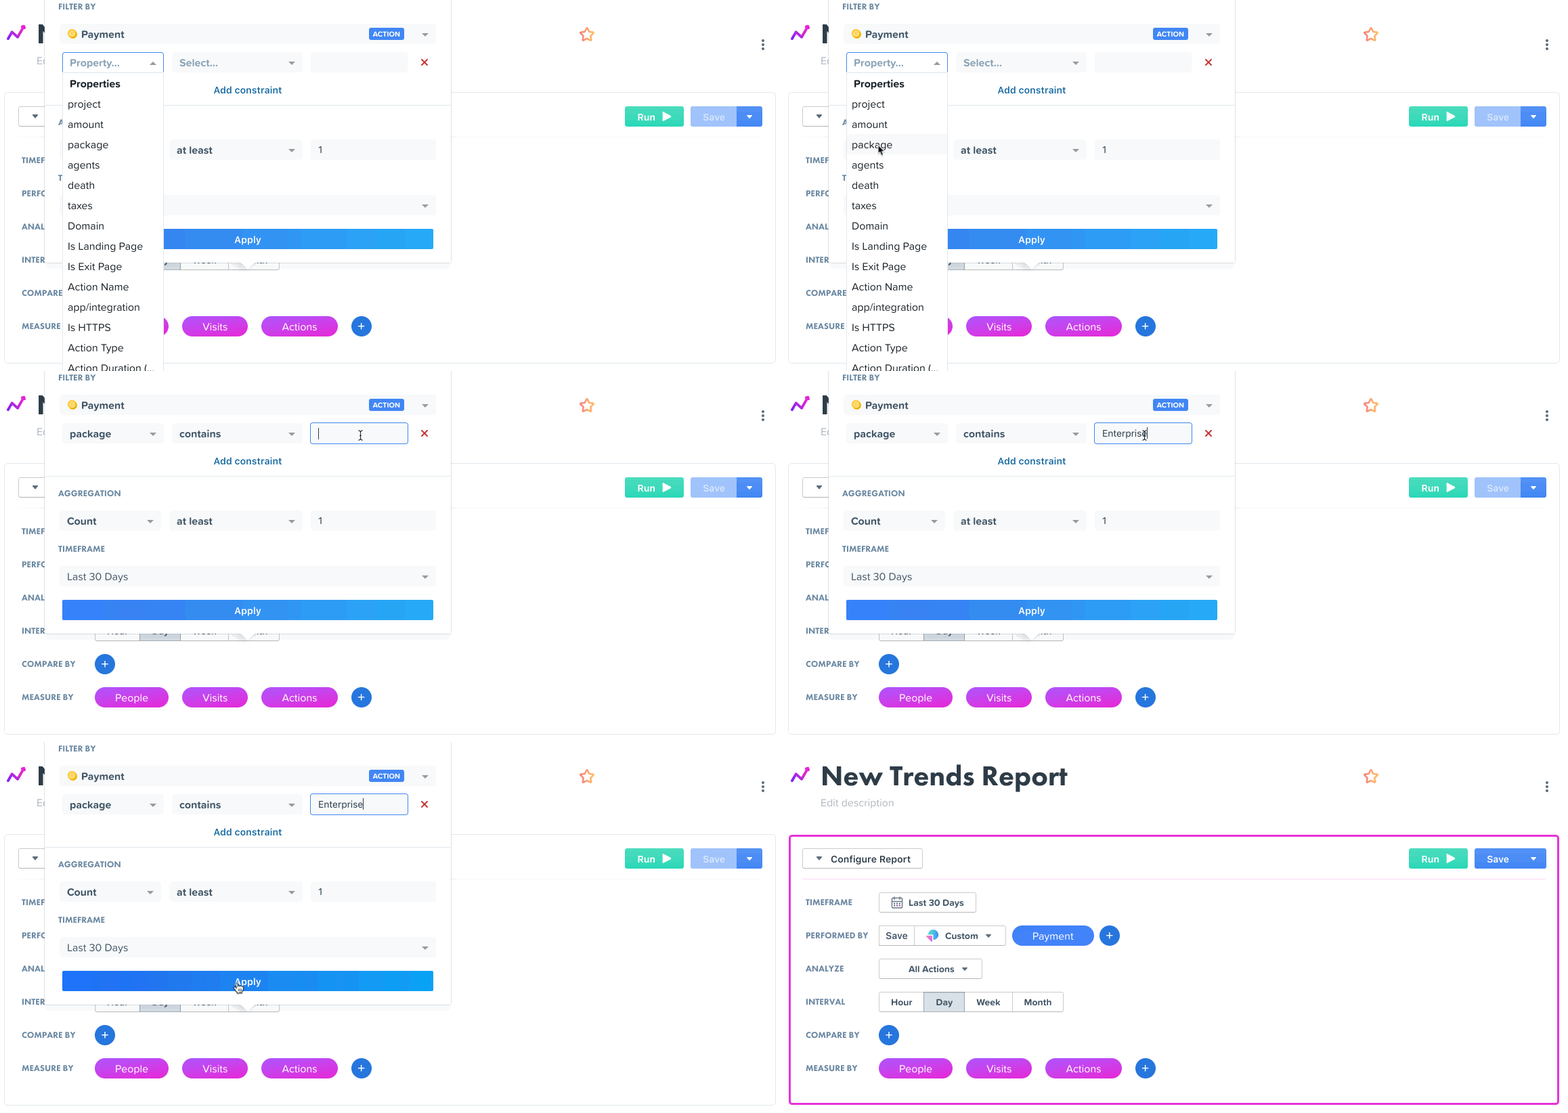
After selecting an event in the drop-down, you’ll see the “+ Add condition” button underneath the event. This is where you can select your event properties. Note that for every event Woopra defines two types of event properties:

- Custom Properties - These are the custom properties you’ve set up for tracking with your event. Every event will have its own custom event properties – for example, if you’re tracking payment as an event, custom event properties associated with this event could be the payment amount, customers' plan, payment type etc. You can manage custom event properties in your Event Schema. Please check our documentation on tracking custom properties (https://docs.woopra.com/docs/custom-actions-and-visitor-data) for your project. If you have any questions about how to set up custom event properties, consult with your developer or feel free to reach out to us at [email protected].
- System Event Properties – These are the event properties associated with every event you’re tracking in Woopra by default. They include Campaign Name/Source/Medium, Exit/Landing Page, Event Type, and Duration. Check out this document (https://docs.woopra.com/docs/generated-action-properties) on all system event properties that Woopra tracks by default.
Select an event property that you want to define your event by.
_Note: You don’t need to select an event property if you want to analyze just only that event, however, event properties can expand your insights if you’d like to get more specific in the analysis you’re performing._
For example, you could select “Payment” as an event to see all customers who’ve made a payment. Similarly, you can select “Payment” as an event and add an event property such as “Payment Plan equals Enterprise.” In this case, Woopra would show all Enterprise customers who have made a payment in the defined period.

Aggregation
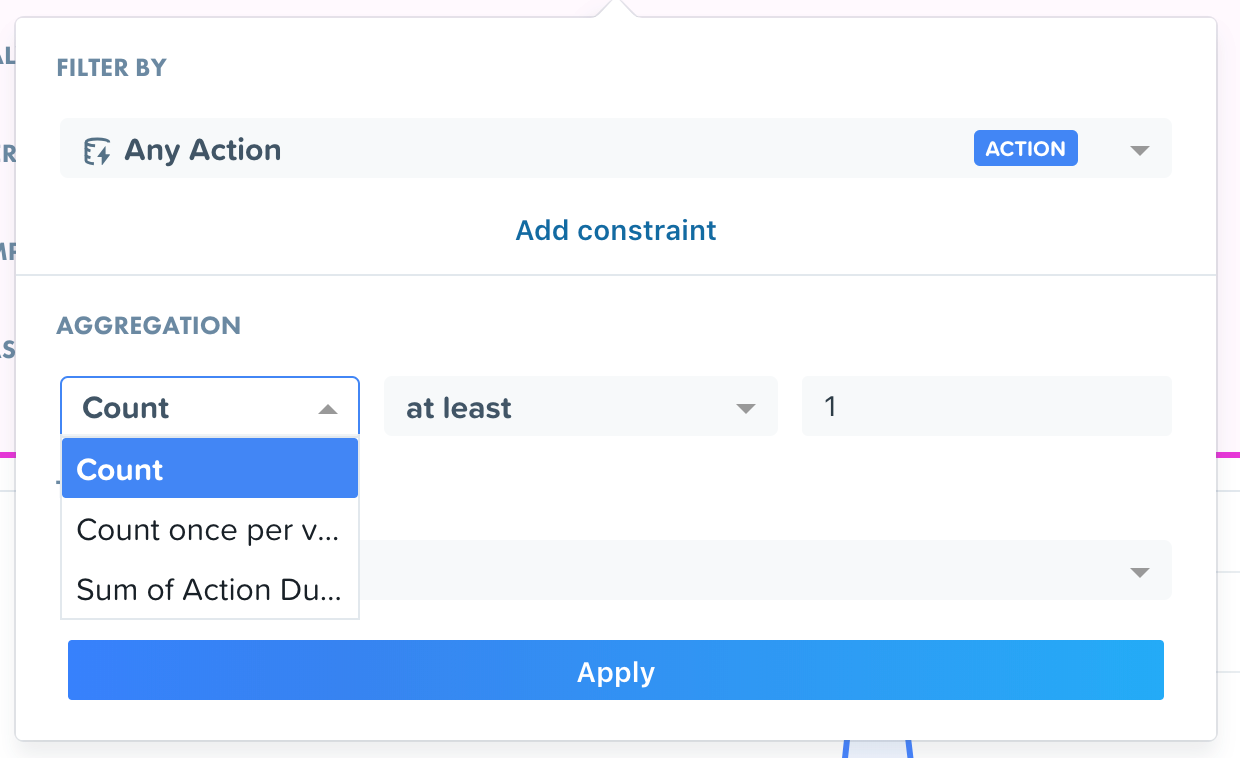
The “Aggregation” section of the Segmentation filter allows you to sum up an event or one of its properties. Think of Aggregation as a way of defining how many times a customer has performed or not performed a certain event or the total value of event properties you want to set a constraint for. There are three types of aggregations you’ll find in the Segmentation filter:

- Count – The Count function allows you to define the number of times a customer has performed the event you’re analyzing. An example would be, “customers who’ve made a payment at least three times.” Alternatively, you could set the count to “0” to see customers who have NOT performed a certain event. For example, you could segment by, “customers who have never visited your website.”
- Count Once Per visit – The Count Once Per Visit function allows you to define the number of times a customer has done a certain event while having an active session on your website or app. For example, using the Count Once Per Visit function, you could define a constraint such as, show me, “customers who have visited my documentation pages at least times in a single visit.”
- Sum of Amount – The Sum of Amount function enables you to calculate how many times an event was performed within the selected timeframe. For example, by applying Sum of Amount, you could analyze a payment event where the sum of the amount is greater than $5,000. Woopra would then create a Segment of customers who’ve made payments of more than $5,000 in total within the time period defined.
- Sum of Event Duration – The sum of Event Duration helps you to sum up the duration of your events.
Timeframe
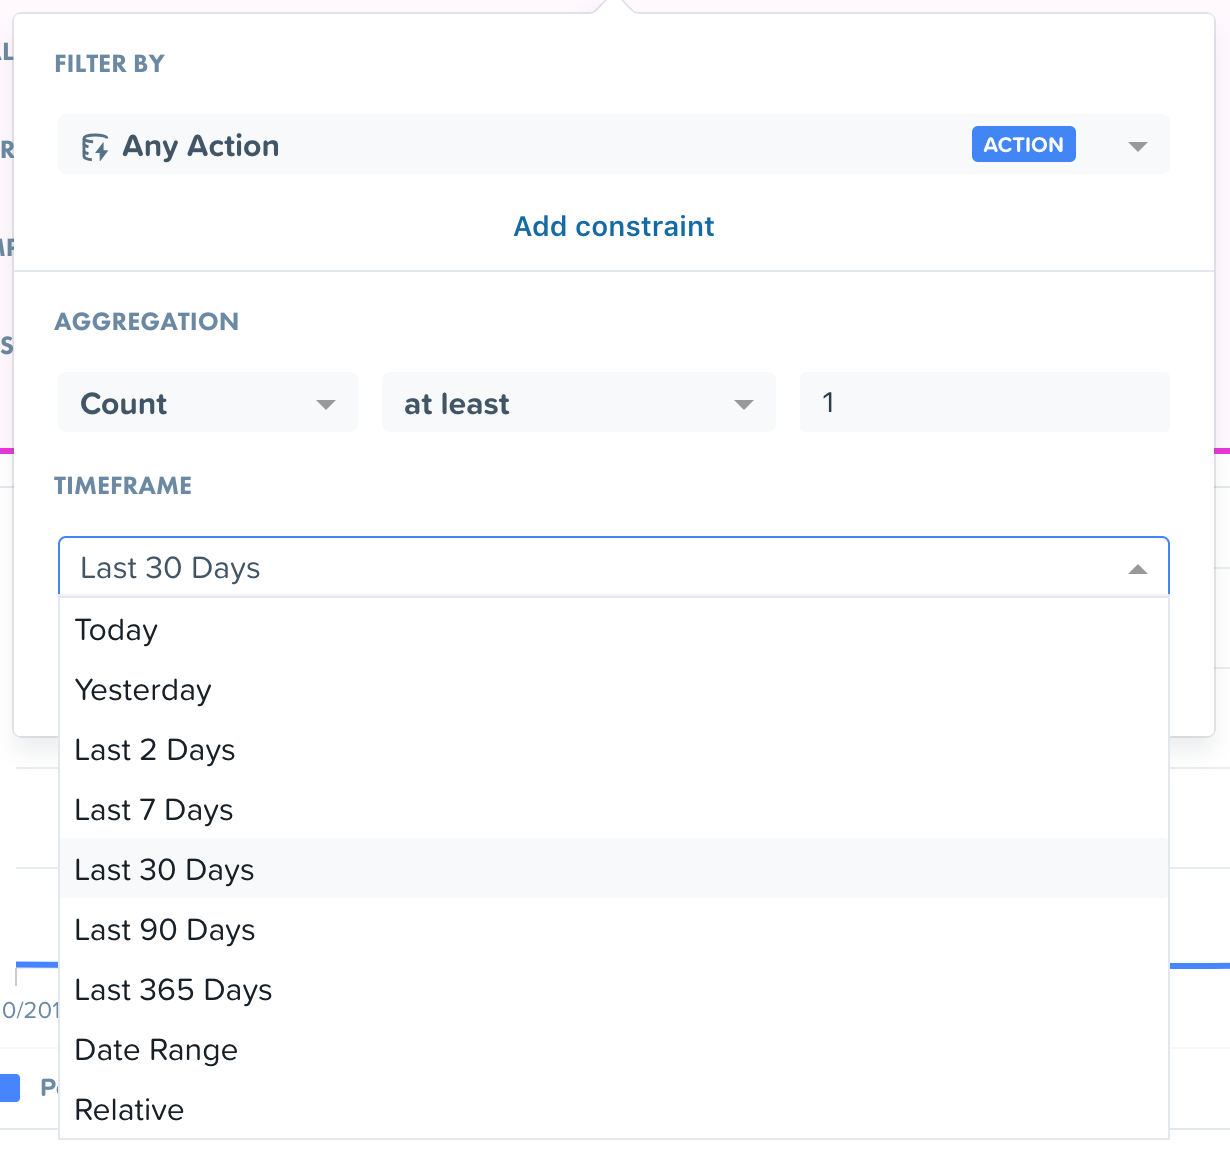
The “Timeframe” section allows you to define a date range for the event you’re analyzing. There are three timeframe options:

- Preset Timeframe – You can select a number of timeframe options preset for you, such as last 30 days, last 90 days, last 365 days, and so on.
- Date Range – Date range allows you to select a static timeframe for your segment, such as “March 4, 2017 through March 16, 2017.”
- Relative – Relative timeframe allows you to select a timeframe that is relative to the present day. This timeframe is dynamic and is updated in real-time. For example, you could select a relative timeframe that’s dynamically updated to look at people who performed an event, “from ten to fifteen days ago.”
Visit Properties
You can apply visit properties in the Segmentation filters within the same drop-down used for event properties. Simply type in the user property you’d like to filter by and set the constraint accordingly. For example, you could filter by the visit property “Country” where the country is “Canada.”

After selecting a visit property, you’ll notice that the event section will default to “All Events.” This means that Woopra will build a segment of customers who have performed any event on you’re tracking and who match the visit property you’ve defined.
You can always change “All Events” to any event you want to expand your analysis with visit property constraints. For example, you can choose “Payment” as an event, and if the user property country is set to Canada, Woopra will create a segment of users who’ve made a payment while being in Canada.
User Properties
Applying user properties in the segmentation filters allows you to build a segment of customers who match certain demographic, firmographic or behavioral constraints.
For instance, if you’re tracking “Company” as a user property, you can leverage the “Company” user property in the filter drop-down and set the company name Slack, for example. In this example, Woopra will create a segment of users at the company, Slack, who’ve engaged with your product within the defined time period.

Please note that with user properties, you need to define a certain condition you want to filter by. If you’re segmenting by companies, you’ll need to select a company name to filter by. If you’re segmenting by ages, you’ll need to select the age range for your segment.
Combining Filters
You can create multiple Segmentation filters in Woopra to be more specific in defining your Segments. Woopra has the option of combining the filters using the following functions:
- And: The “and” parameter will retrieve users who match all of the filters.
- Or: The “or” parameter will retrieve users who match any of the filters.
For example, if you want to create a Segment of customers who’ve submitted at least five support tickets within the last 90 days and who have an ARR greater than $10,000, you could create the two following filters:
- Event is set to “Ticket Submitted”, count is “at least 5 times”, and the timeframe is last 90 days
AND - User Property is set to “ARR”, user property constraint is “ARR>$10,000.”
Alternatively, if you want to create a Segment of all “United States” customers who’ve started a chat conversation with you or opened a promotional email, you’ll set up segmentation filters as follows:
-
Visit Property is country, visit property constraint is USA, event is
“Chat Initiated”OR
-
Visit Property is country, visit property constraint is USA, event is
“Email Opened”
Nested Logic Segmentation
If you have more than two filters that you want to combine, you can leverage even more complex Segmentation called Nested Logic Segmentation. Just drag and drop filter buttons to use this feature.
Let’s take an example. Say you want to identify all customers that are non-paying, basic customers of your web and mobile app in the last month so that you can determine how to engage with them. Simply add the nested logic statement as shown below:
- ARR (user property) equals 0 AND Email (user property) exists AND
- Web View (event) at least once in last 30 days OR Mobile View (event) at least once in last 30 days.
Updated 3 months ago
