Getting Started with Woopra
10-Steps to Get Familiar with the Woopra Platform and Unleash Your Inner Data Scientist!
Need help getting started?Our Pro plan comes with an included 1-hour onboarding sessions to help get you on the right track with Woopra.
In addition, we also offer customized comprehensive multi-session onboarding packages. With these packages, we'll deep-dive into your product and work with you to list out all your important tracking events and make sure you're set up for success. Please contact [email protected] for more information.
Here we will go through what you will need to get started with Woopra. Once you sign up and log in to your Dashboard, you will be asked to start tracking your data:

Tracking Data In Woopra
Step One: Install the Javascript Tracking Snippet to see Your First Customer Profile
Woopra’s proprietary tracking technology tracks user behavior across your website, product and mobile app. To get started, simply insert Woopra Javascript Tracking Code to the tag of the website or single-page application pages you’d like to track.
There are several other ways you can start tracking data instantly in Woopra. If you’re using a tool like Segment, you can install the integration to stream any actions already housed in Segment into the Woopra platform.
Once set up, navigate to “People” in Woopra and watch as your Woopra Customer Profiles populate. Initially, it will probably look similar to the below anonymous profile. To begin identifying your users, move on to step two!
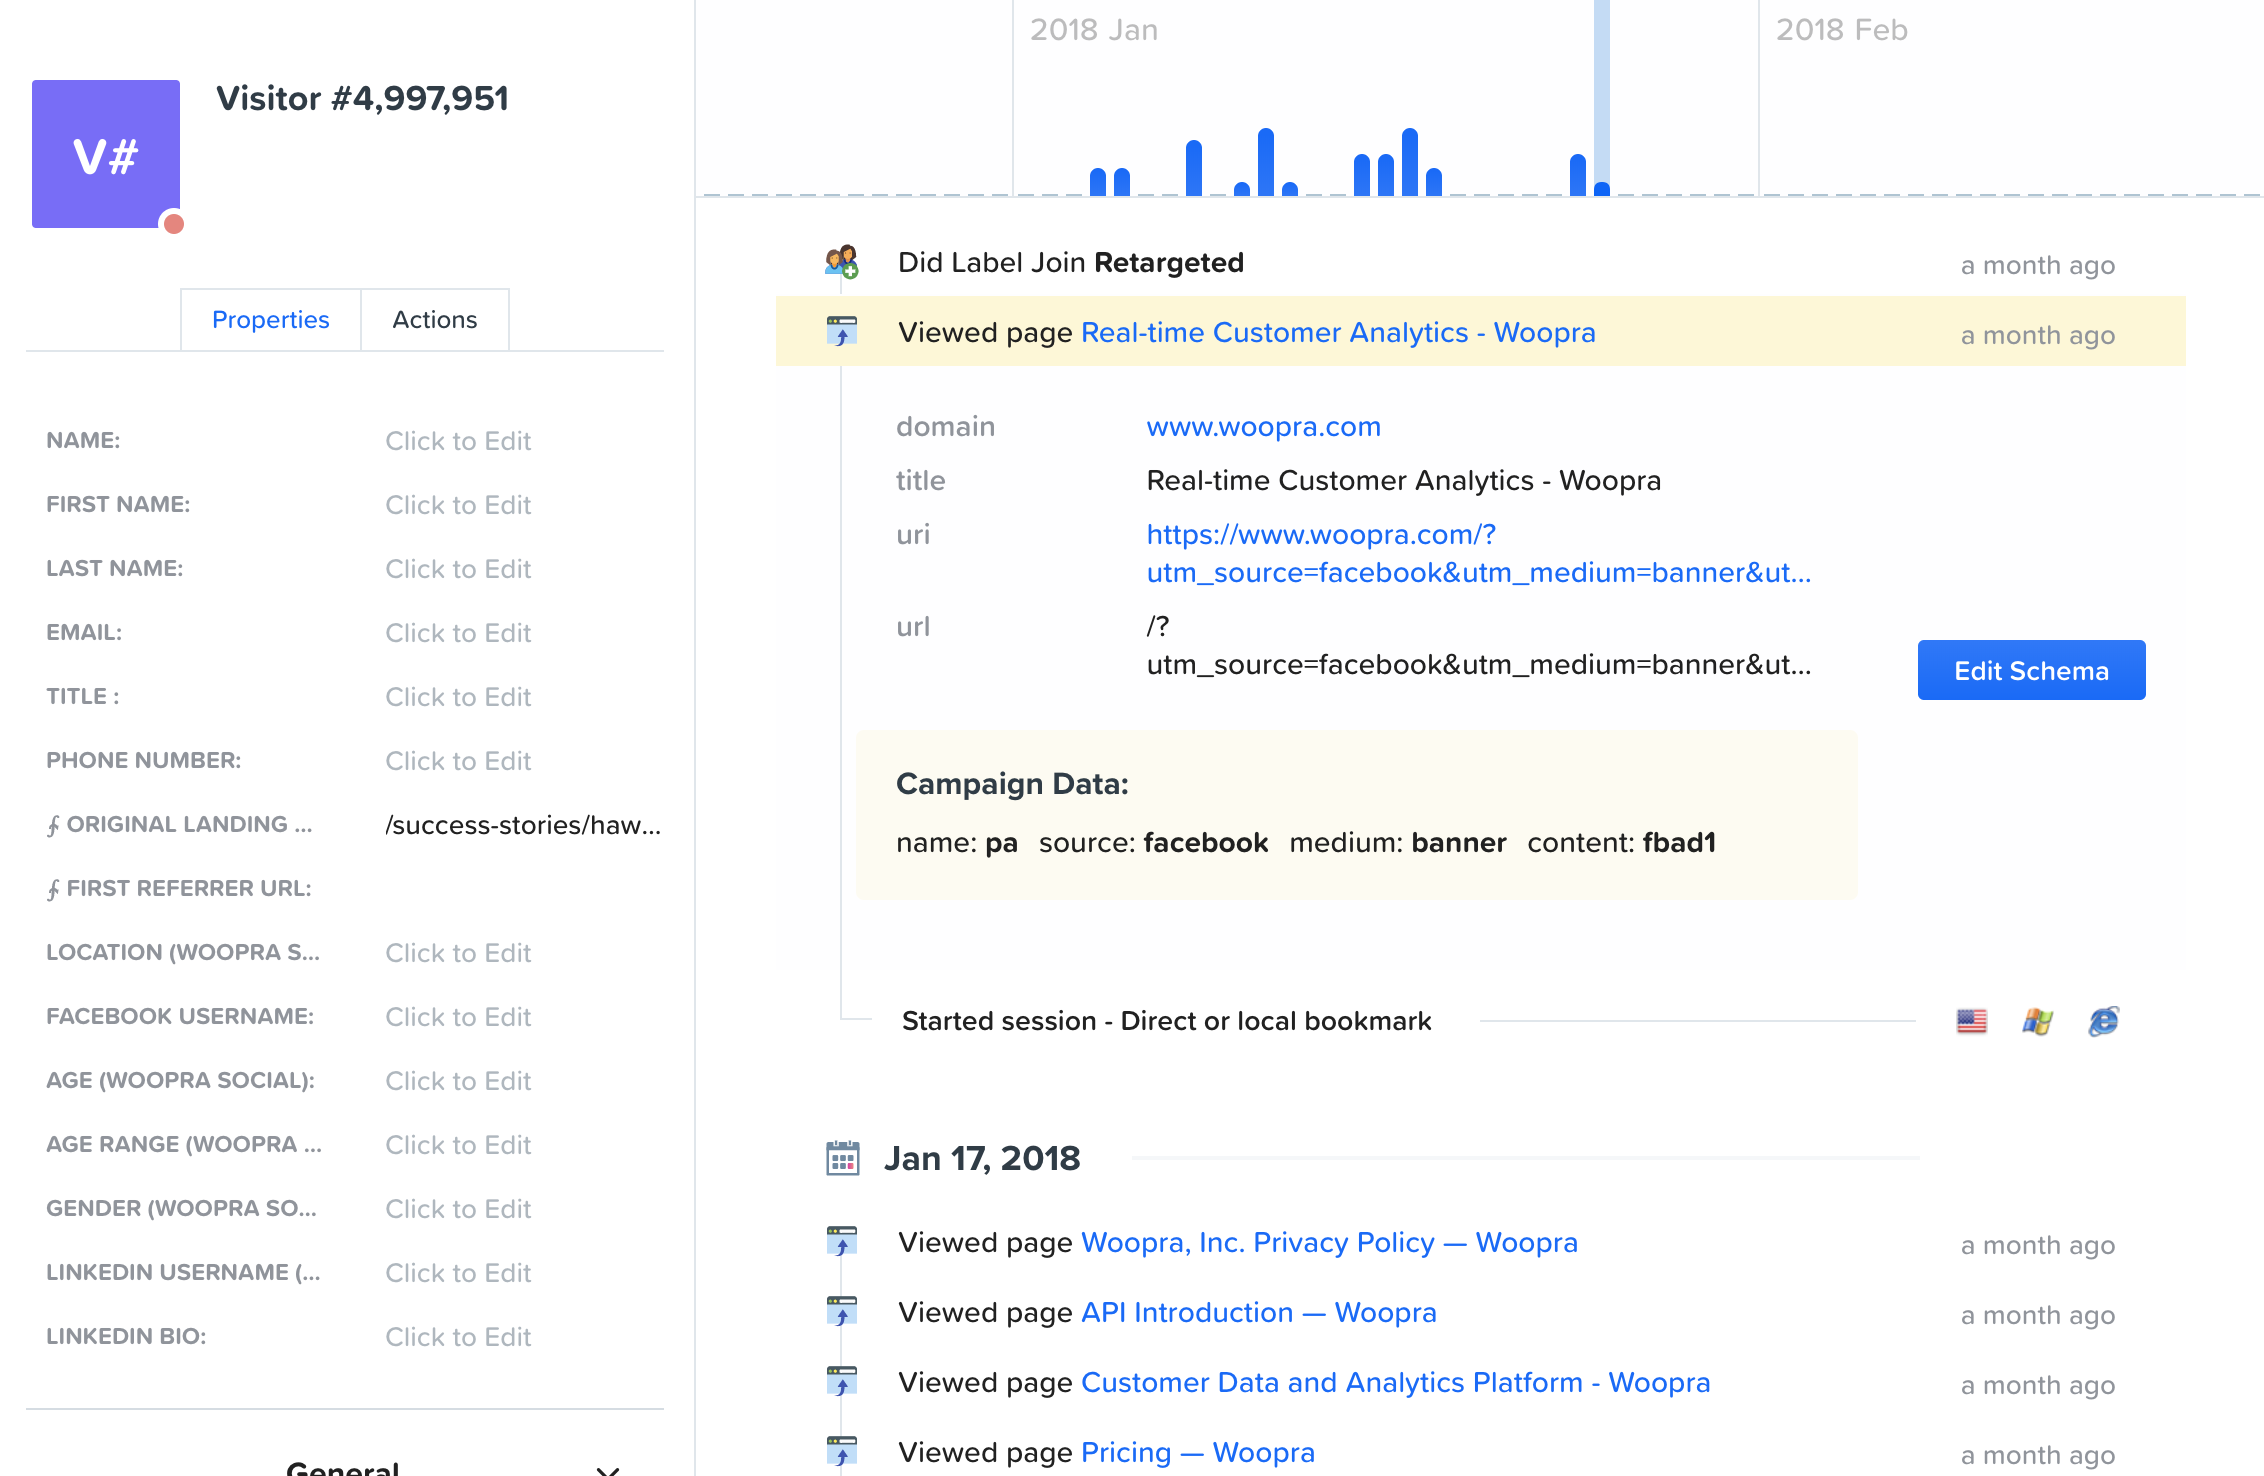
Woopra's Profile
Step Two: Identify Users on Your Website and Web Application
When users browse your website or users sign up for your product, you’ll want to collect this information and send it to Woopra. This will allow Woopra to identify who they are and merge the anonymous profile into a unified customer profile.
You can send any custom user data to Woopra by adding the identify() function anywhere a user is identified for the first time. For example, you can add the identify() function on your website to a demo request form.
Be sure to include the email address so that this can be leveraged as the unique identifier, along with any other relevant properties you’re collecting, such as company name, size, location, etc.
Step Three: Track Custom Actions to Tailor Woopra to your Business
Get OrganizedBefore you start tracking custom events, it's important to write down all the events you want to track to stay organized. Download an example spreadsheet here which you can use.
Interested in tracking when your users sign up? When customers make a payment? When leads watch a video on your website? Track your first custom action to see how Woopra can be completely customized to track the metrics that matter most to your business.
Woopra allows you to track any combination of custom actions such as payments, logins, product engagement, etc. Use the track(eventName, properties) function to send a custom event that describes a milestone. See the below example for an idea of how you can send a custom payment action, along with any associated properties such as the amount and currency.
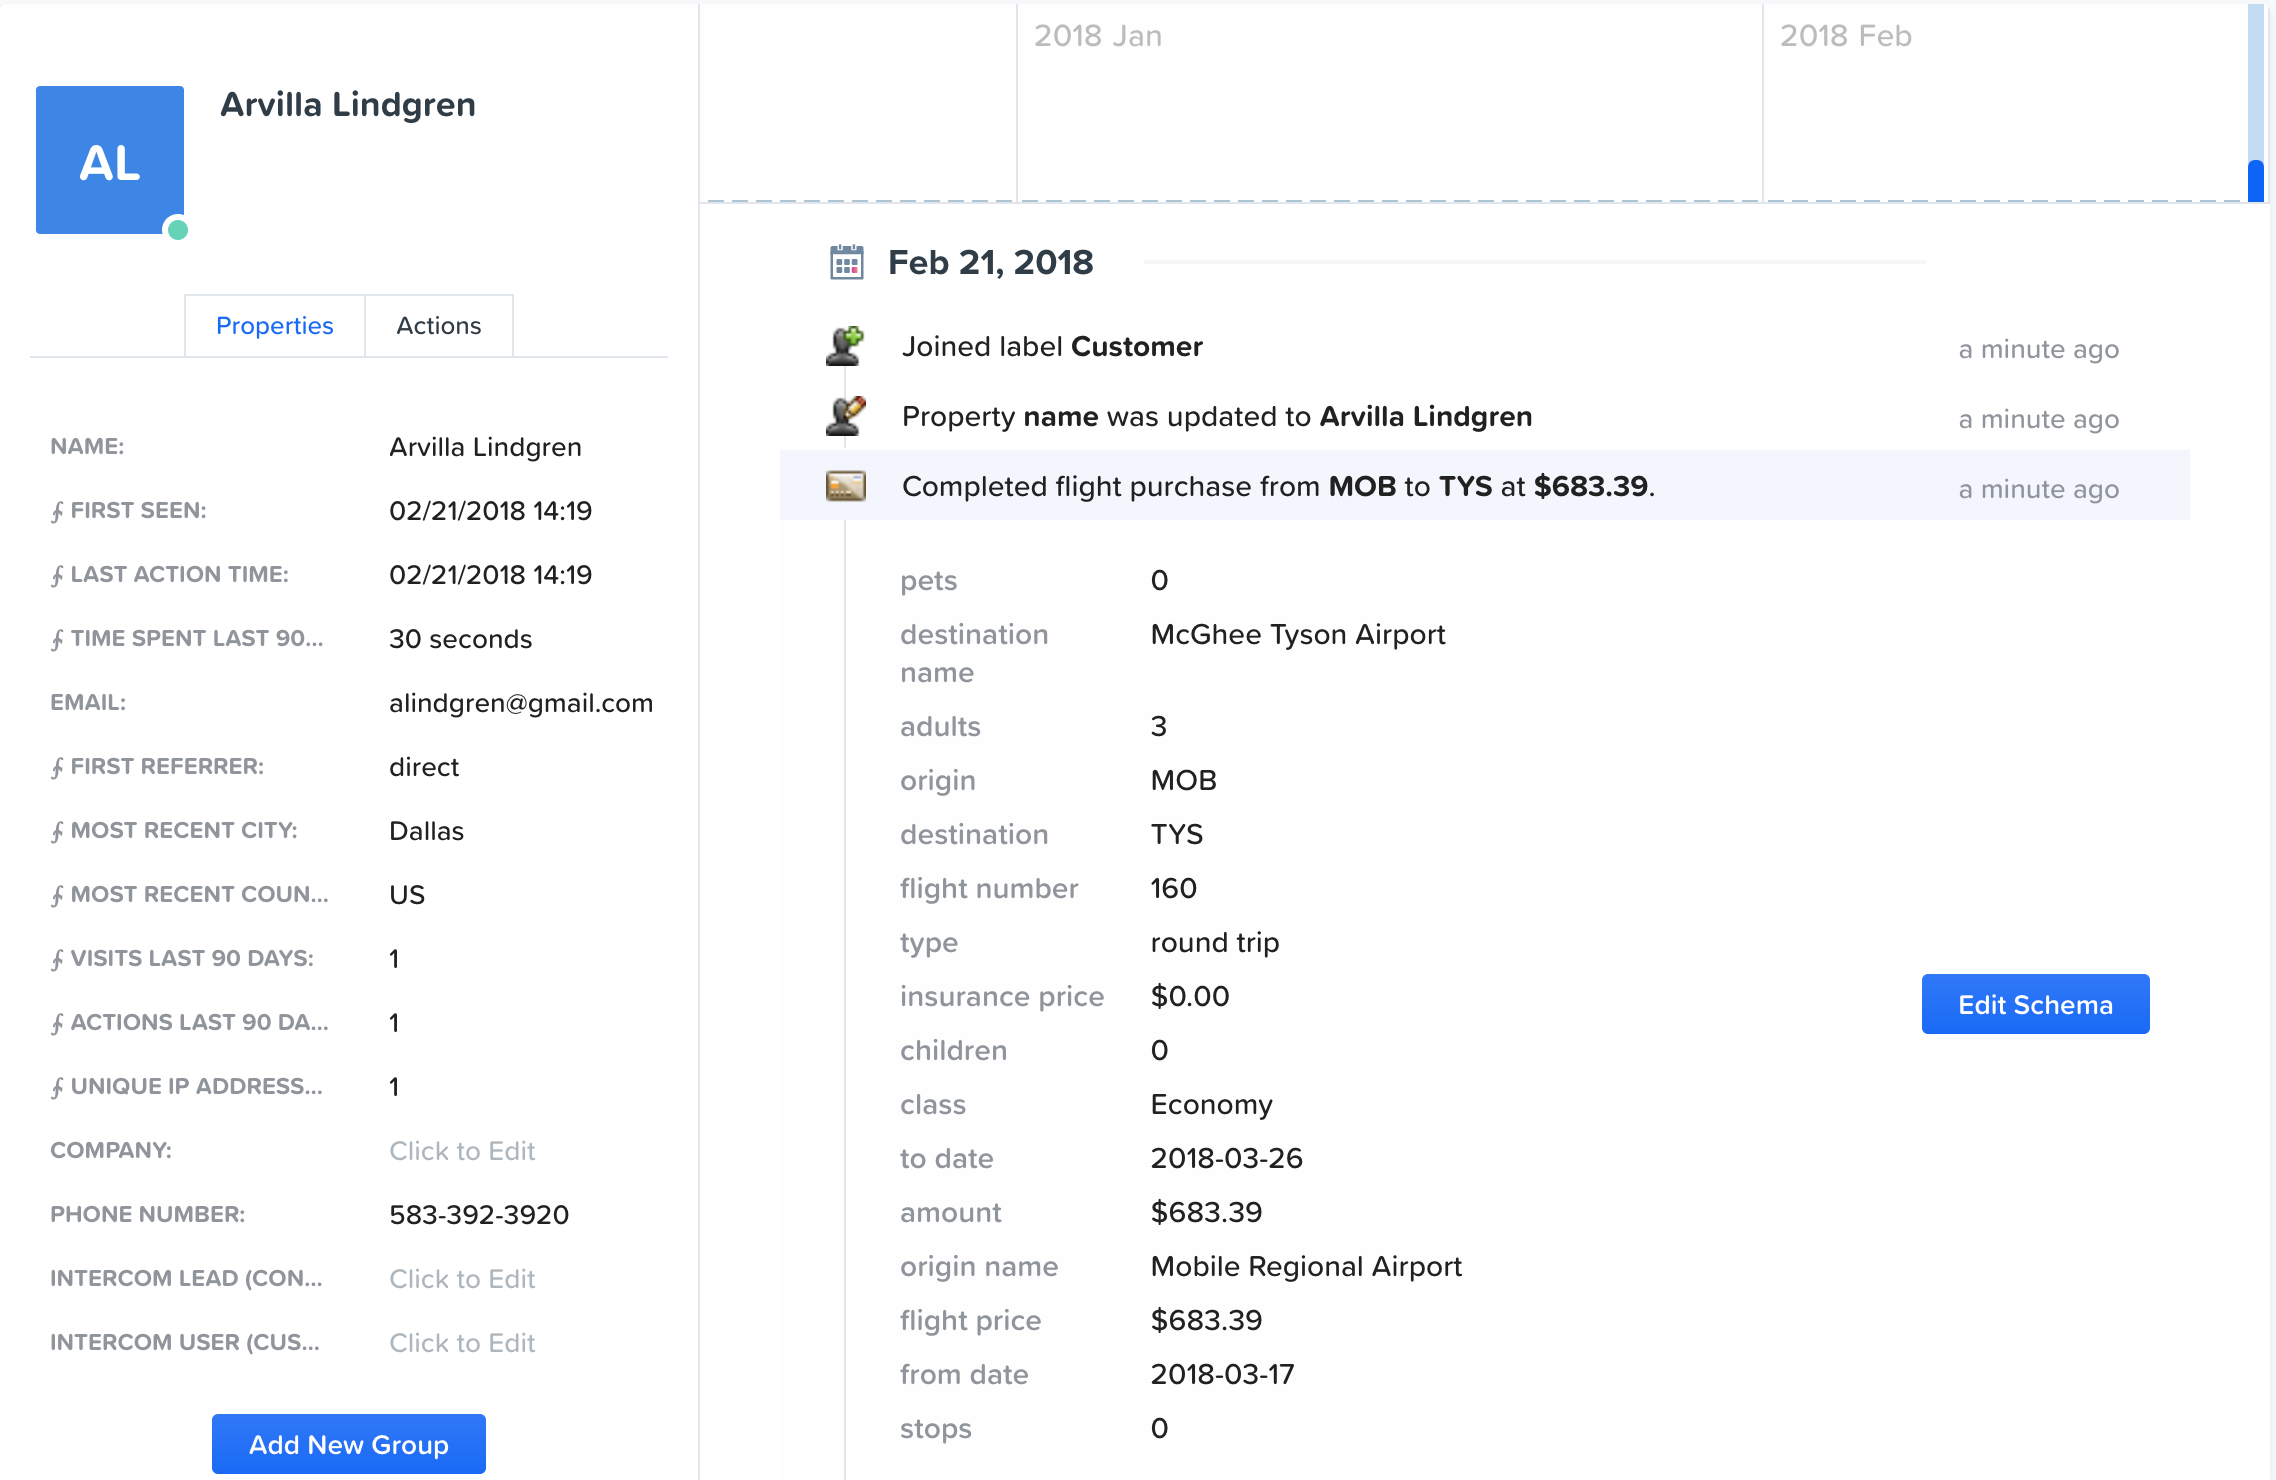
Once you begin identifying users and tracking custom actions, such as a payment, profiles will automatically populate these actions in real-time as users take them.
- Learn more about tracking custom actions.
- Not sure what to track? Check out our SaaS and eCommerce What to Track Guides.
Step Four: Edit Your Schema to Help Every Employee Understand Your Data
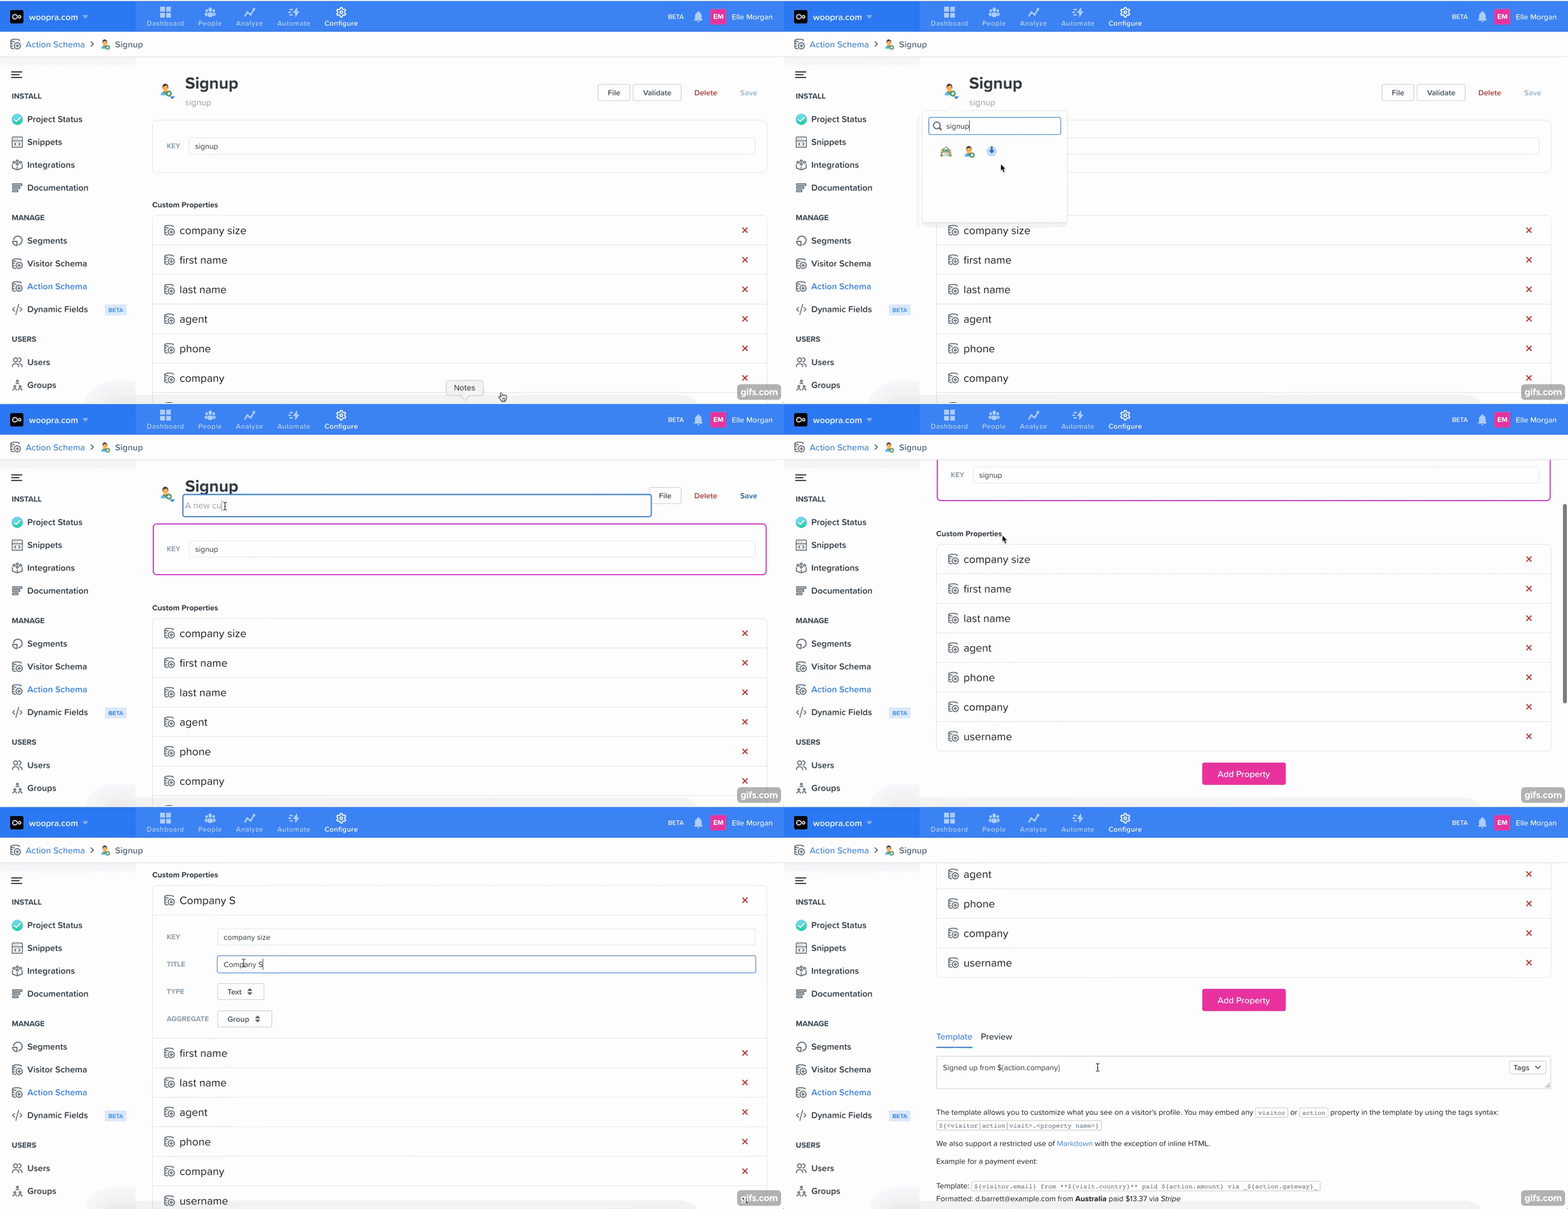
Consider the Woopra Schema your personal data dictionary, outlining the different data sources and types with descriptions that everyone on your team can understand. Once you track your first custom action, navigate the Configure section of Woopra and click to view your User or Action Data Schemas.
Notice in the GIF below how you can update the name, description and corresponding template that displays when a user takes the action. Adding more dynamic tags in the template description will help every employee access the most relevant data for that user or action directly within the customer profile.
Step Five: Integrate Woopra with the Tools you Already use to Unify Touchpoints Across the Organization
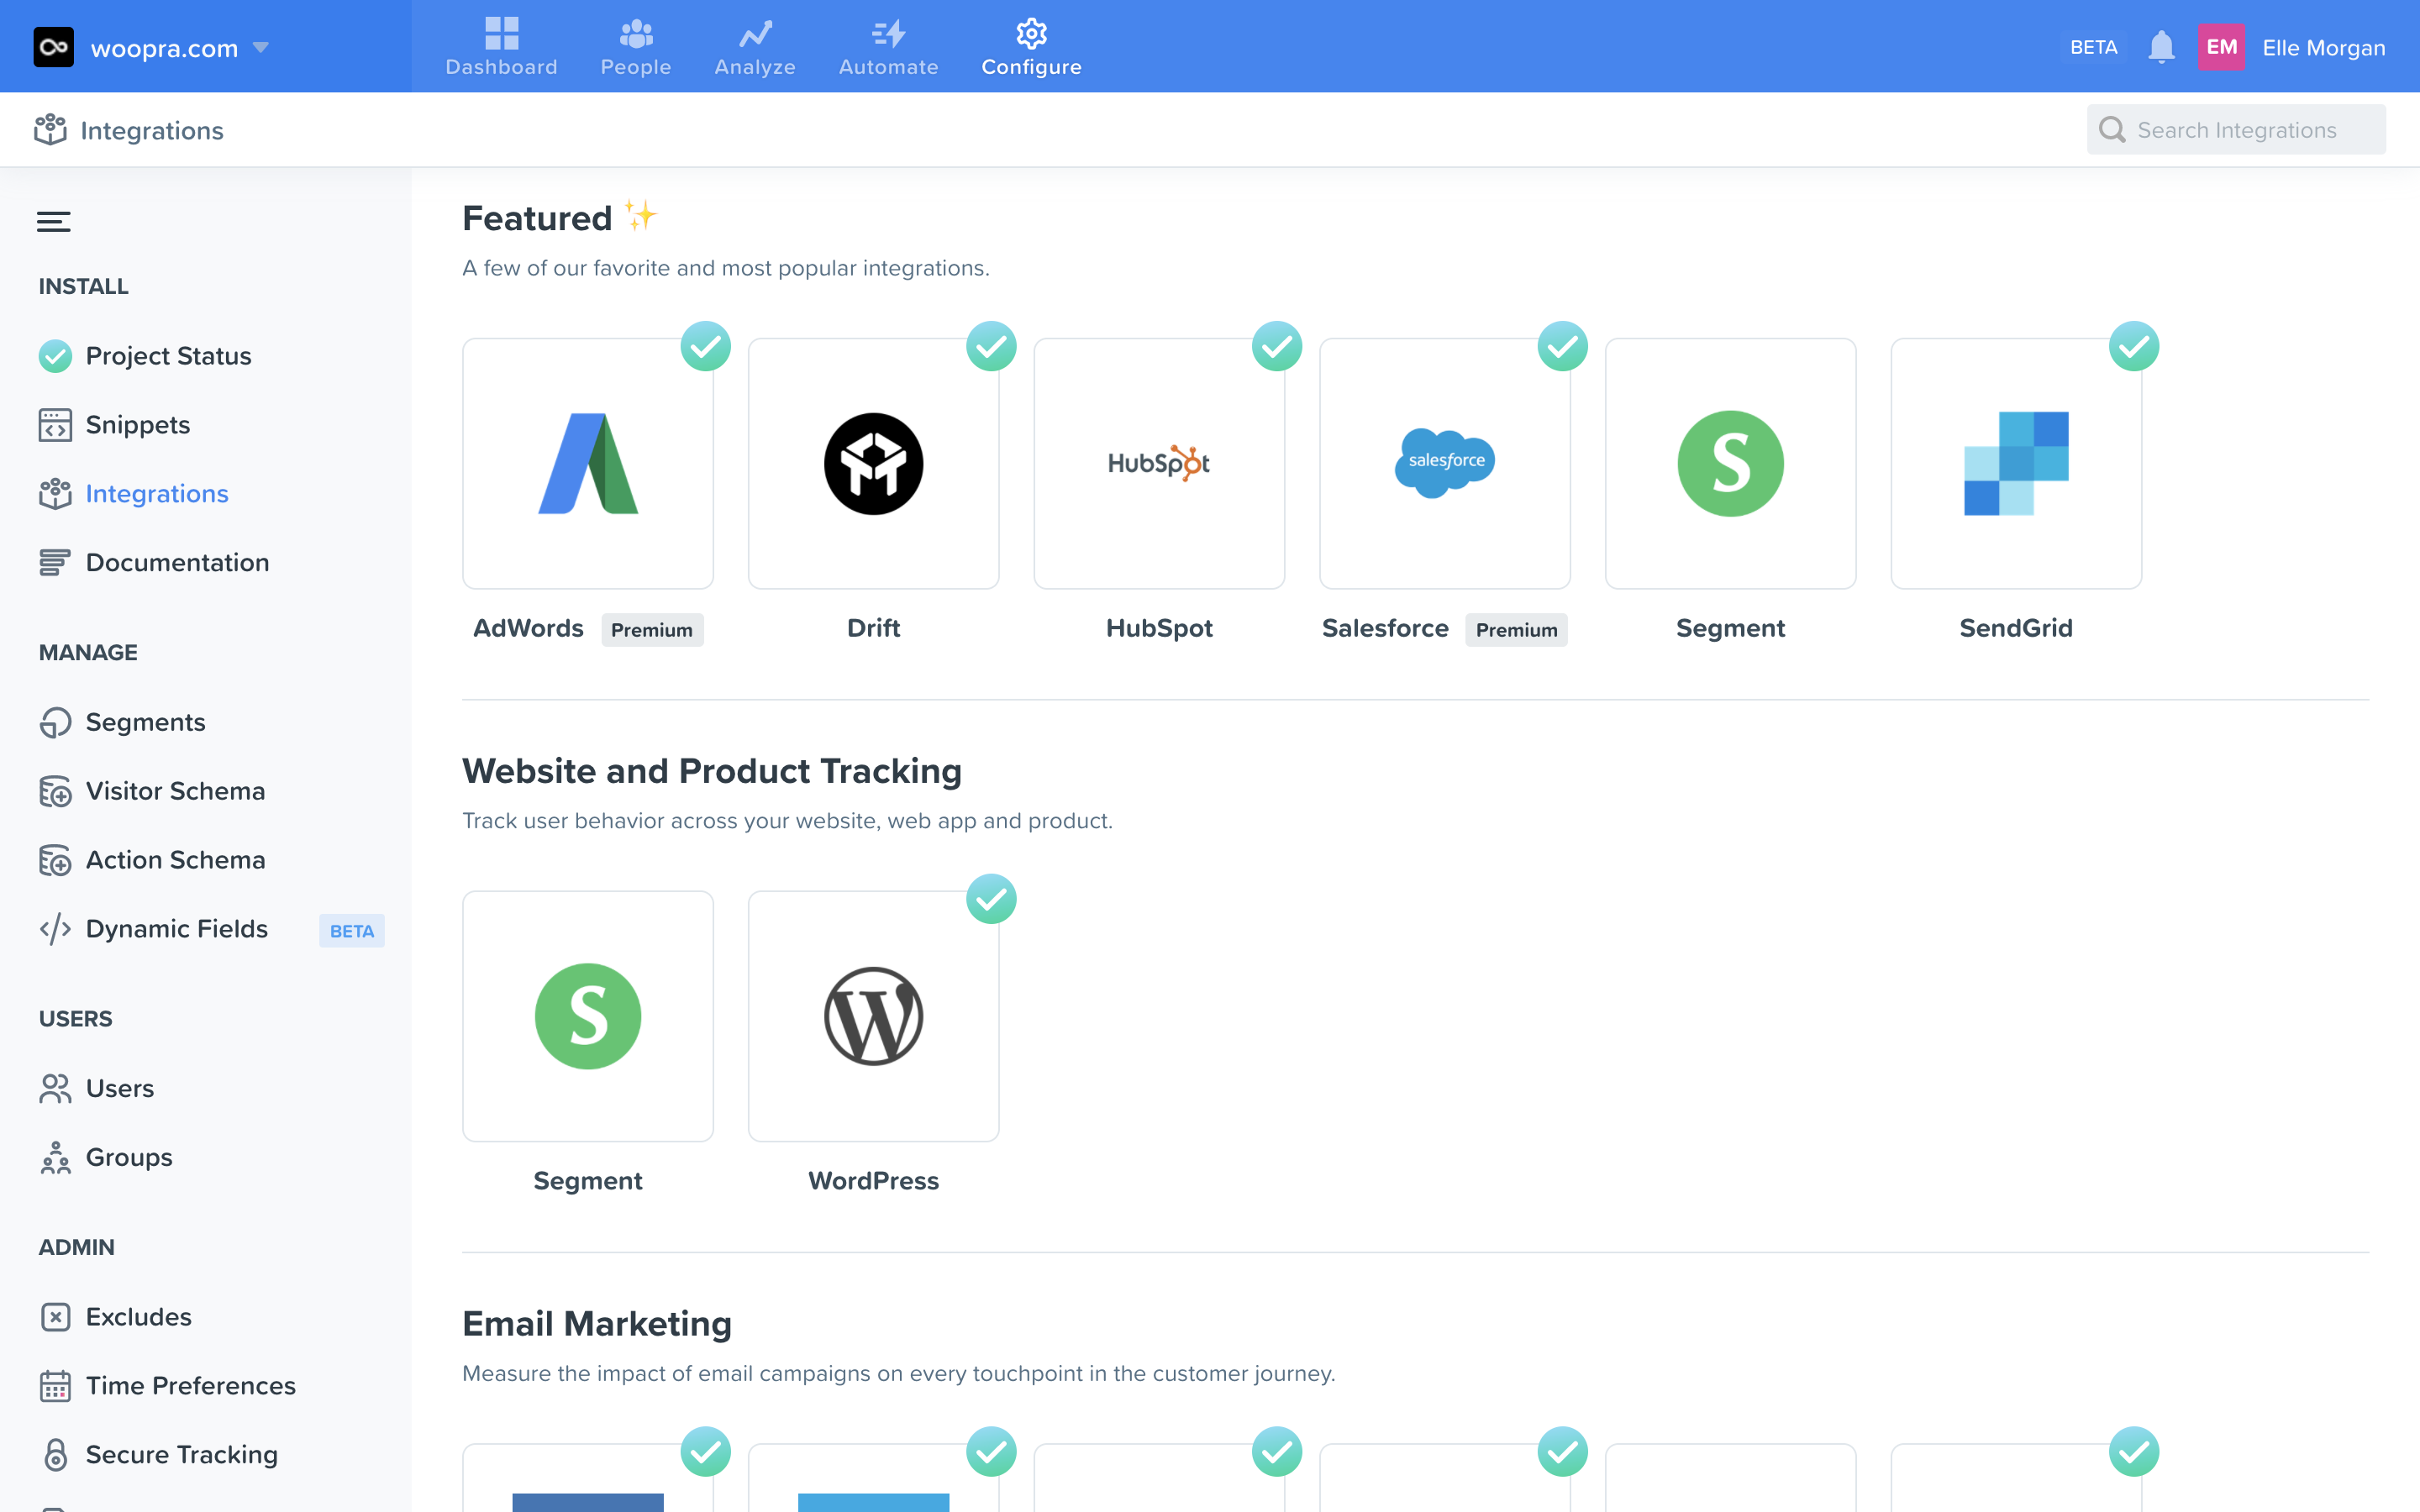
The greatest challenge to improving the customer experience is unifying it. Integrate Woopra in a few clicks with your favorite email, text, push notification, product, support, live chat tools and more. Leverage this data across the platform to analyze the end-to-end experience users have with your brand – from tweets to clicks to conversion and back again.
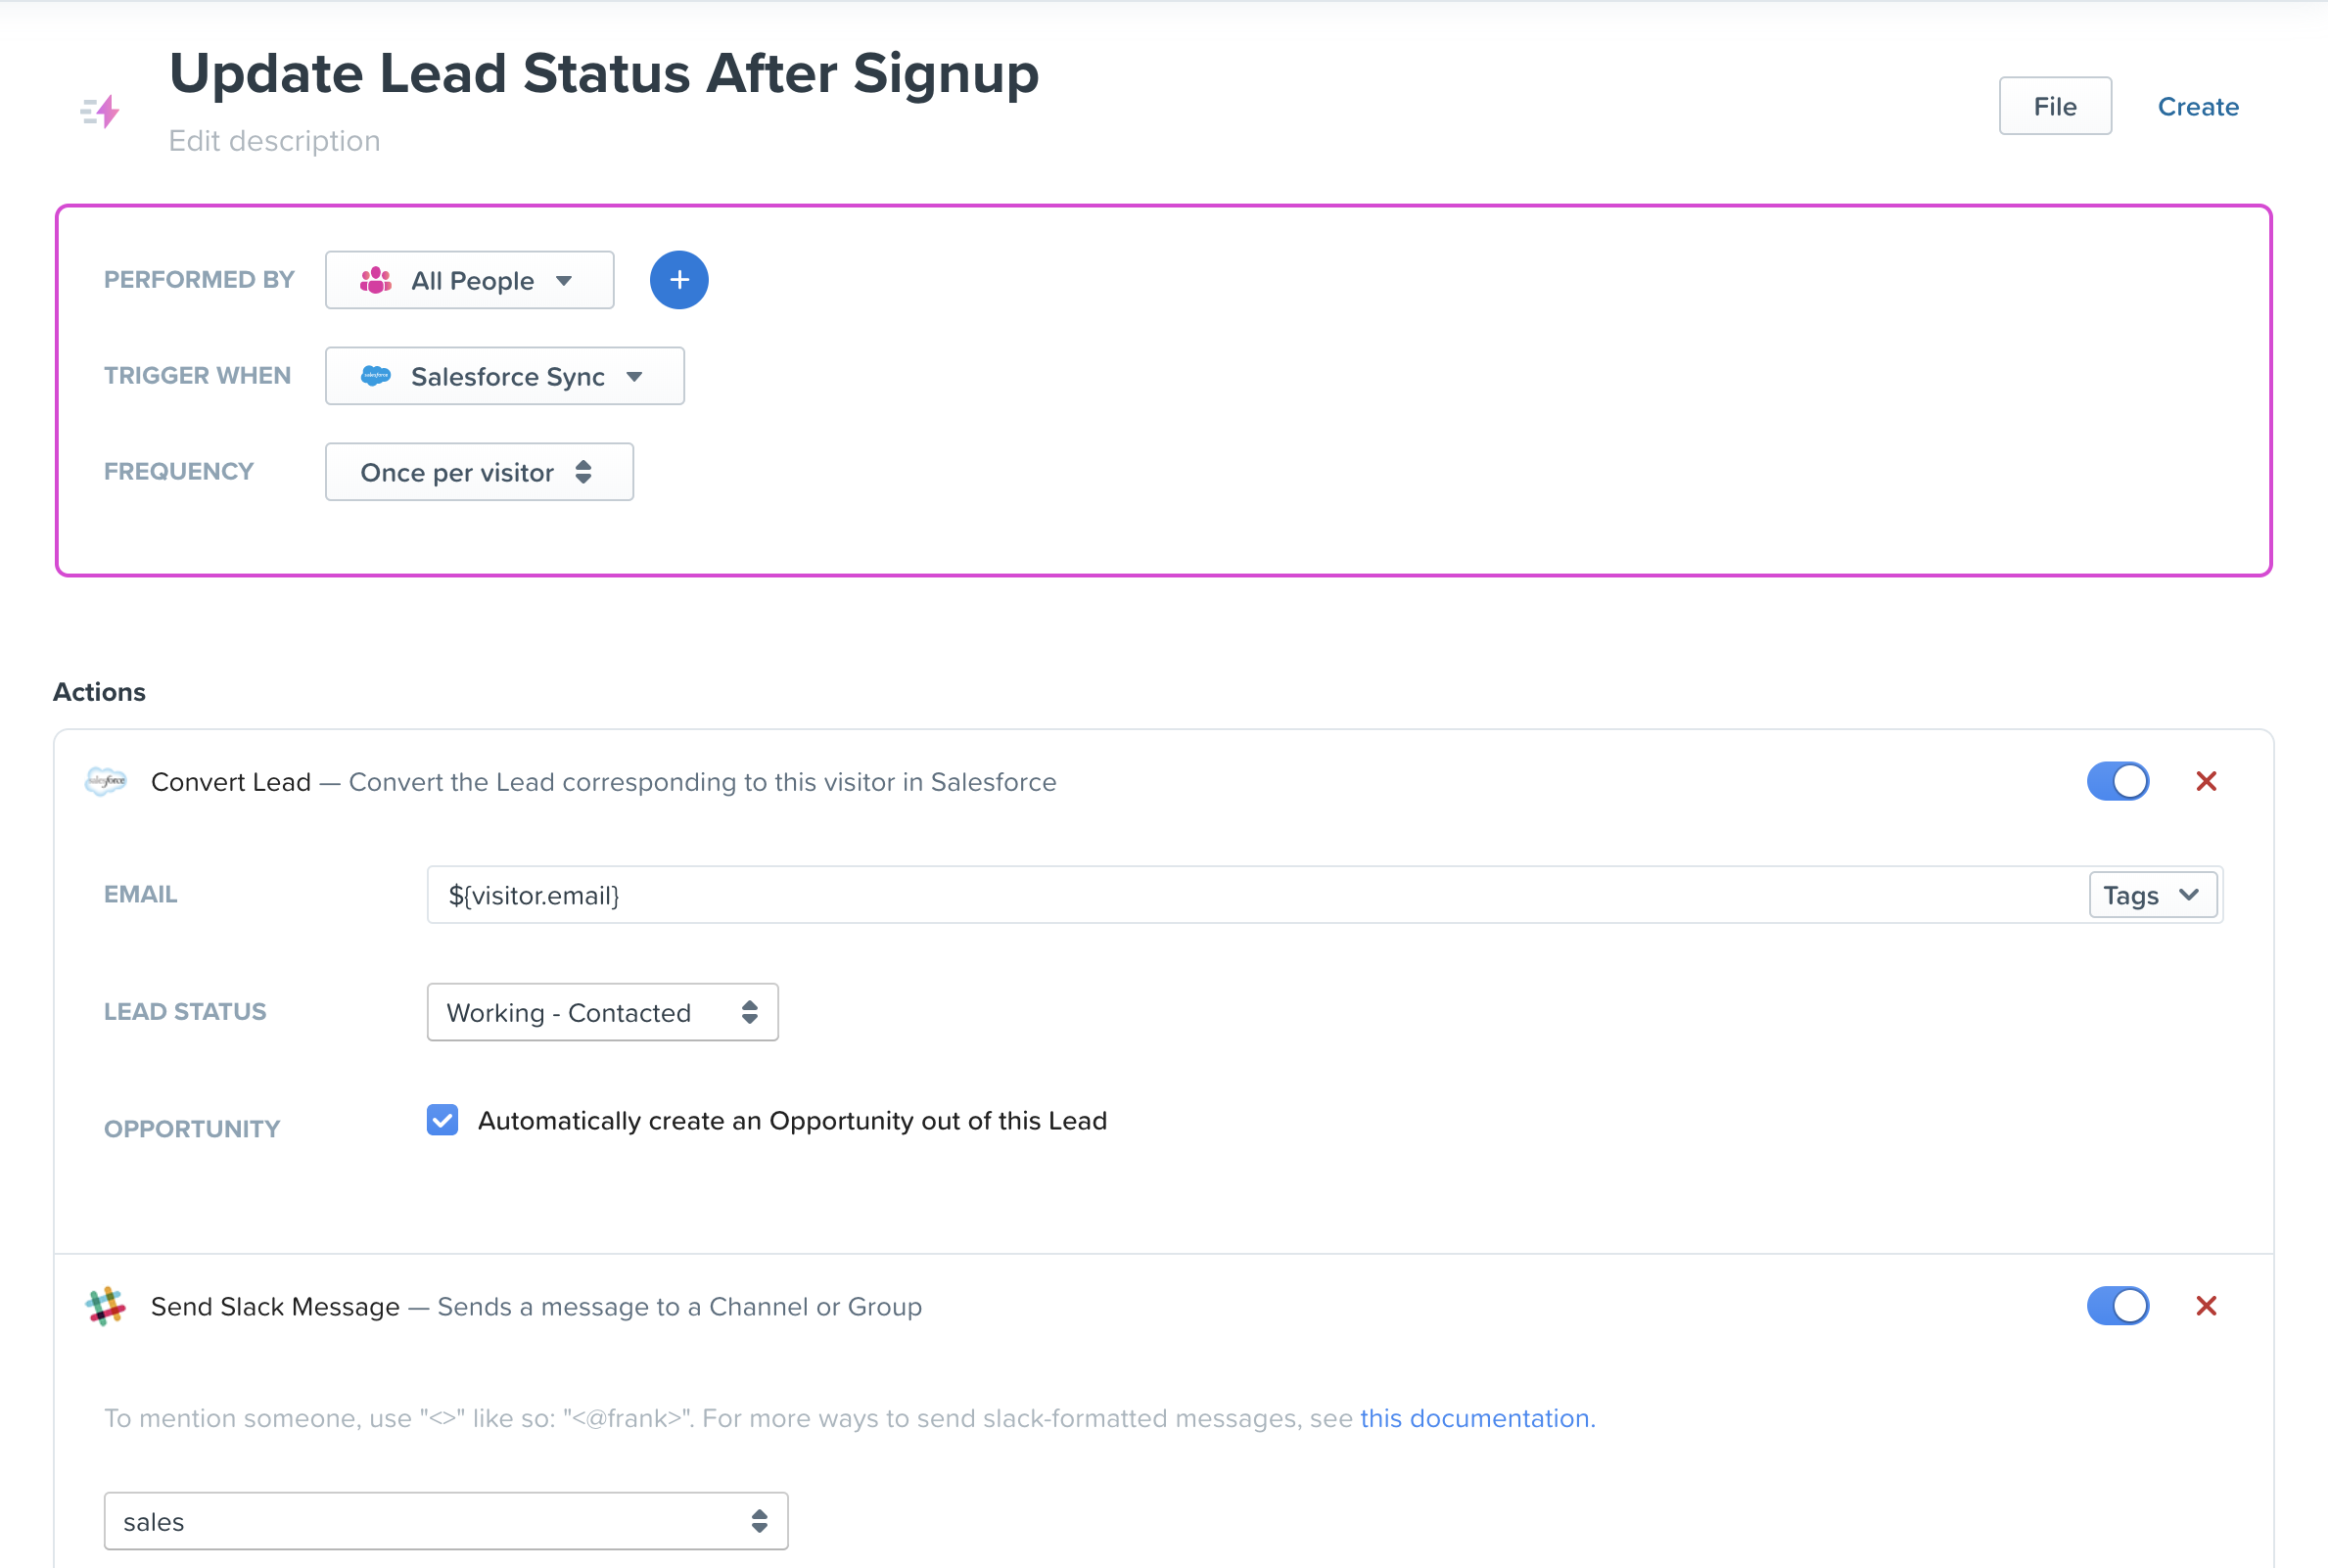
The majority of integrations include pre-built Triggers and Automations that allow you to take real-time action on your data in 3rd-party tools. For example, the Salesforce integration includes a trigger allowing you to automatically updated a lead or contact status based on a user’s behavior, attributes and engagement.
Integrations such as Zendesk and Salesforce also include the ability to embed Woopra’s real-time People Profiles directly within the tools. Having Woopra’s people profiles embedded directly within Zendesk for example, allows support teams to see every action taken by that user or customer prior to submitting a support ticket. This provides a foundation for resolving support inquiries with increased efficiency and greater personalization.
Step Six: Step Six: Build Your First Journey Report to See the World as Your Customers Do
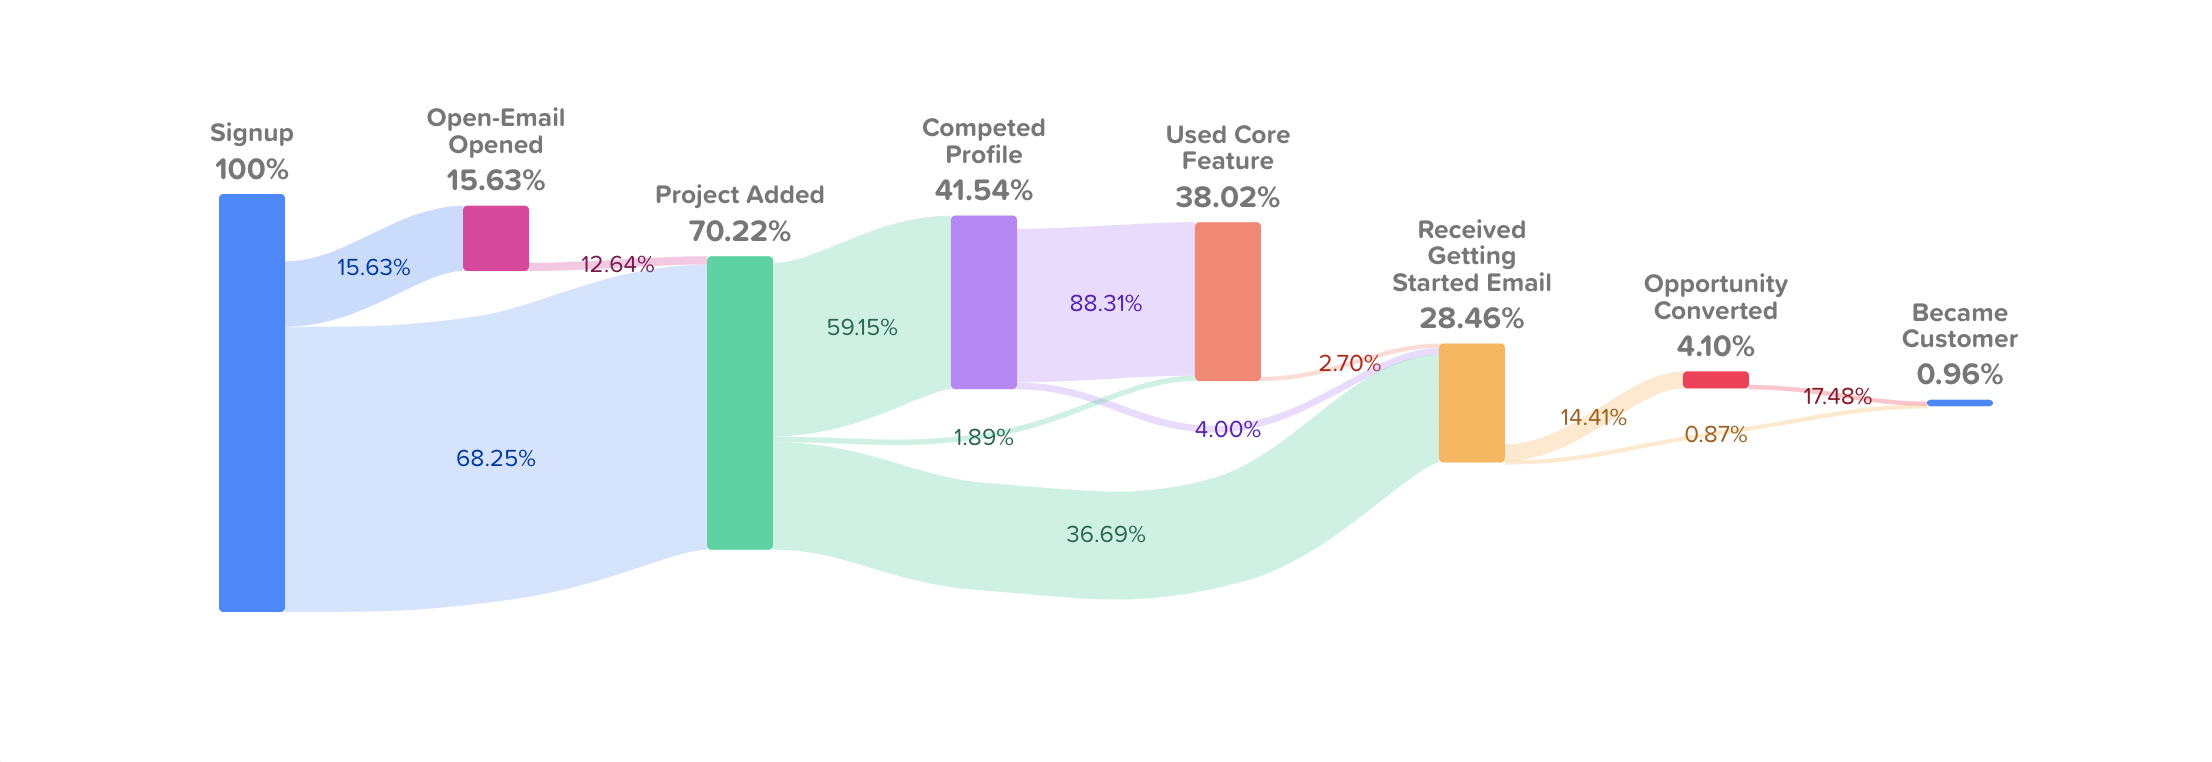
Combine any set of actions, events, or goals to understand how users move across campaigns, through your website, within your application, and beyond!
This post highlights some of the key features and benefits of Woopra’s Customer Journey Reports.
These reports allow you to answer questions such as:
- Which of my marketing campaigns drove the most conversions last year?
- Where am I losing potential users during onboarding?
- What are my highest performing customer segments?
- How many users read documentation or submit a support ticket before becoming a customer?
Learn More About Customer Journey Reports
Step Seven: Monitor and analyze the growth of key metrics over time with your first Trends Report
Trends Reports help you understand how most relevant metrics to your business change over time and the underlying forces behind these changes. With Trends, you can easily understand which mobile platform brings in the most revenue to your business or which city or country has the most engaged users.
Create your first Trends Report to answer questions such as:
- How are subscriptions trending over time by package or plan type?
- Which product features are used most and by whom?
- Are mobile users more engaged as compared to those that use the web app? For mobile users, how active are iOS users compared to Android users?
- How is signup growth trending month over month and in what regions?
Learn more about Trends Reports

Step Eight: Measure User Retention to Increase Customer Lifetime Value with Your First Retention Report
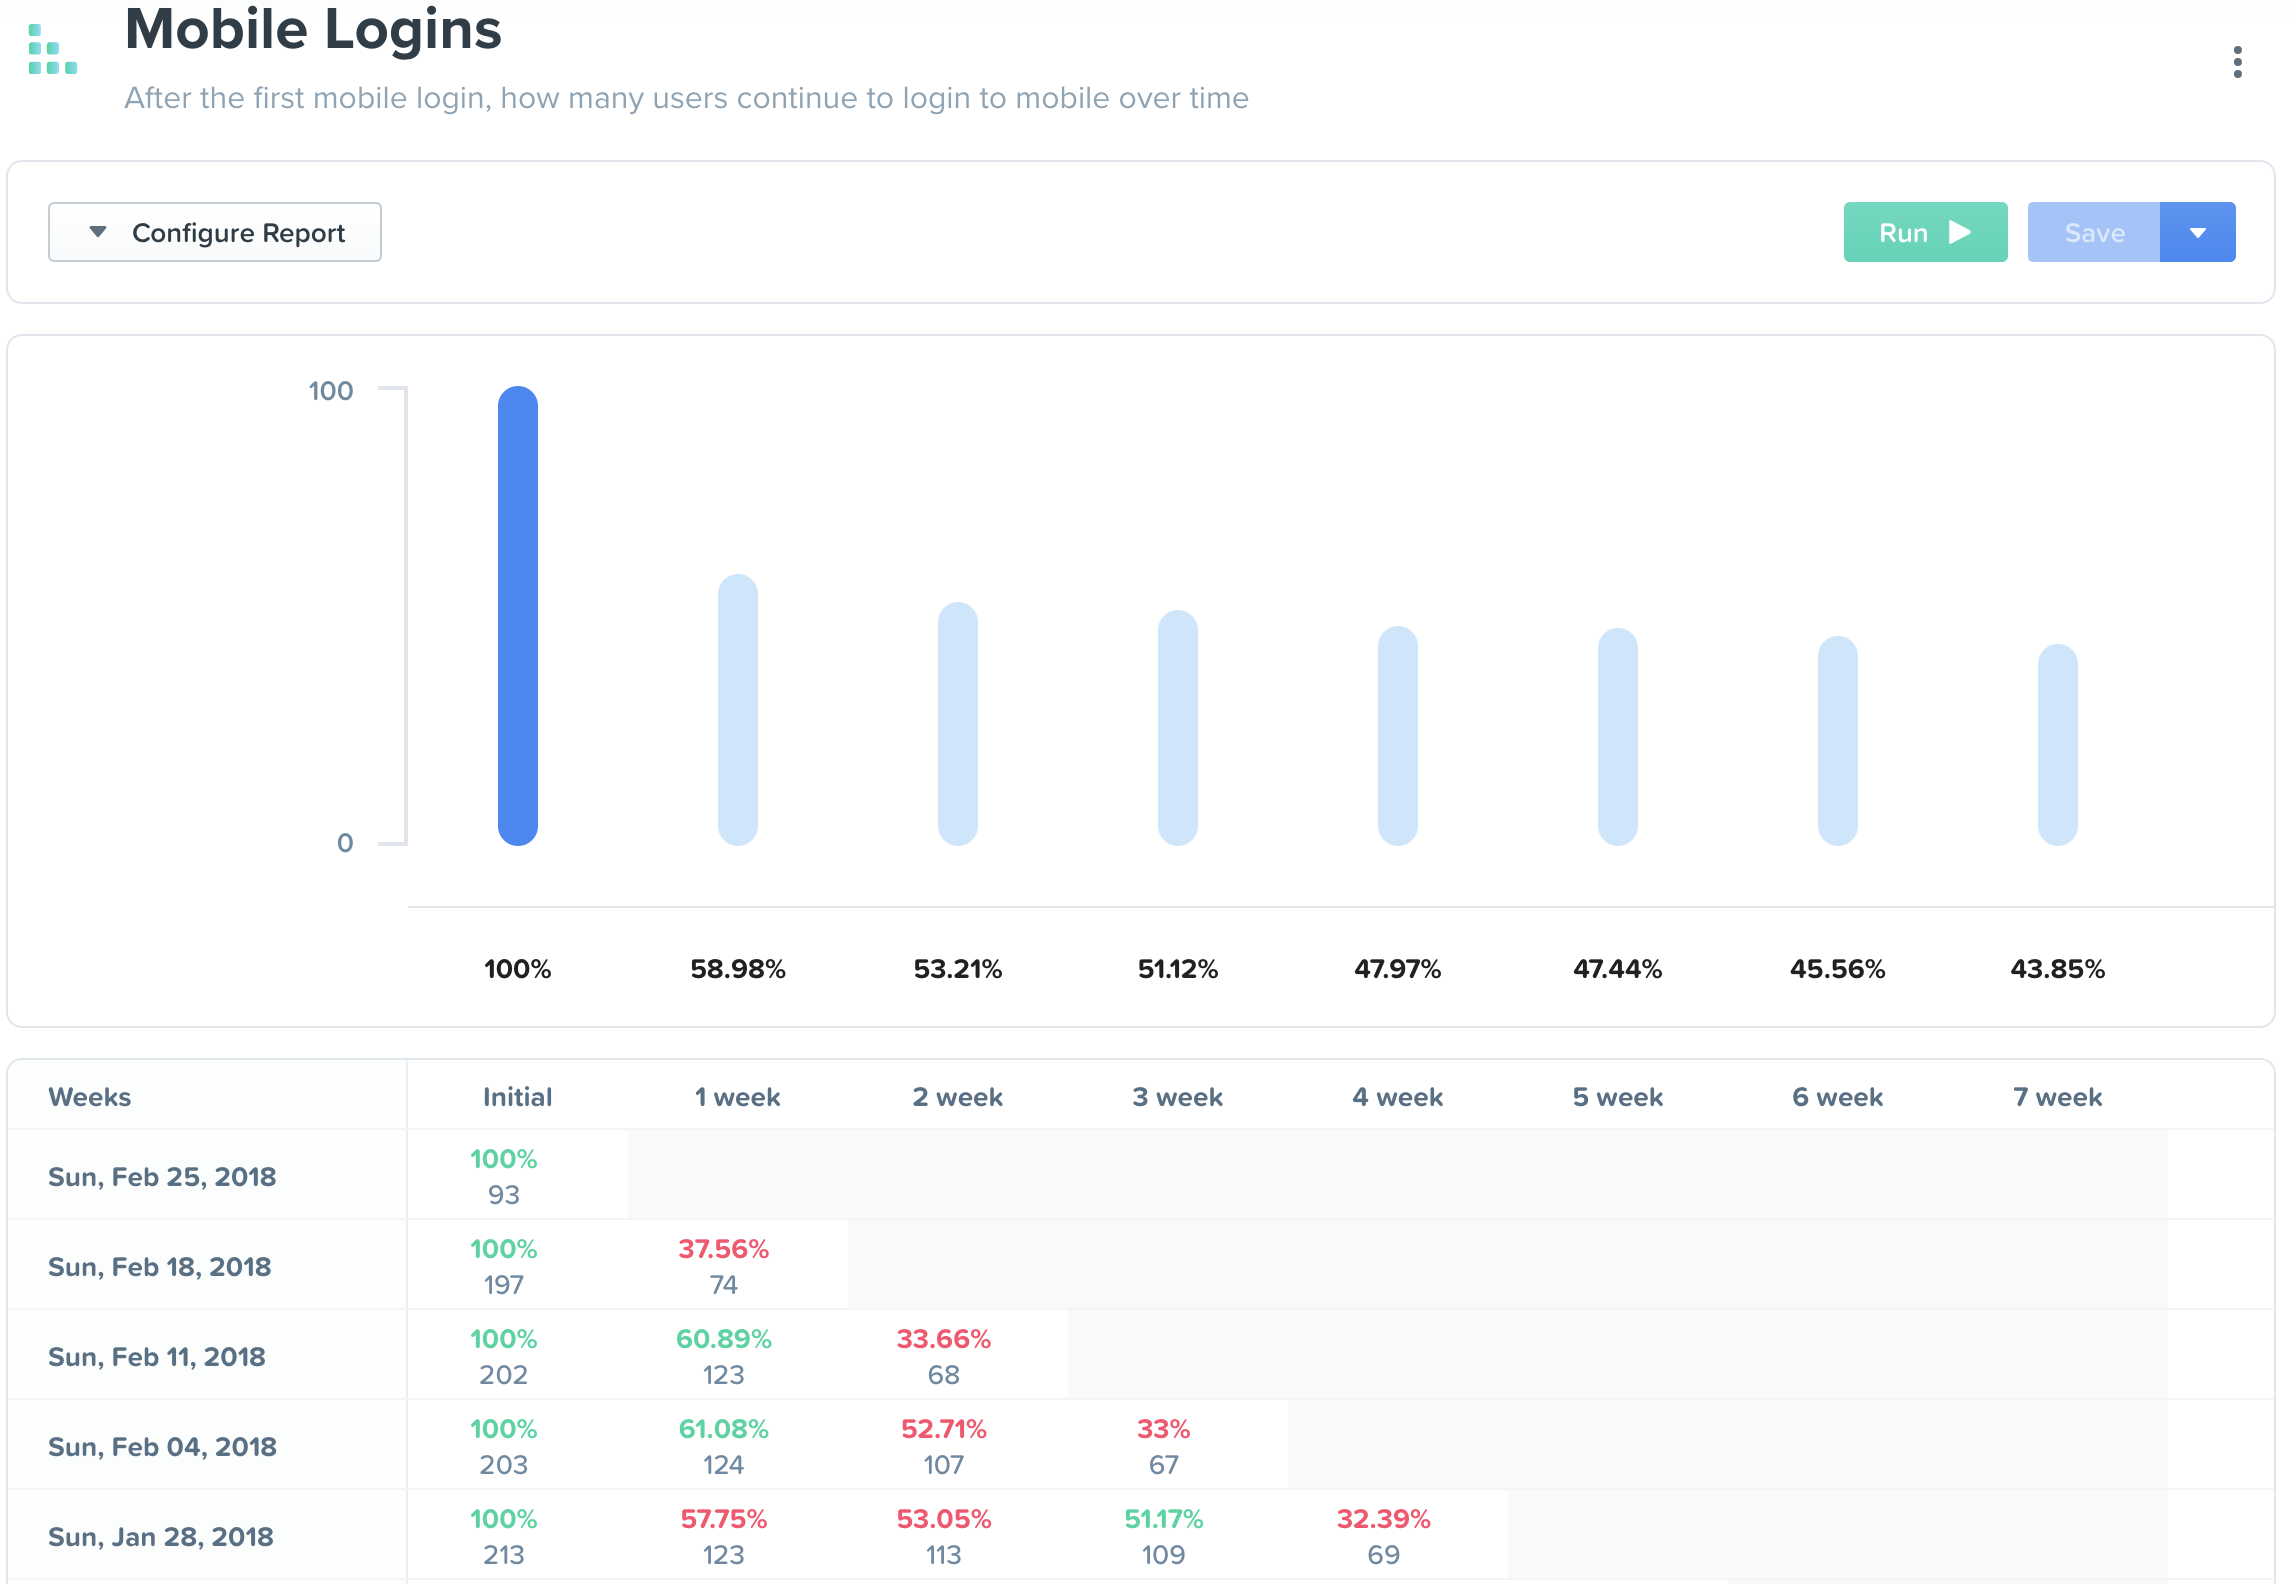
Retention reports tell you if users continue to do important actions, such as making purchases, using your product, or even opening your emails. Finally, understand if users are engaged enough with your offerings to keep coming back. Build your first Retention Report to learn where you’re losing customers and how to get them coming back!
Retention Reports allow you to answer questions such as:
- Do users continue to take important actions, such as making purchases, use your product, or even open your emails?
- How long customers continue to take a specific action after signing up?
- Are users more likely to convert after downloading my mobile application?
Learn more about Retention Reports
Step Nine: Create your First Segment to Begin Analyzing Users by who they are and what they do
Segments are a way of saving customer behavioral groups that are important to you. For example, you may want to save a “Submitted Ticket” customer segment, to monitor users who’ve sought out help or an “at-risk of leaving” customer segment to monitor, analyze, and compare these users.
Navigate to the “Configure” section to create your first dynamic Woopra Segment! Filter by any action or any action/visit/user property. You can also create Segments on the fly in the “Performed By” section of any Woopra Report.
Once you’ve identified a group of users you’d like to save, click “Create” to begin leveraging this segment throughout Woopra reporting, automation, reporting and analysis.
Step Ten: Create Your First Trigger to Automate Personalization, Engagement and Tasks Outside of Woopra
After installing a few of Woopra’s one-click integrations, you’ll instantly see associated “Trigger Actions” appear in the “Automate” section that can be used to take action outside of Woopra in the tools you have integrated.
For example, the Zendesk Integration allows you to automatically update ticket priority based on a user’s behavior or attributes. The Google AdWords integration will allow you to sync any custom segments from Woopra into AdWords to fuel more personalized retargeting campaigns. The HubSpot integration allows you to automatically enroll users in a drip campaign when they meet certain engagement criteria and so on.
Learn more about Triggers and Automations
Congratulations! You’ve covered the fundamentals of the Woopra platform. Now that you’re a Woopra champ – it’s time to invite your colleagues to join. Invite other users to Woopra and start harnessing the power of unified customer data.
Updated 3 months ago
