HubSpot
HubSpot and Woopra Website Tracking Setup
Using HubSpot to host your website? Getting started with website tracking is easy!
1) You'll need to install the Woopra Javascript Tracking Snippet to the Site Header HTML. You can find HubSpot's instructions here for adding to individual landing pages and where to locate the advanced tracking feature.
2) For the integration to function properly, you'll need Woopra's basic Javascript tracking for tracking page views and you'll need to add Woopra's identify tracking to identify the users on your site. This allows Woopra to generate one customer profile for each individual and populate that profile with all the various behavioral data points you're collecting.
<!-- Start of Woopra Code -->
<script>
 (function(){
   var t,i,e,n=window,o=document,a=arguments,s="script",r=["config","track","identify","visit","push","call","trackForm","trackClick"],c=function(){var t,i=this;for(i._e=[],t=0;r.length>t;t++)(function(t){i[t]=function(){return i._e.push([t].concat(Array.prototype.slice.call(arguments,0))),i}})(r[t])};for(n._w=n._w||{},t=0;a.length>t;t++)n._w[a[t]]=n[a[t]]=n[a[t]]||new c;i=o.createElement(s),i.async=1,i.src="//static.woopra.com/js/w.js",e=o.getElementsByTagName(s)[0],e.parentNode.insertBefore(i,e)
 })("woopra");

 woopra.config({
     domain: 'mycompany.com'
 });
 woopra.track();

</script>
<!-- End of Woopra Code -->
Tracking HubSpot Forms on External Website
This a two-part process to successfully track HubSpot forms in Woopra.
###1. Data Loader Method
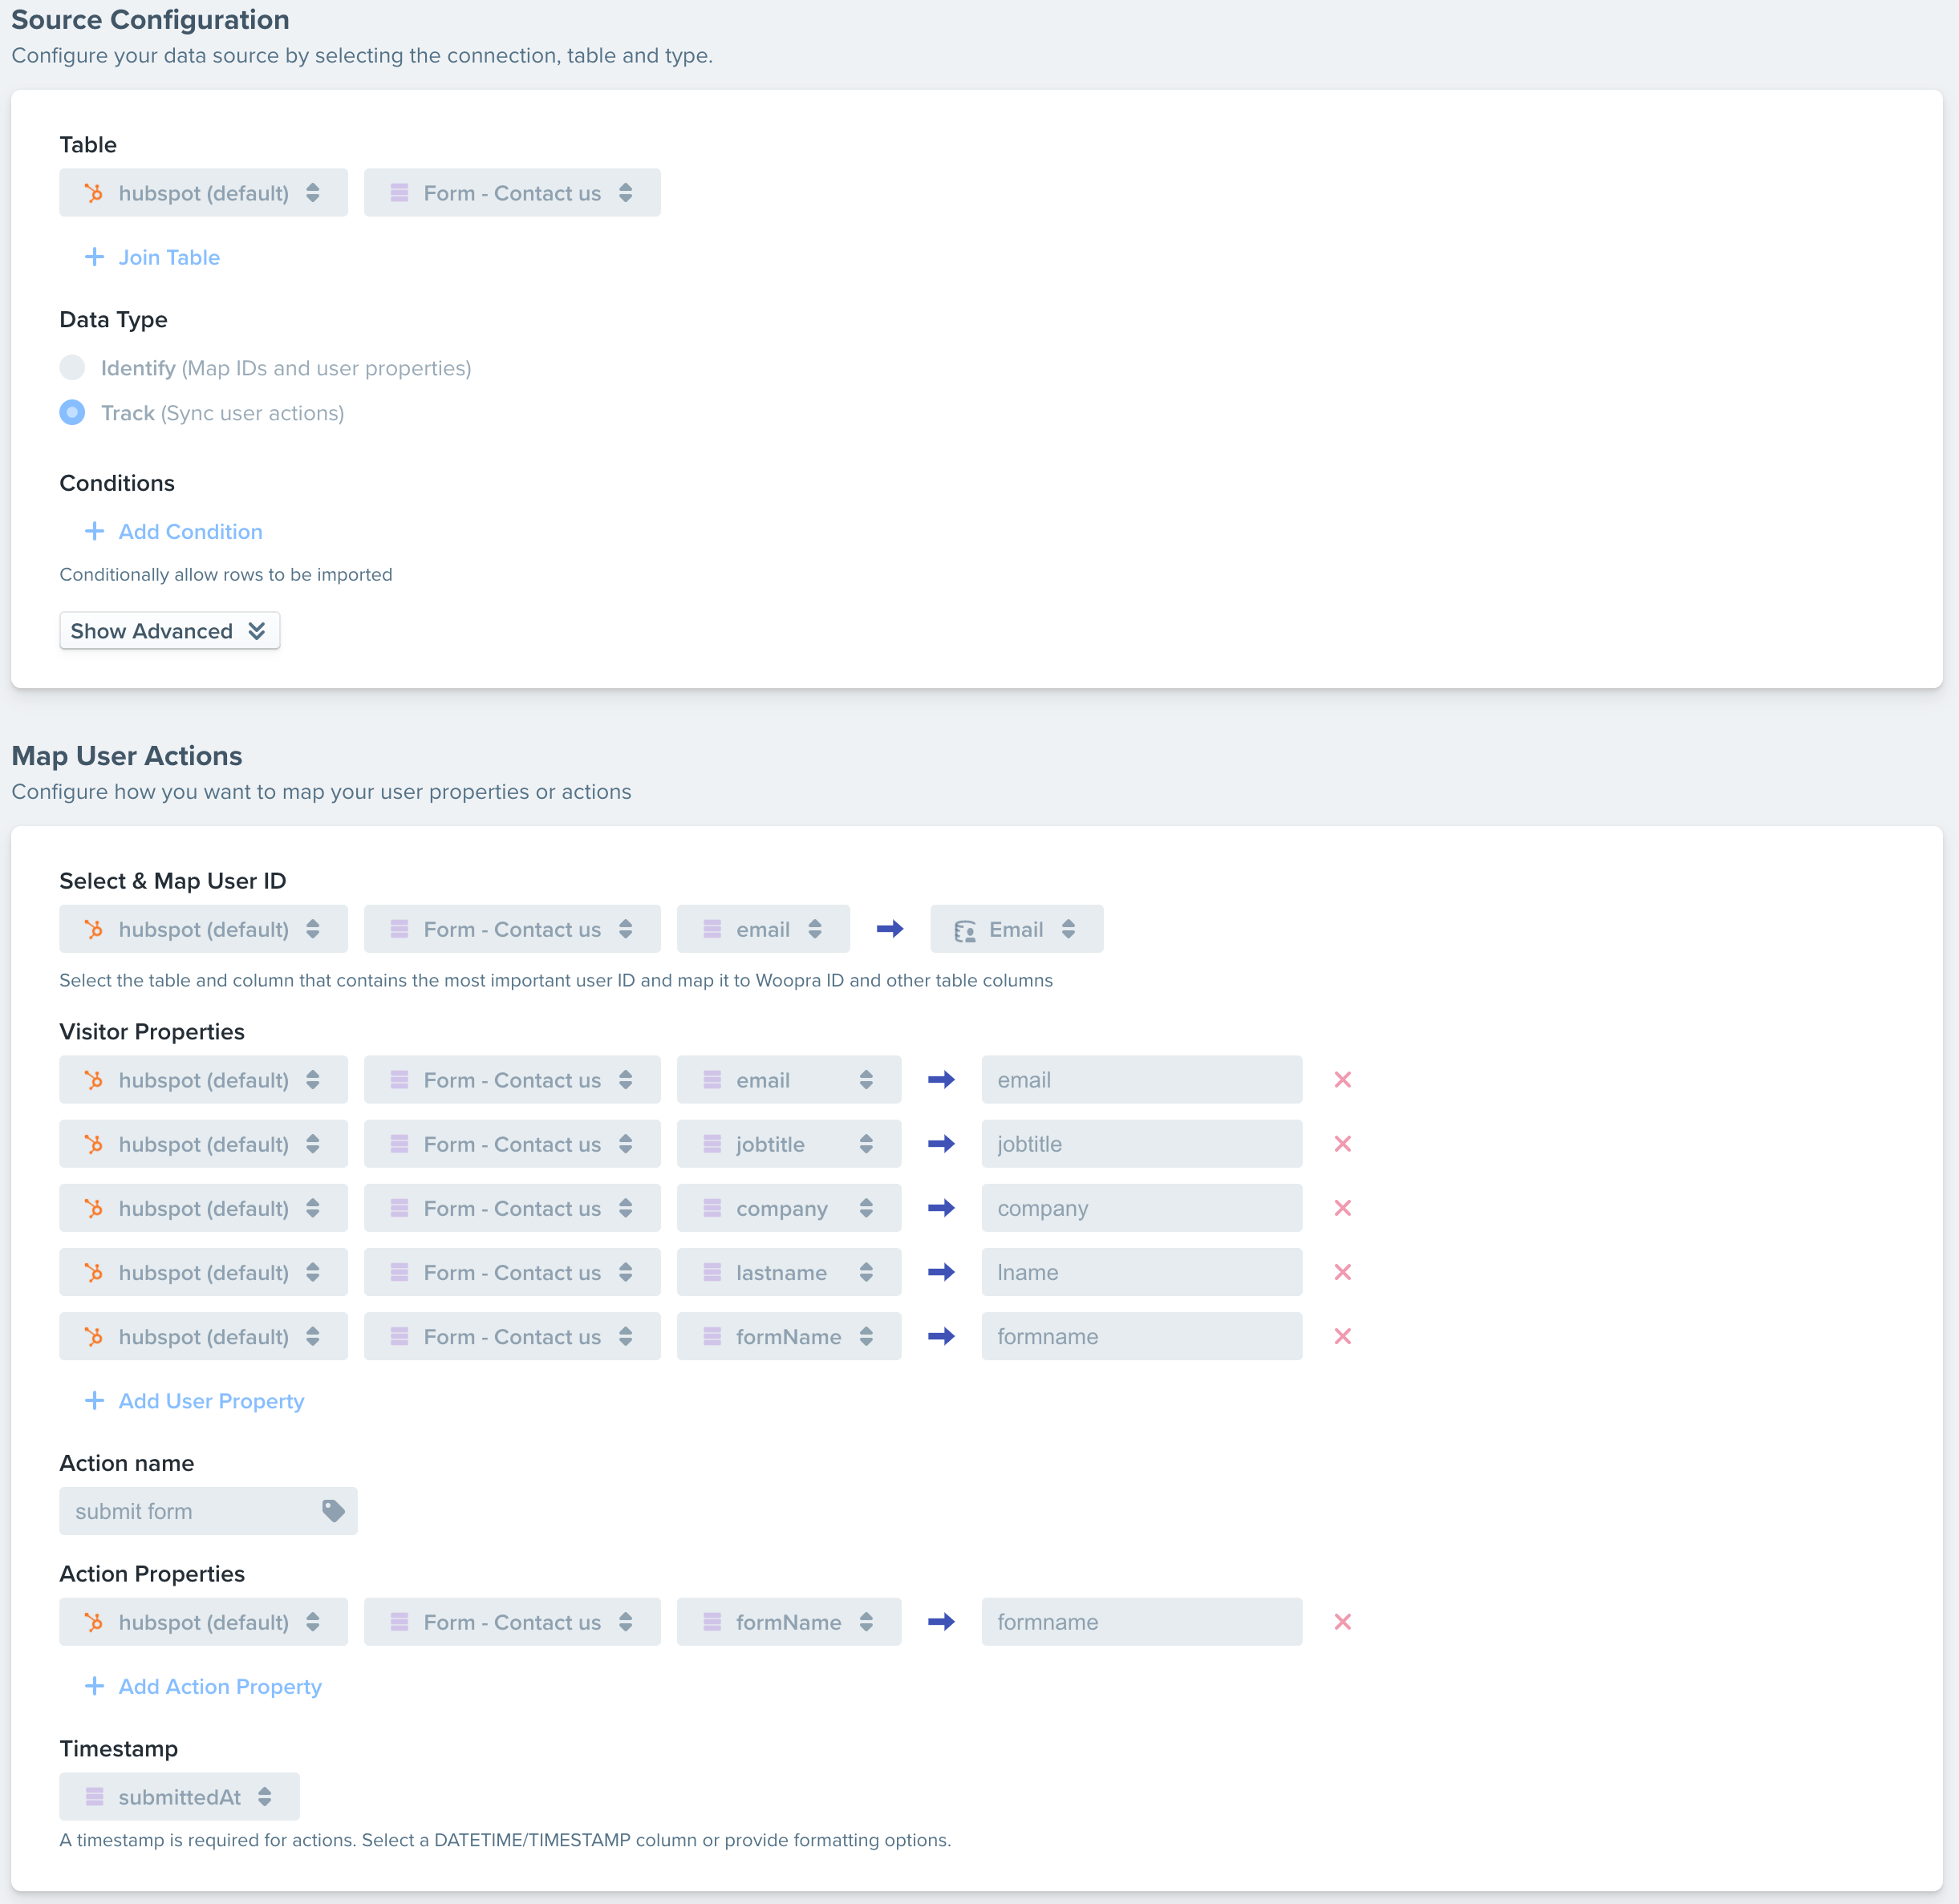
Using the Data Loader will allow you to bring in historical data and will not require any coding. You can create the connection under the Connections in the Data Loader section. Once you create the connection, you can create the Tasks to pull in the data.
Follow the below example of how to set up the Task. Use the 'submittedAt' or 'createdAt' field for the Timestamp.

Event NameBe sure to add the formName field as one of the Event Properties and label the event name something generic like 'import data loader HubSpot form'. Doing this will allow you to create other tasks for other HubSpot forms using the same event name, thus allowing all form events to be track under the same event name instead of creating a new event for every form.
Limitations
Due to limitations with HubSpot API, we can only pull in one form per task. If you have multiple different forms on your site, you'll need to create a new task for each form and use the same event name for each of the Tasks.
Another limitation is linking anonymous users and identifying them after they submit a form. When an anonymous user comes to your site, then submits a HubSpot form, this can create two separate profiles if you do not identify them using woopra.identify. This is because there is no way to link the two profiles together since HubSpot doesn't pass the Woopra cookie with the HubSpot form. There is a solution but will require changes to the HubSpot form embed code. See the next section for details.
2. Editing the HubSpot Embed Code
You can customize the embed code in HubSpot to send track requests when the form is submitted.
Below is an example of the code you can use to link the anonymous profiles with the form submissions from the Data Loader import. You can also edit this code to track all the form fields and not use the Data Loader.
However, we suggest using both methods together for two reasons. For one, client-side tracking is not foolproof, and anyone using a blocker or certain browsers can block these events. Using the Data Loader will ensure 100% of the forms being submitted will be tracked in Woopra. Secondly, sending a woopra.identify() call on the client-side will allow you to link anonymous users and identify them so their anonymous browsing history is merged with the profile made from the Data Loader 'HubSpot form submit' event.
<script charset = "utf-8" type = "text/javascript" src="//js.hsforms.net/forms/shell.js"></script>
<script>
hbspt.forms.create({
  portalId: 'YOUR PORTAL ID',
  formId: 'YOUR FORM ID',
  onFormSubmit: function($form) {

    var userData = {
      email: $form.find("[name=email]").val(),
      firstname: $form.find("[name=firstname]").val(),
      lastname: $form.find("[name=lastname]").val(),
      phone: $form.find("[name=phone]").val(),
      usecase: $form.find("[name=primary_use_case]").val()
    };

    woopra.identify(userData);
    woopra.track("submited cliet side hubspot form", userData);
  }
});
</script>
Example Code OnlyThe above code is an example that worked during our testing. This may not necessarily work in every case and may need modification.
This is one example of how you can identify users when they submit the HubSpot form when you're using the HubSpot embed form code.
Updated 3 months ago
