
Correlation
Doc in progess. Product still in beta so some features may be incomplete.
Overview
Correlation Reports allow you to identify relationships and correlations between different actions, dimensions, metrics, or user properties.
These reports answer questions like:
- How many users convert who visited 1-5, 5-10, and 11-15 pages?
- How much total revenue was generated by first campaign sources?
- By revenue buckets, which features or products are being most used or viewed?
- How many searches or pageviews does a user have that makes a purchase, and how much revenue was generated by search/pageview buckets?
- By plan type, which features are being most used?
Woopra’s Correlation Reports can correlate any two actions to find patterns and explore how users interact with your site and product.
How to create a Correlation Report
Which actions to choose?
The Correlation Report has two main sections. The first step is to identify which two actions you want to correlate. Depending on the two actions, putting them in either the Classification or Measure by will result in different insights. The first action is how you want to group users and the second actions will use aggregate counts in relation to the first action.
Configurations
Correlation Reports are comprised of four sections: Timeframe, Performed By, Classification, and Measure By.

Timeframe
This is the first metric you should choose. Here, the timeframe is the period in which Woopra will examine all your data of users that did at least 1 event during that time frame. You can choose a relative date such as today, last 7 days, last 30 days, last 90 days, last 365 days or any absolute date range of your choice. The default date range is the last 30 days. We choose the last 365 days for this example.

Performed By
Think of this step as the segment or group of people you'll be analyzing. Either select an existing segment or create a new one on the fly, by clicking the “+” button in the “Performed By” section of your configuration. More info on how to create a Segment can be found here: Segments
Timeframe differences
It is important to understand the Performed by timeframe configuration differs from the Timeframe configuration above. The Performed by timeframe will create a subset population of people from the Timeframe configuration section.
For example, let's take the following scenario -- You want to run a marketing campaign to target users that are currently active and also made a purchase on last year's Black Friday. First, you would set the Timeframe to the current month to select an initial group of ALL users that have performed at least one event in the current month. Next, under the Performed by timeframe, you select the event “purchased item” with the date for last year's Black Friday. Now, you will have a list of all active users from the past month that purchased an item last Black Friday. Typically the Performed by timeframe is less than or equal to the Timeframe configuration range.
Also here's a quick video explanation as well: https://share.getcloudapp.com/E0uzzAvP
.gif")
Woopra supports nested segmentation filters as well as the ability to combine filters using AND / OR parameters. Additionally, you can add a split group to segment by multiple events or attributes.
Classification
The Classification is used to bucket users into groups. A user can only be counted in one group or classification bucket. In other words, a user will not be double-counted in different classifications or "groups." You can think of the Classification as a segment of users that you want to compare the second action by.
You may select an Event or User Property in the Classification.
Event: When selecting an event, you'll have to option to group the users into buckets or different aggregate counts.
Bucketing
Bucketing is an essential aspect when dealing with continuous values. This involves grouping continuous data into discrete ranges, making it easier to analyze and interpret the data. By grouping similar data points together, we can identify patterns and trends more efficiently.
For example, if we're analyzing the correlation between age and product views, bucketing age groups (e.g., 18-25, 26-35, 36-45, and so on) helps us understand how different age demographics correlate with product interests.
Bucketing options include:
- Count - Buckets by the number of times a given event was performed.
- Count Unique - Buckets by the number of unique times a given event was performed.
- Sum - Buckets by the total sum of an event property.
- Mean - Buckets by the average value for a given event property.
- Min - Buckets by the minimum value for a given event property.
- Max - Buckets by the maximum value for a given event property.
- Last Touch - Buckets by the most recent valuse for a given event property.
- First Touch - Buckets by the least recent valuse for a given event property.
- Top - Buckets by the most frequent value for a given event property.
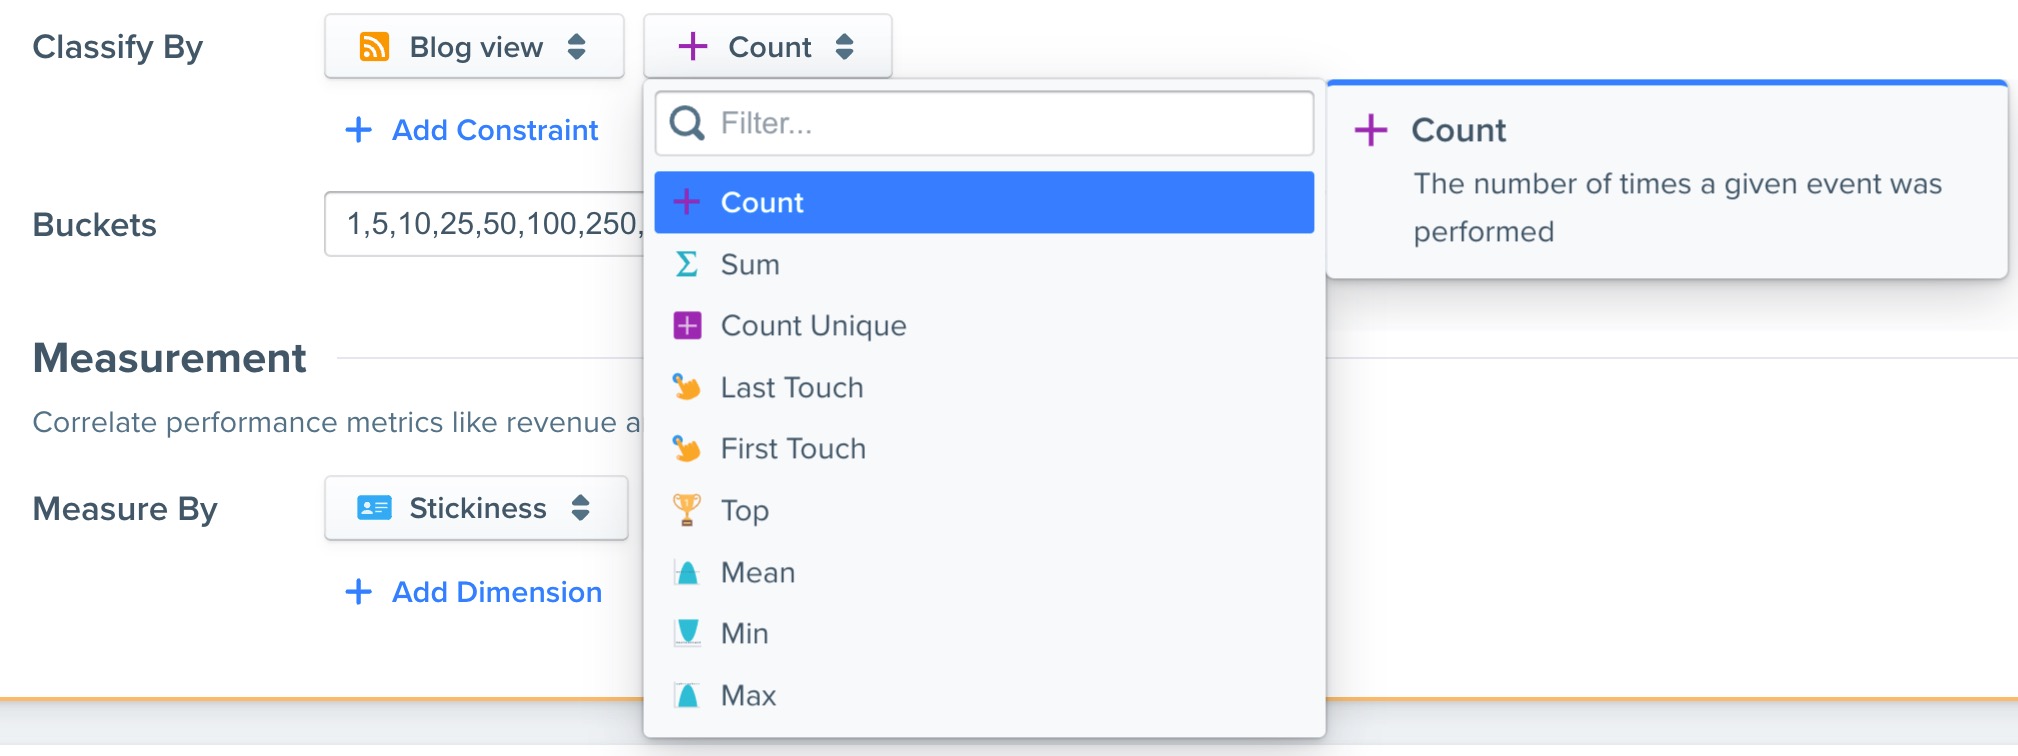
The Dropdown next to the Classification selection contains the bucketing options.
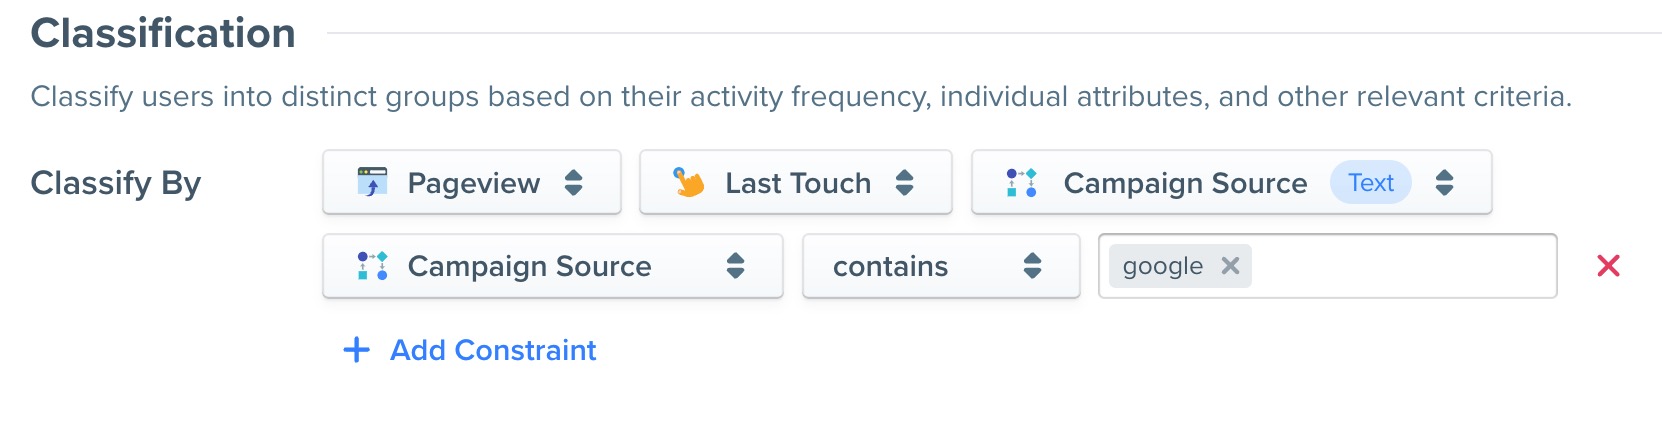
In this example, we want to bucket by the last campaign from a Google Ad that a user saw.
Measure By
The "Measure by" compares a different second action in relation to the classification bucket by aggregate count, count unique, sum, mean, min and max values.
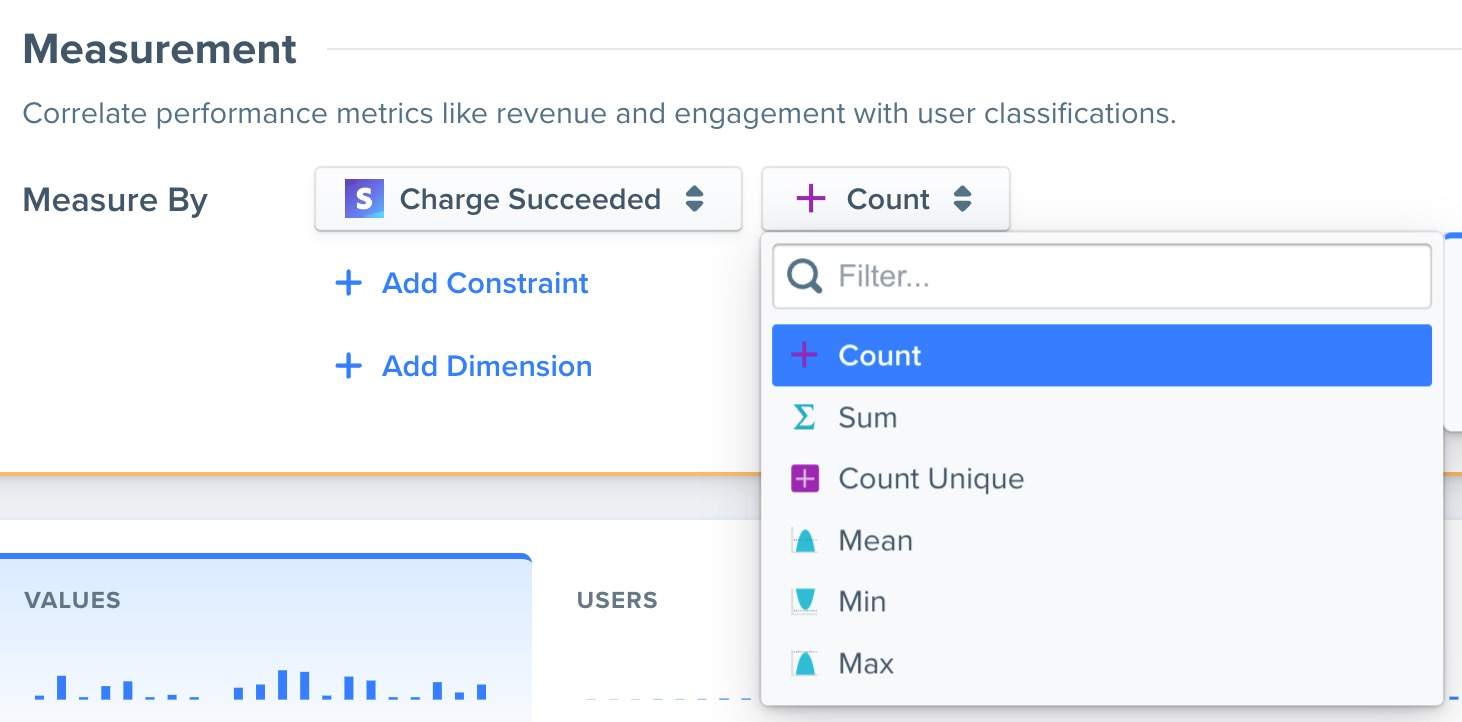
- You can also add constraints to filter on specific action properties.
Dimension can be selected to group the data by some action property. For example, you may want to Measure by a payment by using 'sum' of the 'total and group by 'plan type'.
Chart Metrics
The chart can display a visual of the table metrics. The options include:
- Values - The count of the Measure by
- Users - The total users that matched the Classify
- Matched Users - The total Users that matched the Measure by
- Matched Percent - The percent totals of the users that matched.

You can also change the type of chart:
- Bar, spline, line, step, or stacked

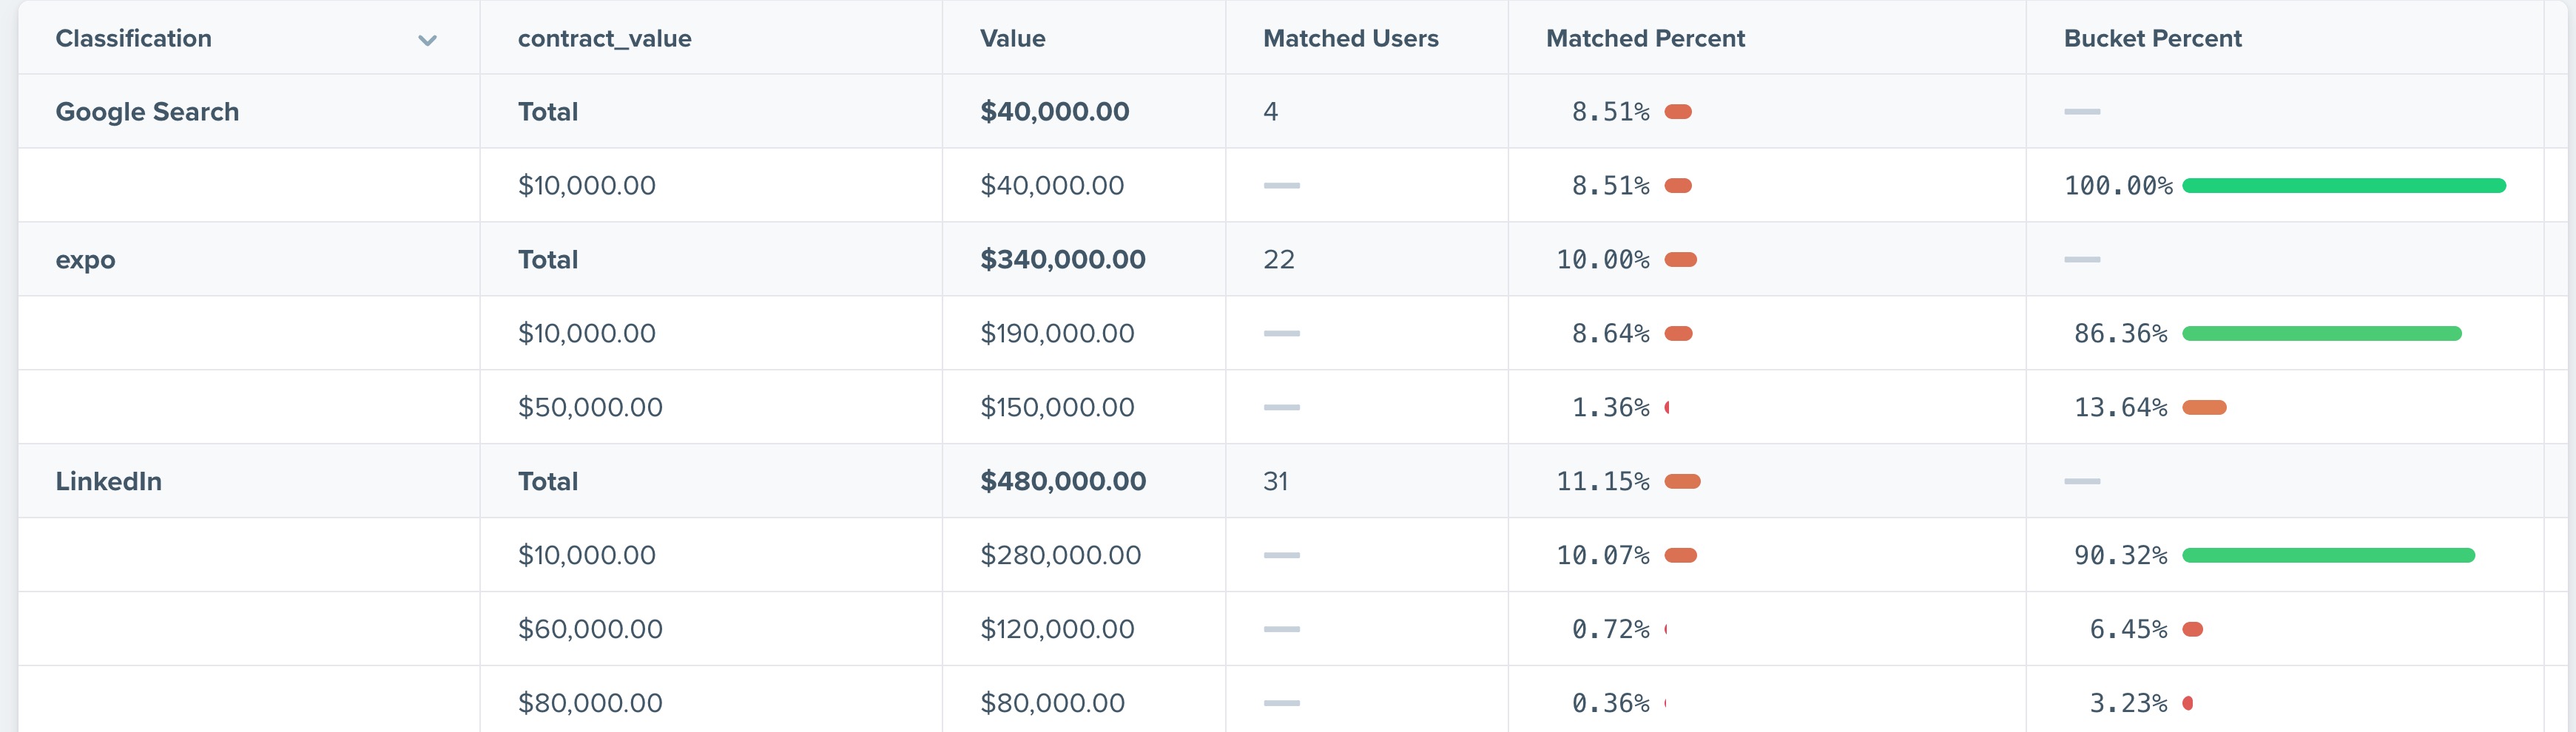
Table View
- Column 1 = Classify by
- Column 2 = Dimension (optional)
- Column 3 = Measure by Value
- Column 4 = Matched users who matched the Measure by.
- Column 5 = Matched Percent: Total matched users of the Measure by / Total users who matched the Classify By
- Column 6 = Bucket Percent: Matched row Value / Total row Value.
Exporting and Sharing (Feature not available yet)
Now that you've built your report, you'll want to share it with your team. You can do this by clicking on the 3 dots/ellipsis, which will open an options menu for exporting, sharing, tagging, pinning, duplicating, and reloading your report.
Downloading
You can download the report in various formats: CSV, CSV (raw), PDF or HTML. Note that CSV (raw) will download some columns, such as average_session_length in total seconds. Exporting the regular CSV for these columns will download timestamps in a string format, e.g. 3 minutes, 21 seconds - 8 minutes, 20 seconds.
Sharing
Remember, reports are not shared with your team by default, so you will need to share it for others to access it. Click share from the menu and select what team you want to share your report with.
Snapshots
Snapshots generate a URL of the report you want to share. You can share this URL with anyone, whether they are apart of Woopra or not. This URL will link to a snapshot of the report you have created.
To take a snapshot, click the ellipsis and select snapshot. This will copy a URL for you to share. This is a public link, so anyone with the link will have access to that snapshot. This is an easy way to share reports with external teams or anyone whom you want to share the report with.
Editing the report will not change the snapshot, since the snapshot is a view of the report at the time when the snapshot was created.
Updated about 1 year ago